26
No.
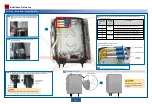
Check Item
1
Verify that OAU 2As are installed in planned locations, and sufficient space is reserved
for maintenance.
2
Verify that OAU 2As are securely installed by turning them gently (in both the horizontal
and vertical directions).
3
Verify that all outdoor connectors connected to IF ports and ground clips are
waterproofed.
4
Verify that OT terminals of PGND cables are tightly crimped and PGND cables are not
damaged or broken.
5
Verify that PGND cables are bound separately from other cables.
6
Verify that shielded RJ45 connectors of outdoor network cables are intact and securely
connected and the cables are not damaged or broken.
7
Verify that unused ports are protected with caps, and removed caps are retained for
future use.
8
Verify that outdoor network cables are routed along planned paths and bound properly
and neatly at equal intervals (about 1 meter), and the excess of each cable tie is cut off
without leaving sharp edges.
9
Verify that unused waterproof cable holes are plugged with waterproof blocks.
10
Verify that the shield layers of all DC power cables and outdoor network cables are
grounded using wire clips in the maintenance compartment.
11
Ensure that the maintenance compartment and USB port compartment are tightly closed.
12
Verify that all devices are intact and do not have any paint defects or damage. If a device
has a paint defect or damage, clean it and then re-paint it.
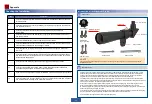
Appendix
Checking the Installation
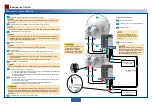
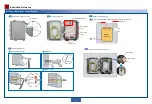
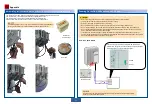
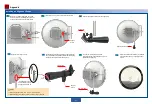
Hand wheel
Socket head
cap screws M6
Captive screws
Support rob B
Objective lens tube
Eye lens tube
Support plate
Prism table
Locking ring
Support rob A
• Alignment scopes are high-precision devices for alignment. Before an aiming telescope leaves the factory, parts
between the eye lens tube and the prism table as well between the objective lens tube and the prism table have
undergone necessary anti-loosing treatments. Any rotating operation or disassembly among the eye lens tube,
objective lens tube, and prism table will weaken or even eliminate the effect of the treatments.
• The fitting surface of the aiming telescope is treated by the grinding process, which ensures the coaxiality of the
fitting surface‘s normal direction and the alignment scope’s optical axis. Carefully protect the fitting surface from any
scratch or burr to avoid a decrease in alignment precision.
• As the support plate is closely fitted with the objective lens tube with a locking ring, the locking ring needs to be
loosened if you attempt to rotate the objective lens tube for adjustment. After the adjustment is complete,
immediately tighten the locking ring to prevent redundant substances from entering the fitting space. It is advised to
loosen the locking ring less than one circle.
• To loosen the locking ring, grasp the objective lens tube tightly with one hand, and grasp and rotate the locking ring
with the other hand. Avoid applied moment between the prism table and the locking ring.
• Avoid removing the support plate from the objective lends tube.
Introduction of the Alignment Scope
A
Components
B
Important Notes
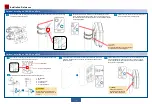
There are multiple types of sights. This document uses only one type of sights as an example to describe the
installation process.

