Copyright HT ITALIA 2014
Release 1.00 - 26/11/2014
HT14D
Manuale d'uso
User manual
Manual de instrucciones
Bedienungsanleitung
Manuel d’utilisation
Page 1: ... Copyright HT ITALIA 2014 Release 1 00 26 11 2014 HT14D Manuale d uso User manual Manual de instrucciones Bedienungsanleitung Manuel d utilisation ...
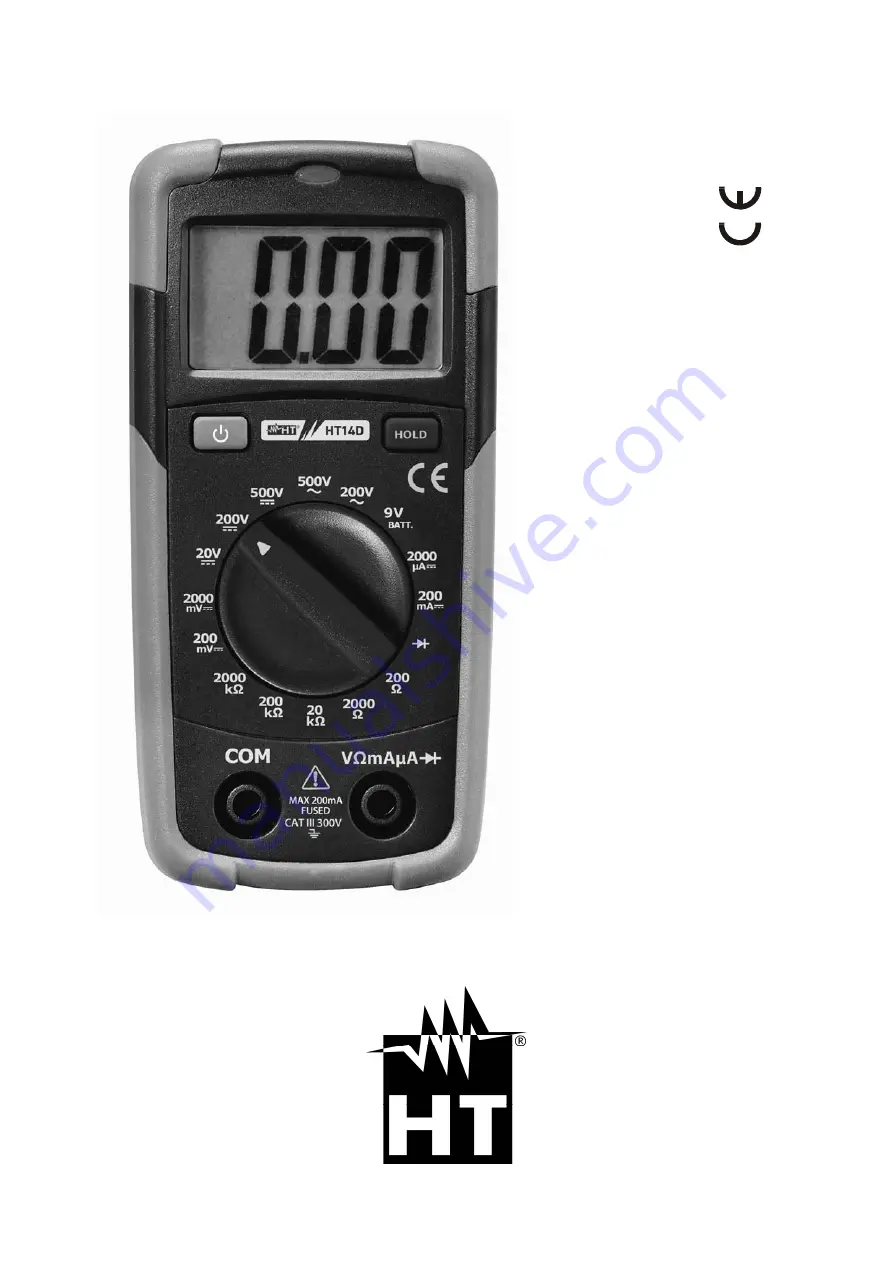
Page 2: ...ie 9V 3 DESCRIZIONE DELLO STRUMENTO LEGENDA 1 Display LCD 2 Tasto ON OFF 3 Tasto HOLD 4 Selettore funzioni 5 Terminale di ingresso COM 6 Terminale di ingresso V mA A 7 Sensore per rilevazione tensione AC 8 Vano batteria Fig 1 Descrizione dello strumento 4 ISTRUZIONI OPERATIVE 4 1 MISURA DI TENSIONE DC 1 Selezionare il campo di misura desiderato tra le opzioni 200mV 2000mV 20V 200V 500V 2 Inserire ...
Page 3: ...UZIONE DELLA BATTERIA 1 Spegnere lo strumento con tasto ON OFF 2 Rimuovere i cavi dai terminali di ingresso 3 Svitare la vite di fissaggio del vano batterie e rimuovere lo stesso 4 Rimuovere la batteria e inserire la nuova dello stesso tipo 12V MN21 rispettando le polarità indicate 5 Riposizionare il vano batteria e fissarlo con l apposita vite 6 Non disperdere nell ambiente la batteria utilizzata...
Page 4: ...D display 2 ON OFF key 3 HOLD key 4 Functions selector 5 COM input jack 6 V mA A input jack 7 Red LED for AC voltage detection 8 Battery cover Fig 1 Instrument description 4 OPERATING INSTRUCTIONS 4 1 DC VOLTAGE MEASUREMENT 1 Switch on the desired measurement range among the options 200mV 2000mV 20V 200V 500V 2 Insert the test leads into the jacks the red plug into V mA A jack and black plug into ...
Page 5: ...6F22 battery respectively The voltage value is displayed 5 BATTERY REPLACEMENT 1 Turn off the instrument by means ON OFF key 2 Disconnect the test leads from the input terminals 3 Remove the fixing screw from the battery cover and detach it 4 Replace the battery with a new one of the same type 12V MN21 observing the proper polarities 5 Replace the battery cover and screw 6 Use the appropriate batt...
Page 6: ...cla ON OFF 3 Tecla HOLD 4 Selector rotativo de escala 5 Terminal de entrada COM 6 Terminal de entrada V mA A 7 LED para indicación presencia de tensión CA 8 Tornillo de la tapa de pila Fig 1 Descripción del instrumento 4 INSTRUCCIONES DE USO 4 1 MEDIDA DE TENSIÓN CC 1 Seleccione el rango de medida deseado entra las opciones 200mV 2000mV 20V 200V 500V 2 Inserte las puntas de prueba en los terminale...
Page 7: ...o en el visualizador 5 SUSTITUCIÓN DE LA PILA 1 Apague el instrumento con la tecla ON OFF 2 Desconecte todas las puntas de prueba o el objeto bajo prueba 3 Saque el tornillo y la tapa de la parte posterior 4 Saque la pila de sus conectores Inserte la nueva pila del mismo tipo 12V MN21 respetando la polaridad indicada 5 Coloque la tapa de pila y el tornillo 6 No tire la pila agotada Use los contene...
Page 8: ...SCHREIBUNG LEGENDE 1 LCD Display 2 ON OFF Taste 3 HOLD Taste 4 Funktionswahlschalter 5 COM Eingangsbuchse 6 V mA A Eingangsbuchse 7 Rote LED für berührungs lose AC Spannungserkennung 8 Batteriedeckel Abb 1 Messgerätebeschreibung 4 MESSUNGEN 4 1 DC SPANNUNGSMESSUNG 1 Drehen Sie den Funktionswahlschalter in eine Position zwischen 200mV 2000mV 20V 200V 500V 2 Verbinden Sie die Messleitungen wie folgt...
Page 9: ...terie unter Berücksichtigung der Polarität Der Batterie Spannungswert wird angezeigt 5 BATTERIEWECHSEL 1 Schalten Sie das Gerät aus mit ON OFF Taste 2 Entfernen Sie die Messleitungen vom Gerät 3 Entfernen Sie die Schraube an der Gehäuserückseite und nehmen sie ab 4 Ersetzen Sie die Batterien mit neuen demselben Typ entsprechenden Batterien 12V MN21 und achten Sie auf die Polarität 5 Setzen Sie den...
Page 10: ...atterie 9V 3 DESCRIPTION DE L INSTRUMENT LEGENDE 1 Afficheur LCD 2 Touche ON OFF 3 Touche HOLD 4 Sélecteur des fonctions 5 Entrée COM 6 Entrée V mA A 7 LED lumineuse pour indiquer la présence de tension AC 8 Compartiment de la batterie Fig 1 Description de l instrument 4 DESCRIPTION DES FONCTIONS DU SELECTEUR 4 1 MESURE DE TENSION DC 1 Sélectionner l échelle de mesure entre les options 200mV 2000m...
Page 11: ... l écran 5 REMPLACEMENT DE LA BATTERIE 1 Eteignez l instrument utiliser la touche ON OFF 2 Retirer les câbles des bornes d entrée 3 Dévisser la vis de fixation du compartiment des piles et le retirer 4 Enlever la batterie et les remplacer par d autres batterie du même type 12V MN21 en respectant les polarités indiquées 5 Repositionner le compartiment des batteries et le fixer par la vis correspond...
Page 12: ...Via della Boaria 40 48018 Faenza RA Italy Tel 39 0546 621002 4 linee r a Fax 39 0546 621144 Email ht htitalia it http www ht instruments com ...