11148
5
10
11
1
2
3
4
6
7
8
9
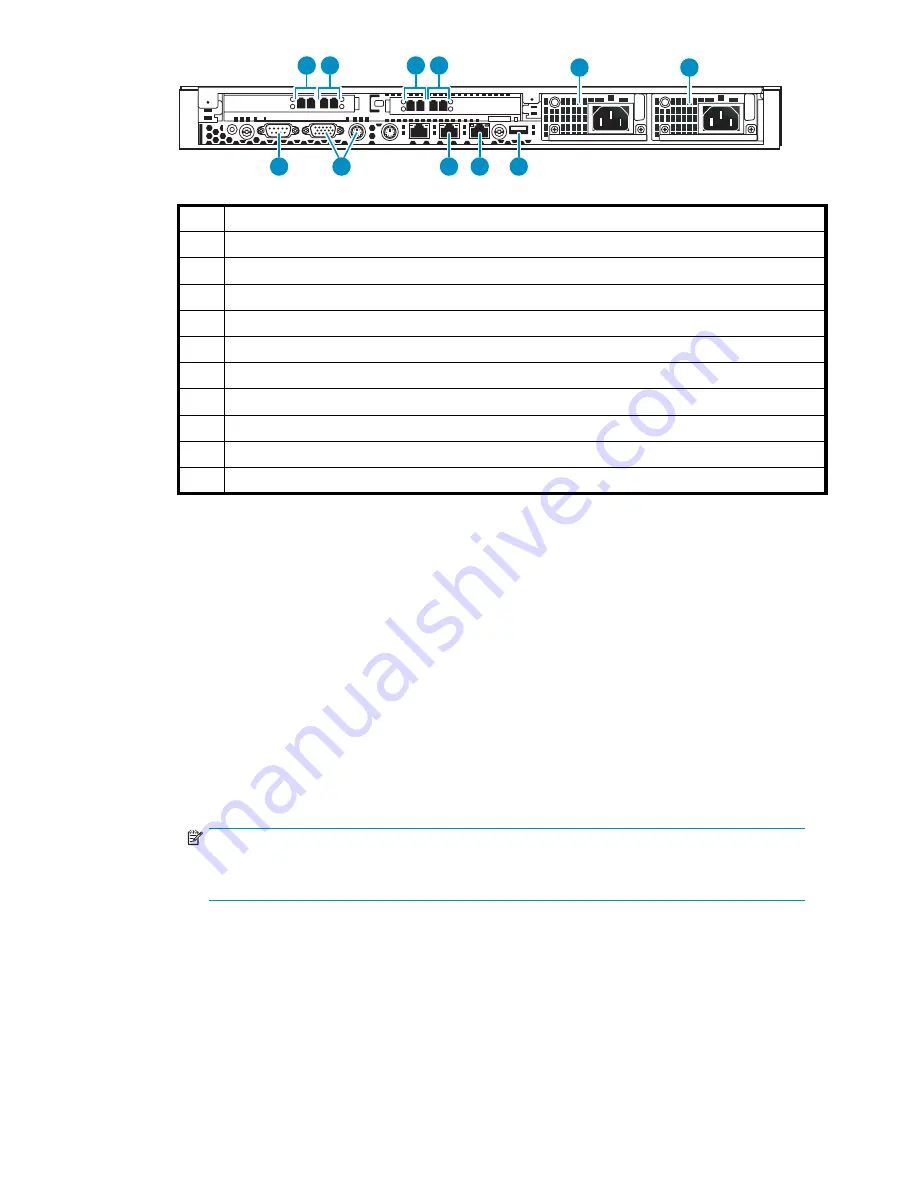
1
Dual port FC card, host port, port 0
2
Dual port FC card, host port, port 1
3
Dual port FC card, storage port, port 3
4
Dual port FC card, storage port, port 2
5
Serial port to access CLI
6
Monitor and keyboard
7
NIC1, on primary node only connects to the customer-provided external network (array)
8
NIC2, on primary node connects to port 1 of switch 2824
9
USB port, connects to USB/Ethernet adapter, then to port 1 of switch 2524
10
Power supply 2
11
Power supply 1
Figure 8 Primary node ports
a.
Connect one end of an Ethernet cable (not included) to NIC1. Connect the other end of the
cable to the existing external network.
b.
Connect one end of an FC cable (not provided) to host port 0. Connect the other end to an
external FC switch/fabric that connects to your tape backup hosts.
c.
If desired, connect one end of an FC cable (not provided) to host port 1. Connect the other end
to an external FC switch/fabric that connects to your tape backup hosts. Otherwise, connect a
loopback plug to host port 1.
d.
Connect one end of an FC cable (not provided) to device port 3. Connect the other end to an
external FC switch/fabric that connects to your external array.
e.
Connect one end of an FC cable (not provided) to device port 2. Connect the other end to a
second external FC switch/fabric that connects to your external array.
f.
Connect to the serial port (cable is provided) to access the command-line user interface at initial
con
fi
guration. Also connect to this during debug activities. Disconnect from this port during
normal operations.
NOTE:
You must connect to the keyboard and monitor ports when performing Quick Restore
(keyboard and monitor not included).
g.
Connect one end of an Ethernet cable to NIC2. Connect the other end of the cable to port
1 of Switch 2824 (see
Figure 10
).
h.
Connect one end of a USB cable to the USB port. Connect the other end of the cable to the
USB/Ethernet adapter. Connect an Ethernet cable to the Ethernet end of the adapter, then
connect the Ethernet cable to port 1 of Switch 2524 (see
Figure 11
).
i.
Connect a power cable to each power supply and to a PDU. If possible, connect each power
supply to a separate PDU to provide redundancy.
HP StorageWorks
31
Summary of Contents for StorageWorks 300
Page 18: ...18 Introduction ...
Page 50: ...50 Operation ...
Page 60: ...60 User interfaces ...
Page 86: ...86 Configuration ...
Page 98: ...98 Management ...
Page 118: ...1 18 CLI command set ...
Page 128: ...128 Component identification ...
Page 142: ...142 Component replacement ...
Page 150: ...150 Troubleshooting ...
Page 161: ...Latvian notice Lithuanian notice Polish notice HP StorageWorks 161 ...
Page 170: ...170 Specifications ...
Page 176: ...176 Glossary ...


