HP MediaSmart Server User's Guide
Caution
Before removing a drive from an expansion bay, you must remove the drive from the server’s total
storage.
For information about removing a drive from total storage, see
Add and Remove Drives from
Server Storage
.
1.
Be sure that the light bar for the hard drive you want to remove is blinking aqua white
.
This indicates that the drive has been properly removed from the server’s total storage.
2.
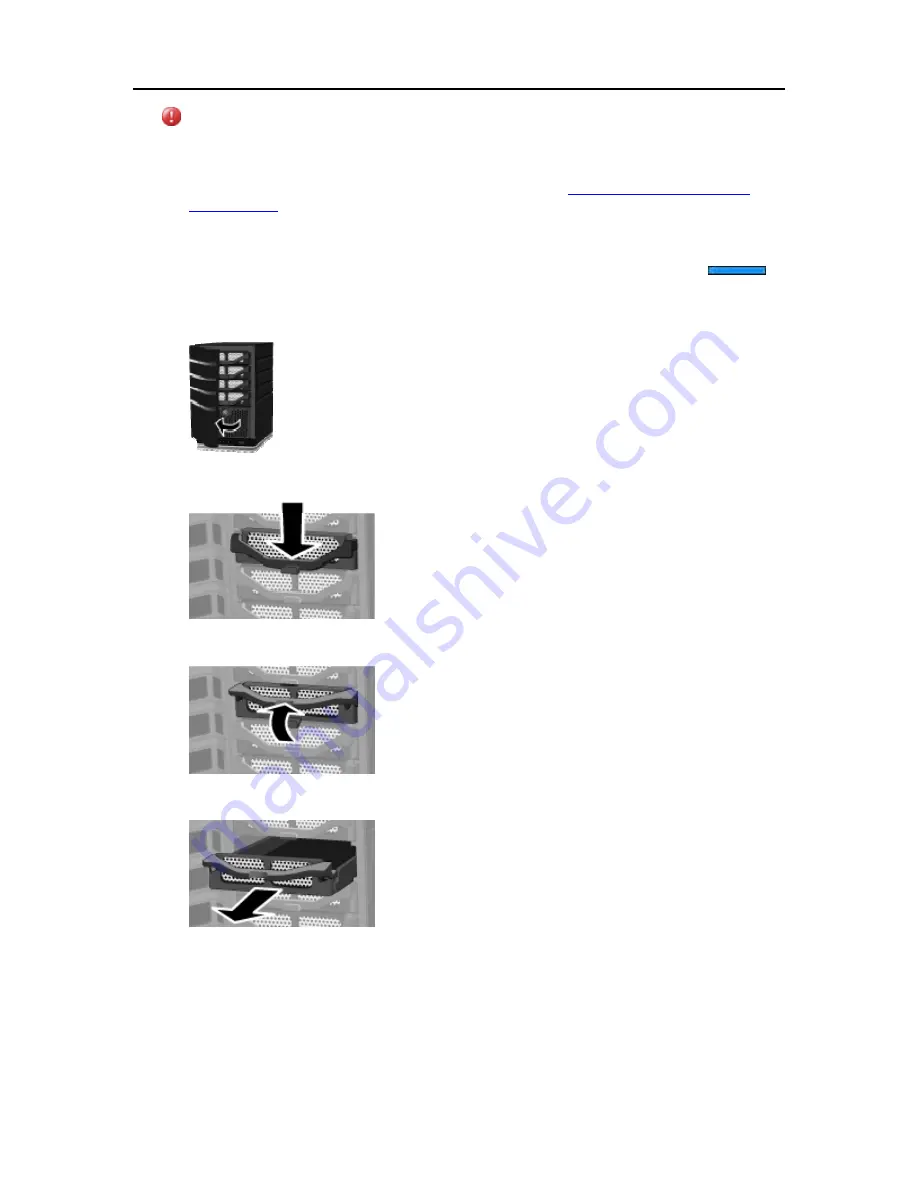
Open the door on the front of the HP MediaSmart Server.
3.
On the drive you want to remove, press down the lever to unlock the handle.
4.
Lift the handle of the hard drive tray all the way up.
5.
Gently pull the system drive from the drive bay.
6.
Flex the back of the right side rail, and then withdraw the back pin from the hard drive by gently
pulling the side rail down and away.
222
Summary of Contents for EX490 - MediaSmart Server - 2 GB RAM
Page 1: ...HP MediaSmart Server User s Guide ...
Page 2: ......
Page 24: ...HP MediaSmart Server User s Guide 2 On the Personal Firewall page click Add 18 ...
Page 60: ......
Page 108: ......
Page 143: ...Media Streaming Media Player From the top down the Player shows these features 137 ...
Page 156: ...HP MediaSmart Server User s Guide 150 ...
Page 180: ...HP MediaSmart Server User s Guide 174 ...
Page 185: ...HP Photo Publisher and HP Photo Viewer 6 Choose the album to add photos to 179 ...
Page 186: ...HP MediaSmart Server User s Guide 7 Select photos and click Finish 180 ...
Page 187: ...HP Photo Publisher and HP Photo Viewer 8 Select the photo album to view 181 ...
Page 189: ...HP Photo Publisher and HP Photo Viewer 3 Choose the album to add photos to 183 ...
Page 190: ...HP MediaSmart Server User s Guide 4 Select photos and click Finish 184 ...
Page 204: ...HP MediaSmart Server User s Guide 198 ...
Page 207: ...HP Photo Publisher and HP Photo Viewer 201 ...
Page 208: ......
Page 224: ......
Page 240: ......
Page 259: ...Network and Firewall 2 On the Personal Firewall page click Add 253 ...
Page 262: ......
Page 272: ......
Page 287: ...Product Information 281 ...
Page 288: ......
Page 318: ......


