3-8
Chapter 3
Unpacking and Installation
Repackaging the Cabinet for Shipment
Before shipment, place a tag on the container (or equipment) to identify the owner and the
service to be performed. Include the equipment model number and the full serial number,
if applicable. The label showing the model number and the full serial number is located on
the outside of the rear door.
Due to the weight of a fully loaded cabinet, it may require two people to push the cabinet
up the ramp onto the pallet.
WARNING
Repackaging a loaded cabinet can be hazardous. This is due to the
weight of the loaded cabinet. Use caution when moving the cabinet
and positioning the cabinet on the pallet. Check the condition of the
loading/unloading ramp before use. If the ramp appears damaged,
DO NOT attempt to push the loaded cabinet up the ramp onto the
pallet. Contact your local Hewlett-Packard Sales and Support Office
regarding shipment.
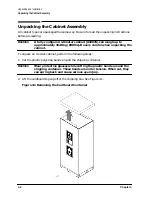
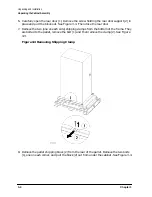
To repackage the cabinet, follow the repacking checklist and refer to the unpacking
instructions for detail.
Repacking Checklist:
1. Assemble the HP packing materials that came with the cabinet.
2. Connect the loading ramp to the pallet.
3. Raise the cabinet levelers before moving the cabinet.
4. Push the cabinet up the ramp onto the pallet. Be sure to position the cabinet so the
front goes up the ramp first.
5. Secure the cabinet to the pallet with the shipping clamps, shipping block, and rear door
support.
6. Place the anti-static bag over the cabinet.
7. Place bezel support packing on the front corners of the cabinet. Secure it with some sort
of wrap.
8. Place the top cap packing material and loading/unloading ramp on top of the cabinet.
9. Wrap the clam shell box around the cabinet.
10. Put the box top on the box and secure the assembly to the pallet.
Be sure to follow the labeling instructions mentioned earlier. The cabinet is now ready for
shipment.
Summary of Contents for A1896A
Page 10: ...1 4 Chapter1 Introduction Required Tools ...
Page 24: ...4 4 Chapter4 Cabinet Operation Turning Off the Computer System With UPS ...
Page 26: ...5 2 Chapter5 Removal and Replacement Procedures Figure 5 2 Cabinet Exploded View Rear ...
Page 36: ...5 12 Chapter5 Removal and Replacement Procedures Removal and Replacement Procedures ...
Page 43: ...Chapter 6 6 7 System Servicing Rack Mount Assemblies Figure 6 5 Rack Mount Kit Assemblies ...
Page 44: ...6 8 Chapter6 System Servicing Rack Mount Assemblies ...


