


IGSMHS Installation and Setup Guide
3-20
PROMPTS
ZONE
TRIG.
4204/
2-4204
ENTRY
OPTIONS
DESCRIPTION
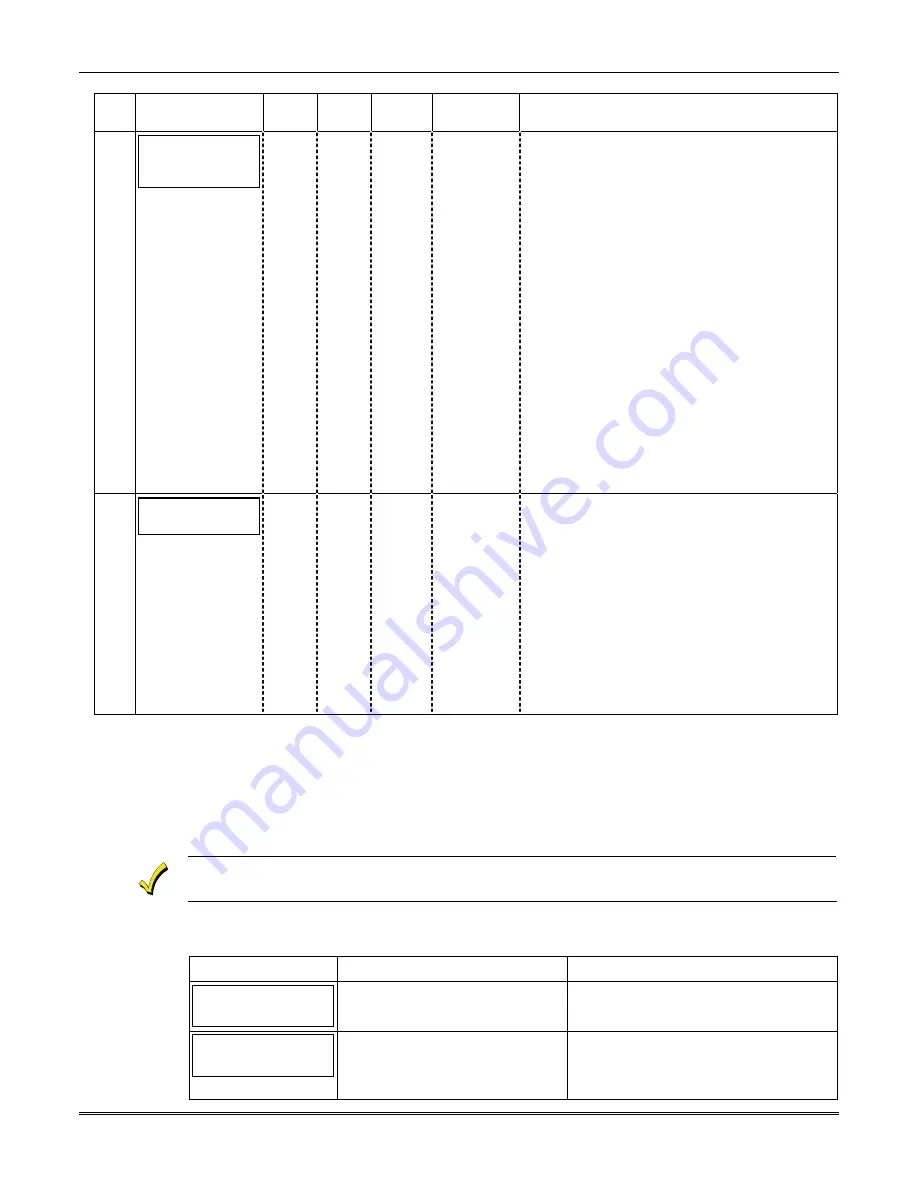
74
IP Connection
(Present)
Present
Auto
Detect
Press the [space] key to toggle between the
options. Press [ENTER] to select the
configuration.
If “Present” is chosen, it is assumed that an IP
is connected to the device. If it is not detected,
a Primary Comm Path Failure message will be
delivered after the programmed fault time
expires.
If “Auto Detect” is chosen, the device will
always try to use IP to communicate but it will
not generate a Primary Comm Path Failure
unless it previously detected the presence of IP.
As soon as the presence of IP is detected, a
Primary Comm Path Restore message is
generated and the value of IP Connectivity pro-
gramming parameter is changed from “Auto
Detect” to “Detected”.
From this point on, the software expects
connectivity. The auto detect logic will resume
only when the parameter is changed back to
“Auto Detect”.
75
Review? Y/N
[Y] =
review
[N] = exit
Reviewing Programming Mode Entries
To review the programming options (to ensure
that the correct entries have been made), press
[Y]. The programming prompts are displayed
again. Use the up/down arrow keys to scroll
through the program fields without changing
any of the values. If a value requires change,
simply type in the correct value. When the last
field is displayed, the “REVIEW?” prompt again
appears.
To exit the programming mode
, press [N] in
response to the "REVIEW?" prompt, and refer
to
Exiting Programming Mode
below.
Exiting Programming Mode
To exit the programming mode, press [N] in response to the "REVIEW?" prompt. Then press
[Y] to the "Exit Prog Mode?" prompt. Upon exiting, the root file is updated to log the changes
made. A message is displayed telling the user that this step is being executed. When
complete, the message "DONE" is displayed to indicate the file was successfully uploaded.
If critical configuration changes were made, such as the mode of operation, the IGSMHS will
reset to ensure that the programming features are enabled.
If the file is not successfully uploaded, one of the following prompts will be displayed. Follow
the steps shown below until the upload is successful.
Display Description
What
to
do
Cannot Upload
Try Again? Y/N_
IGSMHS module is not yet
initialized.
Wait for RSSI LEDs to be lit.
Press [Y].
Failed to Update
Root File!
Network problem, or you
answered "N" to "Cannot Upload
Try Again?" prompt.
Initiate the Force Server Update
Command by pressing the [0] key; refer
to
Section 5: Programmer Keyboard
Commands.
Summary of Contents for AlarmNet IGSMHS
Page 2: ......
Page 10: ...IGSMHS Installation and Setup Guide 1 6 ...
Page 18: ......
Page 40: ...IGSMHS Installation and Setup Guide 3 22 ...
Page 44: ...IGSMHS Installation and Setup Guide 4 4 ...
Page 52: ...IGSMHS Installation and Setup Guide A 2 ...
Page 54: ...IGSMHS Installation and Setup Guide B 2 ...
Page 58: ...IGSMHS Installation and Setup Guide D 2 ...
Page 59: ...NOTES ...
Page 60: ...NOTES ...
Page 61: ...NOTES ...
Page 62: ...NOTES ...