❏
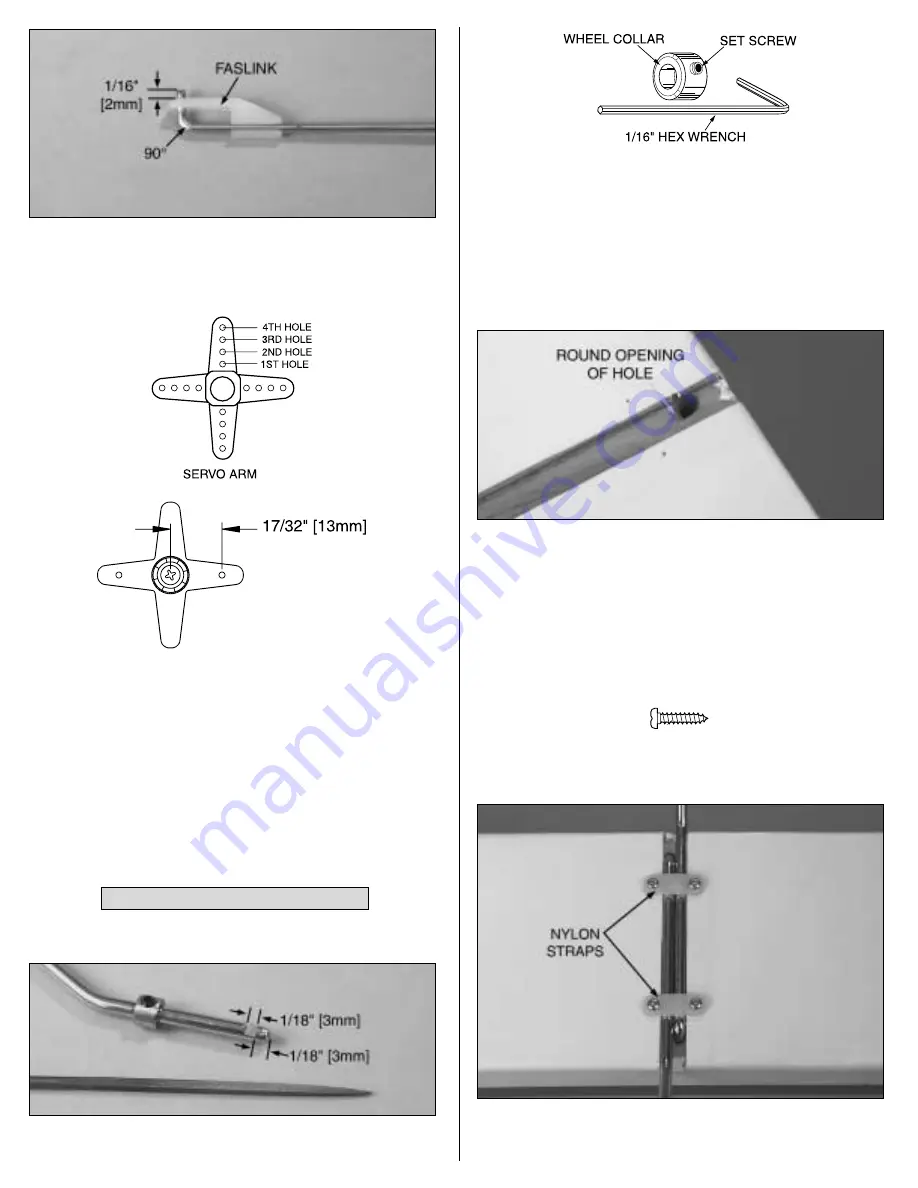
7. Disconnect the pushrod from the torque rod horn. Use
pliers to make a 90° bend in the pushrod at the mark you
made. Fit a nylon Faslink to the pushrod, then cut off the
excess pushrod 1/16" [2mm] above the Faslink.
❏
8. Enlarge the holes in the servo arm with a #48 or 5/64"
[2mm] drill or a hobby knife. Connect the pushrod to the third
hole out on the servo arm. Note: If using servo arms different
than the Futaba servo arms shown in this manual, connect the
pushrod to a hole that is as close as possible to 17/32" [13mm]
from the center.
9. Make and connect the other pushrod the same way.
Now the wing is finished. Set it aside while working on the
fuselage.
Mount the Landing Gear
❏
1. Use a small metal file to file a 1/8" [3mm] wide “flat spot”
1/8" [3mm] from the end of both main landing gear wires.
❏
2. Mount the wheels to the landing gear with a 5/32" wheel
collar on both sides of each wheel. Add a small drop of non-
permanent thread locking compound (such as Great Planes
Threadlocker GPMR6060) to two 6-32 set screws and thread
them into the collars using a 1/16" hex (“Allen”) wrench.
Position the wheel collars, then tighten the set screws. Be
certain the set screw in the outer wheel collar is in the flat spot.
❏
3. Use a hobby knife with a #11 blade to round the inner
edges of the holes in the landing gear rail in the bottom of the
fuselage for the main landing gear. This way, the landing gear
wires will go all the way down. Fuelproof the bare wood in the
groove by applying a light coat of epoxy.
#2 x 1/2" [13mm] screw
❏
4. Insert the main landing gear wires into the holes, then drill
1/16" holes for the nylon straps. Mount the gear to the bottom
of the fuselage with the straps and four #2 x 1/2" [13mm] screws.
Assemble the Fuselage
9


