The batteries must be charged to continue.
Check the Control Directions
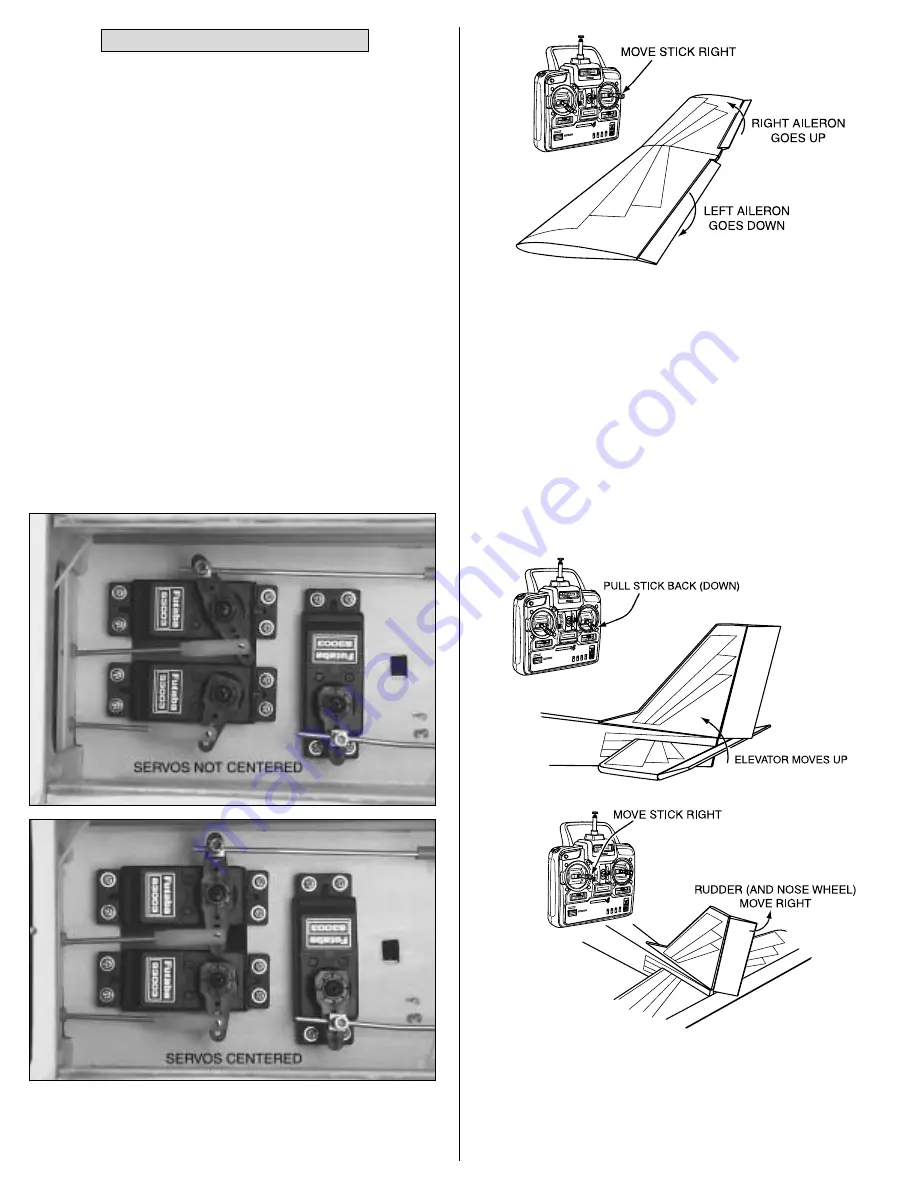
The first thing that has to be done is to center the controls
and make sure they all move in the right direction.
❏
1. Connect the aileron servo wire coming from the wing to
the servo wire coming from the receiver. Temporarily place the
wing on the fuselage.
❏
2. Center all the trims on the transmitter. Turn on the
transmitter, then the receiver. (The idea is to never have the
receiver on by itself. When turning off the system, turn off the
receiver first, then the transmitter.)
❏
3. Observe the servo arms on all the servos. If necessary,
take the servo arms off any servos that are not centered and
reposition them so they are centered. Be certain to reinstall and
tighten any screws you may have removed from the servo arms.
❏
4. Move the right control stick on the transmitter to the right
as shown in the diagram. Observe the ailerons. The right
aileron should move up and the left aileron should move down.
Moving the control stick to the left should make the ailerons
move the opposite way. If the ailerons do not respond as
described, reverse the direction using the reversing switch for
the ailerons on the transmitter. If necessary, refer to the
instructions in the manual that came with your radio to identify
and operate the reversing switch.
❏
5. Move the right stick down (pull it back) to make the
elevator go up. Move the left stick to the right to make the
rudder (and nose wheel) move right. Move the left stick down
to close the throttle. If necessary, use the reversing switches on
the transmitter to make the controls respond in the correct
direction.
Prepare the Model for Flight
16


