❏
7. Tightly tape the wing halves together with several strips
of masking tape on the top and bottom. Continue to wipe away
excess epoxy as it comes out. Be certain the front and back of
both wings accurately align. Do not disturb the wing until the
epoxy has hardened.
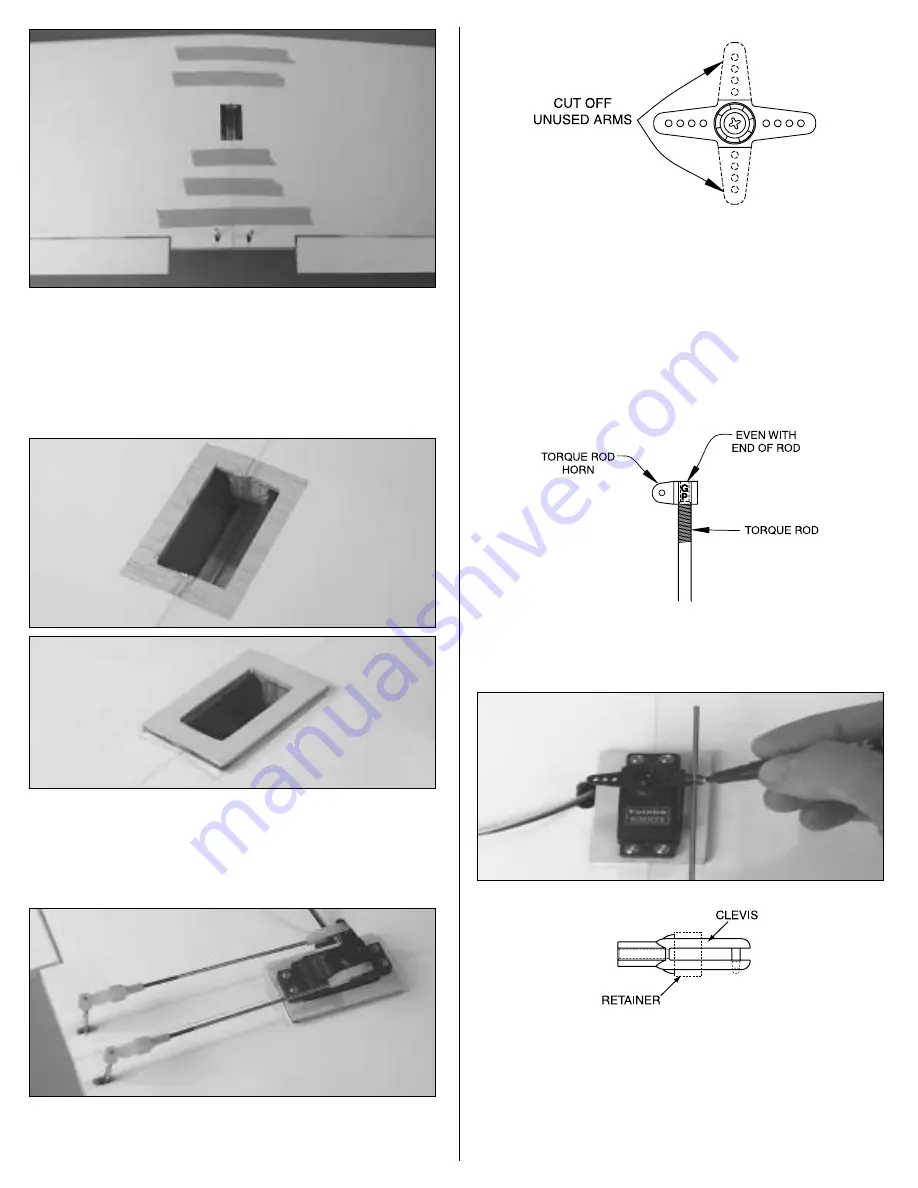
Hook Up the Ailerons
❏
1. Cut the covering from the bottom of the wing for the 1/8"
[3mm] plywood aileron servo mount. Glue the servo mount to
the wing with epoxy. Make sure the mount is level and fill the
gap on both sides with epoxy.
Refer to this photo for the following seven steps.
❏
2. Cut a hole in the sheeting so the servo wire can come
through (the hole can be seen in the photo at step 6). Guide the
servo wire out the hole and install the servo.
❏
3. Use wire cutters to cut two of the arms off a four-arm
servo arm. Install the arm on the aileron servo.
❏
4. Drill 1/16" [1.6mm] holes through the servo mount for the
servo mounting screws, then temporarily mount the servo using
the eyelets, rubber grommets and screws that came with it.
Remove the screws, add a few drops of thin CA to the holes,
allow to fully harden, then remount the servo. This process is
important to harden the “threads” in the wood so the screws
remain tight.
❏
5. Thread the nylon torque rod horns onto the aileron torque
rods until the horns are even with the ends of the torque rods.
❏
6. Thread a nylon clevis twenty full turns onto a 6" [150mm]
wire pushrod that is threaded on one end. Connect the clevis
to the torque rod horn. Align the pushrod with the servo arm,
then use a fine-point felt-tip pen to mark the pushrod where it
crosses the servo holes. Note: The aileron must be centered
during this procedure (the bottom of the aileron should be even
with the bottom of the wing).
8


