


88
On-Scr
een Display
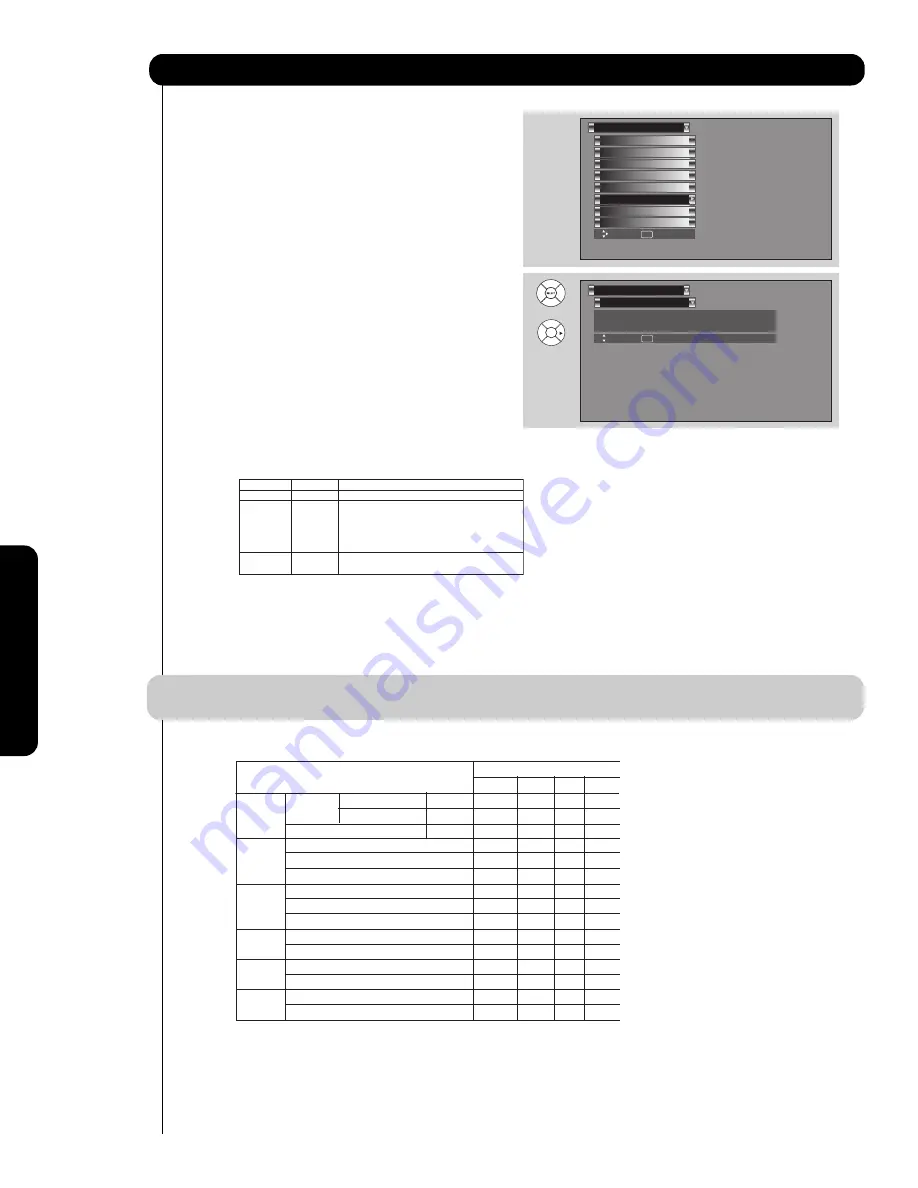
Set Monitor Out
This feature will select the source of the Monitor
Output.
Monitor
:
Select
MONITOR
to output the audio and
video signals of the chosen input source
(CABLE, AIR, INPUT 1-5)
to a VCR or other
A/V device.
TV Tuner Out:
Select
TV TUNER OUT
to output the audio
and video signals of the last watched Antenna
Source
(CABLE, AIR).
Fixed
Select
AUDIO OUT FIXED
to have the Audio
at fixed volume.
Variable
Select
AUDIO OUT VARIABLE
to have Audio volume that can be controlled by the Plasma TV Volume
Up/Down.
1.
Use
CURSOR PAD
or
to highlight the function to change
2.
Use the
CURSOR PAD
or
to select the function.
3.
Press
EXIT
to quit menu or select
SET MONITOR OUT
to return to previous menu.
NOTE:
1.
When
TV TUNER OUT
is selected,
VARIABLE AUDIO OUT
will not be available (grayed out).
2.
When using MONITOR OUT for recording, set the VIDEO OUT to MONITOR.
MONITOR
: Available Monitor Out Signals
Set The Inputs
Screen Saver
Set AV NET
Menu Preference
Set Monitor Out
Set Closed Captions
Upgrades
Setup
Set Stand-by Mode
Move
SEL
Select
Set Monitor Out
Setup
Move
SEL
Return
Video Out : Monitor
Video In : Fixed
OR
Setup
Video Out
Audio Out
Use
Monitor
Fixed
To record currently viewed Video and Audio.
Monitor
Variable
When an external device like a monitor
or Hi-Fi audio system is connected to the
audio
and
video
output
of
the
TV.
You
can
control
the
volume
output
by
changing
the
volume
of
the
TV.
TV Tuner Out Fixed
To record currently viewed Video and Audio
from
either
Cable
or
Air.
Input Mode
Monitor Out
S-Video
Video
L/R
HiFi
ANT
Digital No
Macrovision S-Video YES YES YES YES
(Air or Channel Macrovision S-Video
-
-
-
YES
Cable)
Analog Channel
Video
-
YES YES YES
Input 1
HDMI_1
-
-
-
YES
S-Video_1
YES
YES
YES
YES
Video_1
- YES
YES
YES
Input 2
HDMI_2
-
-
-
YES
S-Video_2
YES
YES
YES
YES
Video_2
-
YES
YES
YES
Input 3
Y-PbPr_3
-
-
-
YES
Video_3
- YES
YES
YES
Input4
Y-PbPr_4
-
-
-
YES
Video_4
- YES
YES
YES
Input5
S-Video_5
YES YES YES YES
Video_5
- YES
YES
YES
Summary of Contents for 42HDT52A
Page 103: ...103 Notes ...
Page 104: ...QR64865 ...


