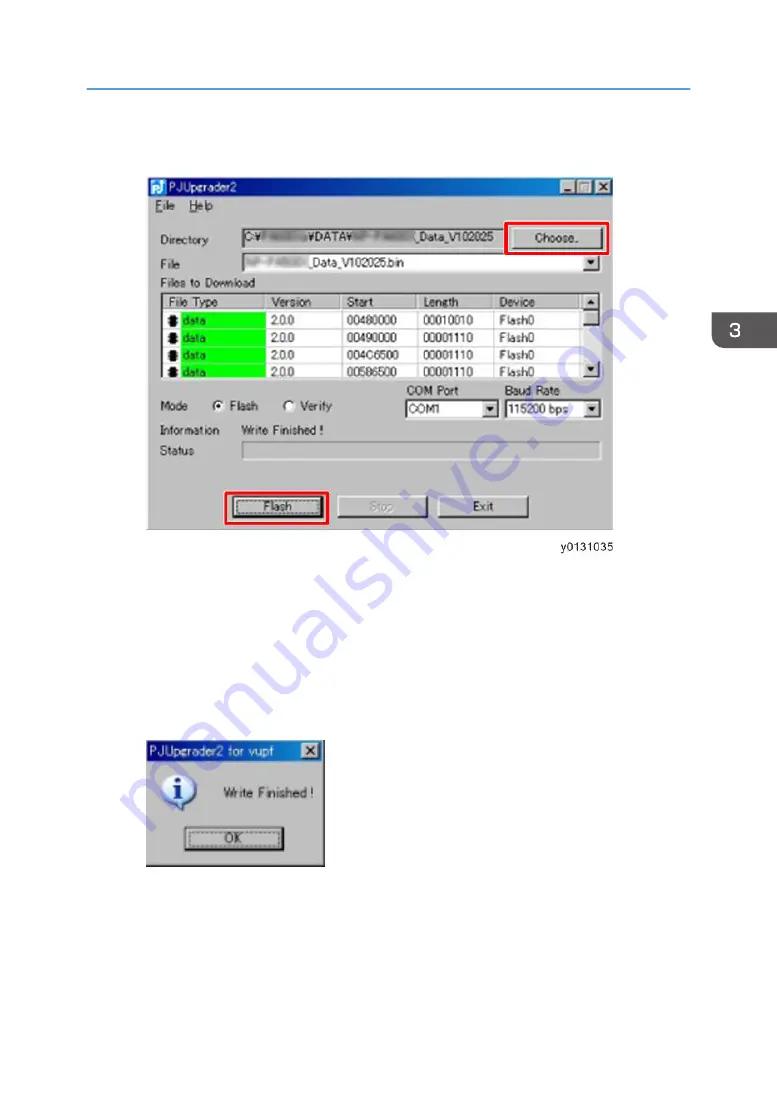
4.
Start up PJUpgrader2.exe copied previously.
5.
Press [choose….] button to select the file (WX6181N_Data_V******.bin) to be
written.
6.
Check that the projector and PC are properly connected each other, then press
[Flash] button.
Message "Do you start flash write?" is displayed.
7.
When [Yes(Y)] button is pressed, writing is started.
(Progress bar showing writing situation is displayed.)
8.
Message "Write Finished!" is displayed, when completed. Press [OK] button to finish
the operation.
9.
Unplug the power cord from the projector.
Electrical Adjustment
85
Summary of Contents for Sirius-PJ2
Page 1: ...Model Sirius PJ2 Machine Codes Y076 Y077 Y078 Field Service Manual June 2015 ...
Page 2: ......
Page 12: ...10 ...
Page 20: ...No Name 16 Ethernet Port RJ 45 Part Names of the Remote Controller 1 Product Information 18 ...
Page 24: ...1 Product Information 22 ...
Page 34: ...Filters 1 Remove the Filter cover A 2 Remove the Filters A 3 Replacement and Adjustment 32 ...
Page 36: ...5 Disconnect the cable 1 PCB Key Pad 1 Top cover page 33 3 Replacement and Adjustment 34 ...
Page 54: ...5 Remove the Duct Cover A 3 6 Remove the Duct Base A 3 3 Replacement and Adjustment 52 ...
Page 67: ...3 Remove the bracket A 2 4 Remove the Power supply DC 6 Parts Replacement 65 ...
Page 153: ...MEMO 151 ...
Page 154: ...MEMO 152 EN ...
Page 155: ...Model Sirius PJ2 Machine Codes Y076 Y077 Y078 Appendices June 2015 ...
Page 156: ......
Page 158: ...2 ...
Page 172: ...MEMO 16 EN ...


