
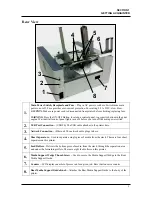
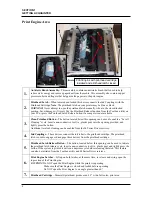
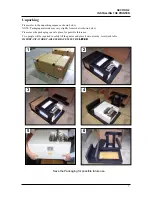


SECTION 2
INSTALLING THE PRINTER
12
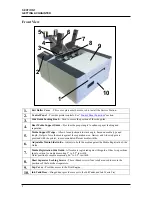
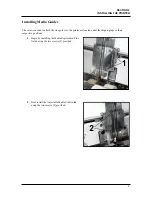
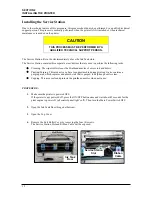
Installing the Service Station
Due to the technical nature of this procedure; this process should only be performed by a qualified technical
support person. This process is normally performed when the printer is first installed or when technical
maintenance is needed on the printer.
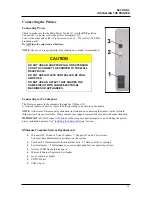
CAUTION
THIS PROCESS MUST BE PERFORMED BY A
QUALIFIED TECHNICAL SUPPORT PERSON.
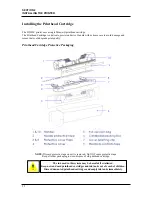
The Service Station fits in the slot immediately above the Ink Tank slots.
The Service Station contains three separate areas/devices that are used to perform the following tasks.
•
Cleaning. The wiper roller cleans the Printhead nozzles of excess ink and debris.
•
Printing/Purging. This area acts as a base to support media during printing. It also contains a
purging area; which captures and absorbs ink that is purged, to help keep nozzles clear.
•
Capping. This area seals and protects the printhead nozzles when not in use.
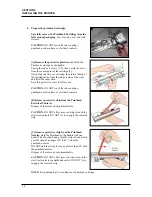
PROCEDURE:
1.
Make sure the printer is powered OFF.
If the printer is not powered off, press the ON/OFF button once and wait about 45 seconds for the
print engine to power off (all control panel light’s off). Then turn the Main Power Switch OFF.
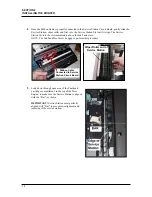
2.
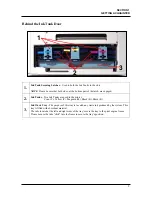
Open the Ink Tank Door (hinged at bottom).
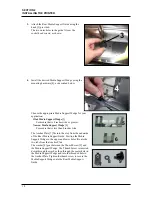
3.
Open the Top Cover.
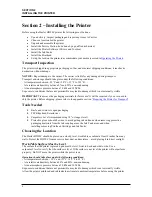
4.
Remove the Exit Roller Cover by removing the four (4) screws.
The Service Station Slot and Ribbon Cable will be exposed.
Ribbon
Cable
Service Station
Slot
Ink Tank
Door


