30
AUXILIARY ANALOG AUDIO INPUTS AND PROGRAMMING
Auxiliary Analog audio Inputs and Programming
Auxiliary Analog Audio Inputs
In addition to digital media, the DMC 250 may
also be used for playback of analog media using
an external source device. You may connect the
analog audio outputs of any compatible device,
such as a cassette deck, to the rear-panel
Auxiliary Analog Audio Inputs.
NOTE:
You may connect a turntable to the
DMC 250, but only if it has an integrated phono
preamp, or if you are using a separate phono
preamp.
Select the AUX media source as usual by press-
ing the Source Button, navigating to the AUX
icon and pressing the Enter Button. A screen
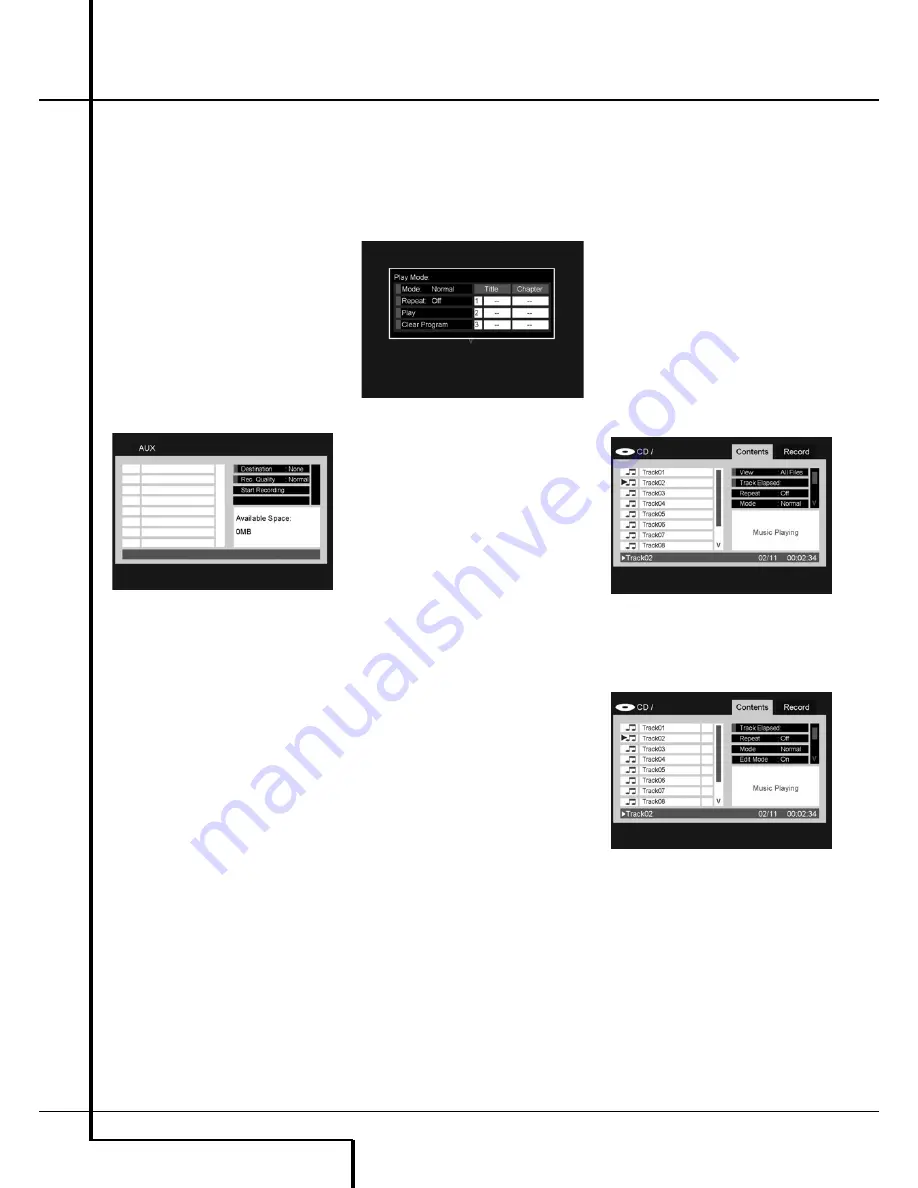
similar to the one shown in Figure 10 (AUX
Contens Menu) will appear. It is possible to
make a recording of the analog audio stream
and save it to one of the solid-state media as an
MP3 file.
Figure 10 – AUX Contents Menu
NOTE:
The DMC 250 does not convert analog
audio to the digital audio format for output via
either of its digital audio outputs. Therefore, in
order to hear the analog audio stream from the
AUX source, make sure to connect the rear-panel
Analog Audio Output(FL/FR) to corresponding
input on your receiver or processor, and select
the receiver’s analog audio inputs.
Programming a Playlist
Programmed play allows you to select chapters,
up to 99 tracks or files on a disc, memory card
or USB drive for playback in a specific order,
skipping selections you don’t wish to hear and
reordering others to suit your tastes.
The method for programming a play list differs
depending on the media type. For DVDs and
VCDs, the Play Mode Menu is used. For audio
CDs and data files, the Control Commands sec-
tion of the Contents Menu is used.
Programming a Playlist From a DVD or
VCD
You may program a play list from a DVD Audio
or Video disc, or from a Video CD, by following
these steps:
Step One:
Making sure that the Disc Player has
been selected as the media source and with the
disc loaded, press the Stop Button to make sure
the disc is stopped.
Step Two:
Press the Play Mode Button to dis-
play the Play Mode Menu (see Figure 11 - Play
Mode Menu).
Figure 11 – Play Mode Menu (disc stopped)
Step Three:
The Mode line will be highlighted.
If it isn’t, use the
KL
Buttons
to highlight it.
Press the
Enter
Button repeatedly until the
Mode setting changes to Program.
Step Four:
Now use the Navigation Buttons to
move the on-screen cursor to the first step in the
play list on the right side of the Play Mode
Menu.
Step Five:
Use the Numeric Keys to enter the
title number containing the first selection, and
press the
N
Button to move the cursor to the
Chapter column. It is not necessary to use the
Enter Button.
Step Six:
Use the Numeric Keys to enter the
number of the first chapter you would like to
program into your play list.
NOTE:
For DVD Audio discs, the Title and
Chapter column headings will be replaced by
Group and Track headings. For VCDs, a single
column labeled Track will appear.
Step Seven:
Use the Navigation Buttons to
move the cursor to the Title column of the sec-
ond step in the play list, and program the sec-
ond selection as you did in Steps Five and Six.
Step Eight:
When you have finished program-
ming all steps in your play list, use the
Navigation Buttons to highlight the cell labeled
“Play
N
” on the left side of the Play Mode
Menu. Press either the Enter Button or the Play
Button to begin play of your play list.
During playback of a programmed list you may
use the Previous and Next Buttons to move
through the tracks in the play list in programmed
order.
If you wish to play the disc in its native order,
press the Play Mode Button and change the
Mode setting to Normal.
To clear the program:
1. Press the Play Mode Button and use the
KL
Buttons
to highlight the Clear Program
cell. Press the Enter Button.
2. Alternatively, open the disc drawer.
Programming a Playlist From an Audio CD
or Data Source
When an audio or data (MP3, WMA, JPEG,
MPEG) CD, or a memory card or USB drive con-
taining data files, is loaded, the Contents Menu
appears. Play lists may be programmed using the
Control Commands section of the Contents
Menu, as follows:
Step One:
Since play will automatically stop
when you begin programming the play list, it is
not necessary to stop play. Use the Navigation
Buttons to move the on-screen cursor to the
Control Commands side of the screen. See
Figure 11a (CD Control Commands).
Figure 11a – CD Control Commands
Step Two:
Use the
L
Button to scroll down to
the Edit Mode line, and press the Enter Button
to change the Edit Mode setting to On. See
Figure 11b (Edit Mode Setting).
Figure 11b – Edit Mode Setting
NOTE:
With Edit Mode turned on, you will not
be able to navigate through a hierarchy of fold-
ers on a data disc, other than scrolling through
items in the current folder view. To resume navi-
gation, for example if you wish to add items
from different folders to your play list, remember
to change the Edit Mode setting to Off, and then
return it to On when you are ready to select
tracks or files.
Step Three:
You may now select items to be
added to your play list.
Use the Navigation Buttons to return to the
Contents listing on the left side of the screen
and to highlight each desired selection. Press the


