Page 3
6)
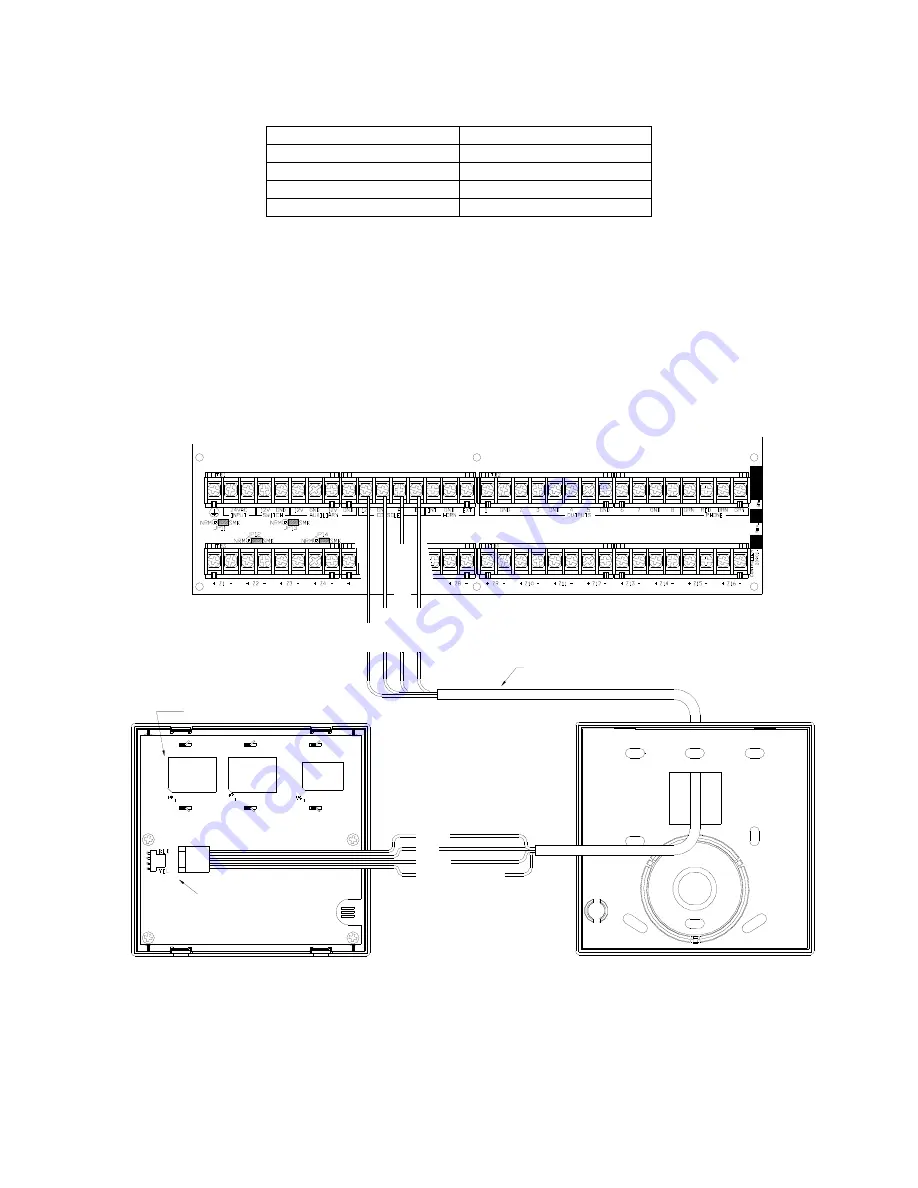
Install the Lumina Keypad
a)
Connect the supplied keypad (P/N: 33A00-19) using the supplied 6’ Keypad Cable (P/N: 11A02-2) as follows:
11A02-2 Cable
Lumina Controller
RED CONSOLE
12V
BLACK CONSOLE
GND
YELLOW or WHITE
CONSOLE A
GREEN CONSOLE
B
b)
Remove the keypad from the back plate by gently prying the unit open with a screwdriver.
c)
Mount the back plate to the wall. Mounting holes are designed to fit on a single or double gang box, or directly to the wall.
d)
Plug the cable into the connector on the keypad Printed Circuit Board (J1) as shown.
e)
Snap the console face on to the back plate. Remove protective film from the LCD lens.
(MOUNTED TO KEYPAD FACE)
KEYPAD PC BOARD
BACK PLATE
P/N: 11A02-2
(PLUGS INTO J1)
G
R
EEN
Y
E
LLO
W OR WH
IT
E
BL
A
C
K
RE
D
YELLOW OR WHITE
GREEN
RED
BLACK
SUPPLIED 6' KEYPAD CABLE
SUPPLIED 6' KEYPAD CABLE
P/N: 11A02-2
J1


