UtilityScan Quick Start Guide
Page 23
4
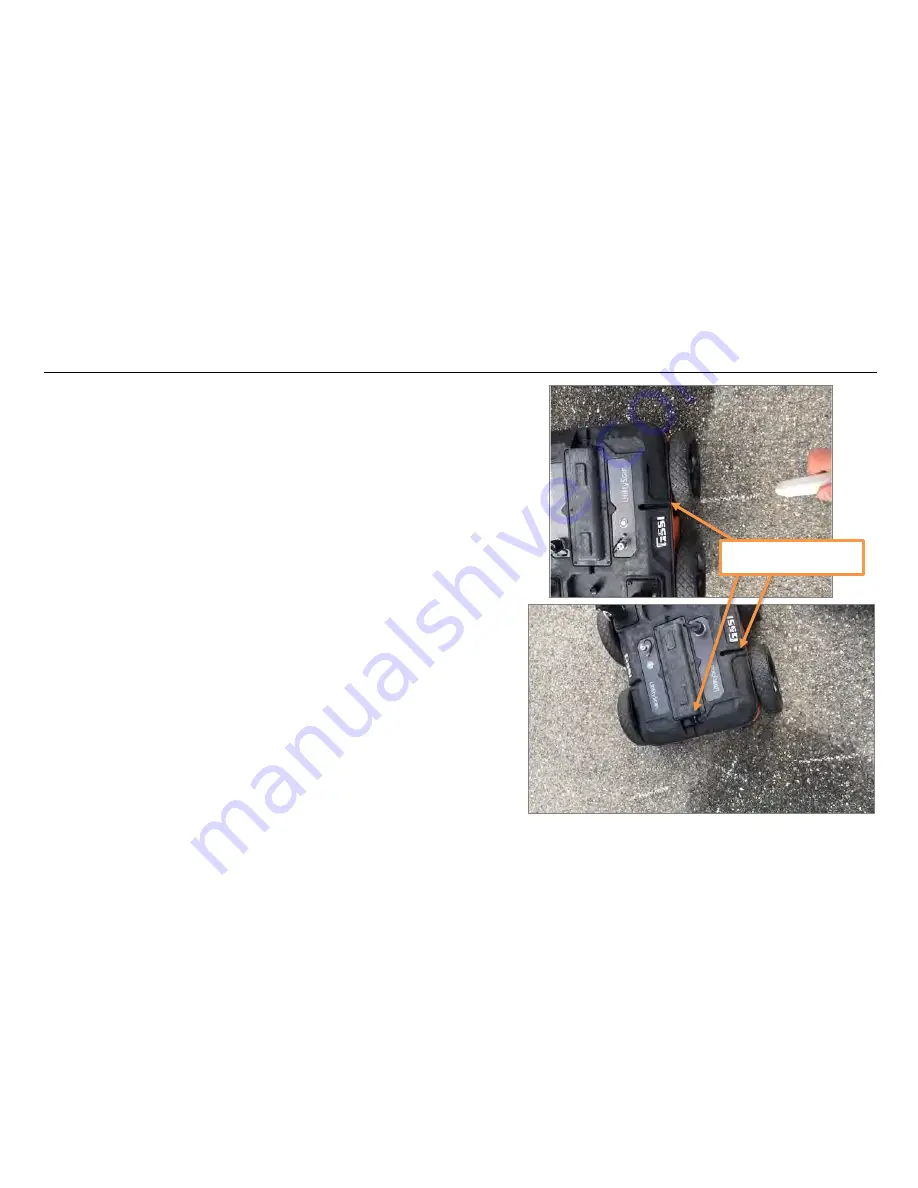
Mark the ground in line with the marking grooves on the side of the
UtilityScan. GSSI recommends marking both sides of the cart.
5
Move the UtilityScan back a little more and draw an
“X”
between
your side marks and lining up with the marking groove on the front,
center of the UtilityScan. The
“X”
represents the point actually
imaged on the UtilityScan screen. Note that you have only one
point, so you will need more markouts of the same target before
you can consider it a utility line (or other linear target).
6
Continue to push the UtilityScan forward in a straight line,
retracing your steps, to mark additional targets in that file
or to collect more data. The UtilityScan will not overwrite data
already collected, so you will need to move beyond where you
began to back up in order to collect more data.
7
Collect more data lines parallel to your previous lines. As you
make additional marks you will begin to see a pattern develop.
Marking Grooves
Summary of Contents for UtilityScan
Page 1: ...UtilityScan Quick Start Guide MN71 292 Rev C ...
Page 4: ......
Page 6: ......
Page 10: ...UtilityScan Quick Start Guide Page 4 UtilityScan Transport Configurations ...
Page 53: ...Notes ...
Page 54: ......
Page 55: ......
Page 56: ......


