To start the unit
1.
Place the unit on a solid, flat, dry surface making sure that
the water tank and medicine cup have been properly filled
and the mouth nozzle is properly attached to the top cover.
2.
Press the start button.
Note:
• Your unit has been designed to automatically output the
highest level or airflowThe airflow.
• The Airflow Volume Indicator Light will illuminate at the highest
setting.
To adjust the airflow, and nebulizer rate
1.
Your Ulrasonic Nebulizer has 3
airflow setting: Maximal, Medium and
Minimum.
2.
Based on instruction from your physician
and/or respiratory therapist, press the
Nebulization rate control button to
adjust the airflow volume. The Airflow
Volume Indicator Light will show the
level (Maximal, Medium or Minimum)
selected,
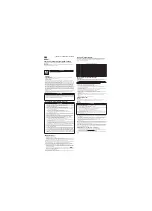
Fig. 5.
3.
The Transfer Cone located inside the Transducer
enhances the level is too strong, the cone should be
carefully
removed
after
the unit has completely cooled.
Restart the unit and resume treatment.
To begin a treatment
1.
Follow the instruction provided by your physician and/or
respiratory therapist.
2.
Your Nebulizer is designed to start at a lower
atomization rate in the beginning and will become
stronger after a few minutes.
Remember:
• Keep your eyes away from the output of medication mist.
• If any discomfort or abnormality occurs, stop using the unit
immediately.
• Do not tilt or shake the unit when in operation ..
• Opening the top cover during operation may cause a severe
injury.
To end a treatment
1.
When the treatment has ended, press the power button
to shut off the unit. Otherwise,your unit will automatically
shut off after approximately 10 minutes of continuos use.
2.
Unplug the adapter from the outlet and detach the
adapter plug from unit’s AC port.
3.
Allow the unit to cool - approximately 20-30 minutes.
Remember:
• The unit should not be used for more than 20 minutes at the time.
• Wait 30 minutes before reusing the unit.
After every use
1.
Allow the unit to completely cool.
2.
Remove the top cover.
3.
Carefully remove the medicine cup and pour remaining
medication.
4.
Empty the water tank.
5.
Wipe out the water tank and transducer with a soft, lint-
free cloth.
6.
Follow the cleaning procedures provided in this guidebook
TROUBLESHOOTING
If any abnormality occurs during use, please
check and correct the following:
Unit does not operate when power button is
pressed:
• Check the Ac adapter connection to the outlet and/or
check the AC plug to the unit’s AC port.
• Check that the water tank is filled to the correct level.
• If using with optional battery pack, check that the battery
is completely charged. Check that the battery is mounted
correctly to the unit.
No misting or low rate of misting
• Check that there is medication in the medicine cup.
• Check the medication cup for damage.
• Check that the transducer is clean.
Replacement Parts
Replacement parts are available through your local retailer
or they can be ordered by mail, See separate replacement
part of list for details.
Your PINGOO Ultrasonic Nebulizer can operate with the
use of a rechargeable battery when AC power is not
available.The life of the battery life will vary depending on
usage, storage and charging conditions.
To charge the battery
1.
Plug the adapter into standard AC outlet.
2.
Insert the adapter plug into the unit’s AC port, ,
Fig. 1
Note:
• For first time use or after storing the
battery for a period time, charge the
battery at least 24 hours, and
thereafter 4 to 12 hours depending on
the length of usage.
• A fully charged battery will last for 20-30 minutes of
continuos use.
• To prolong the life of the battery, the charging current is
designed at the minimum level. Therefore, it is
recommended to charge the battery after each use and let
it charge overnight.
To use the battery
1.
Insert the battery’s plug into nebulizer’s power
receptacle.
Fig.1.
2.
Begin the use the Nebulizer as
described in the Operating Your
Nebulizer section of this guidebook.
3.
If the nebulizer’s indication lamp
changes to red color, it indicates that
the battery is low voltage condition
and needs to be charged.
4.
After use, dispose excess medication
and water before disconnecting the
battery.
5.
Always remove the battery from
nebulizer whenever not in use.
➞
Fig. 1
Fig. 5
9
Fig. 1