background image

Operation

28

1

AAAA

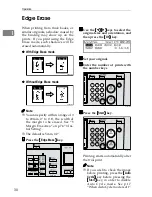
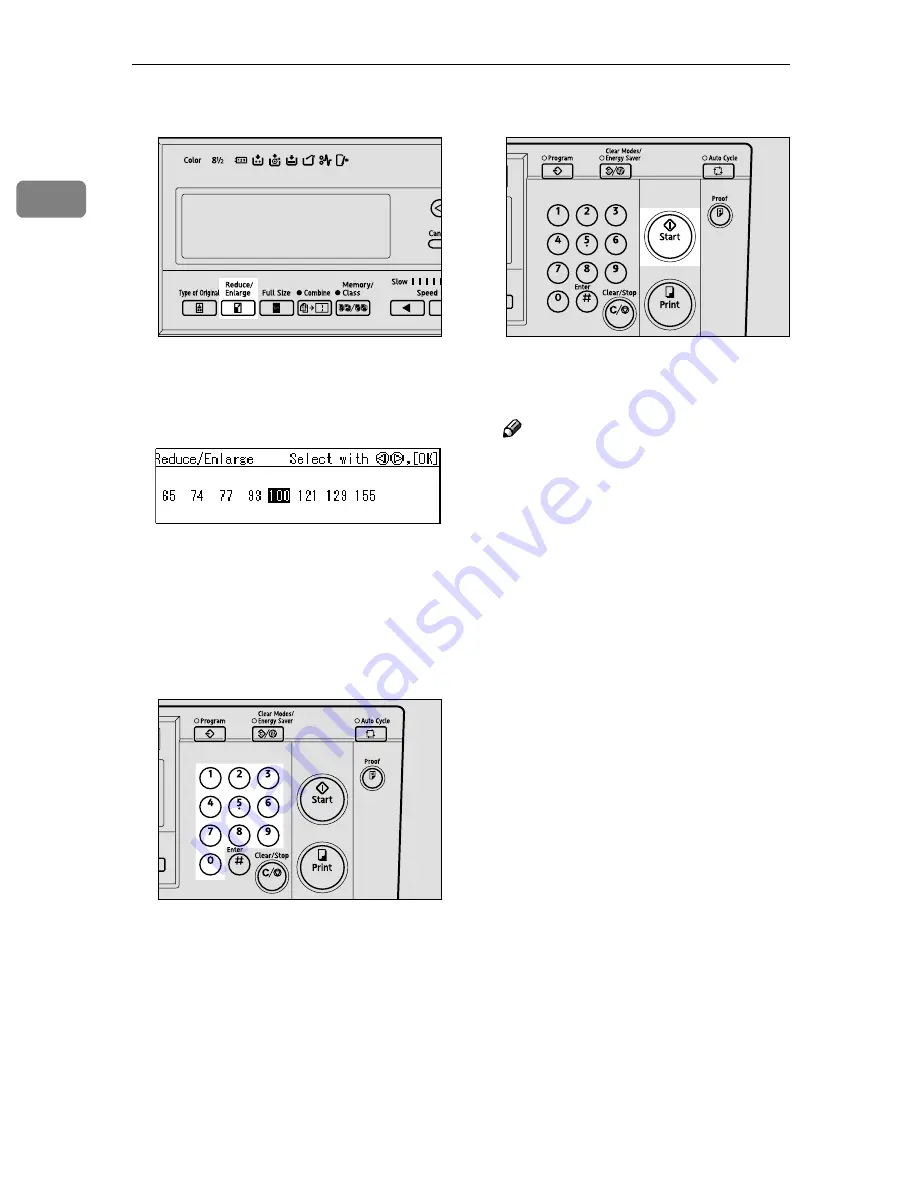
Press the 

{{{{

Reduce/Enlarge

}}}}

 key.

BBBB

Use the 

{{{{

~

~

~

~

}}}}{{{{

}

}

}

}

}}}}

 keys to select

your desired reproduction ratio,
and press the 

{{{{

OK

}}}}

 key.

CCCC

Check that the original and the
print paper are of the correct size.

DDDD

Set your original.

EEEE

Enter the number of prints with
the number keys.

FFFF

Press the 

{{{{

Start

}}}}

 key.

Printing starts automatically after
the trial print.

Note

If you wish to check the image
before printing, press the 

{{{{

Auto

Cycle

}}}}

 key before pressing the

{{{{

Start

}}}}

 key, in order to disable

Auto Cycle mode. See p.17
“When Auto Cycle mode is off”.

ZLKS051N

ZLKS032N

ZLKS030N

Summary of Contents for 3560DNP

Page 1: ...tions For safety please read this manual carefully before you use this product and keep it handy for future reference Operation Optional Functions User Tools Replenishing Supplies Troubleshooting Remarks Specifications ...

Page 2: ...Type for CP6244 LDD145 JP4500 3560DNP Printed in Japan EN USA C249 8697 ...

Page 3: ...al dealer The model names of the machines do not appear in the following pages Check the type of your ma chine before reading this manual LG drum CP6244 LDD145 JP4500 3560DNP A3 drum Not Available Certain types might not be available in some countries For details please contact your local dealer Two kinds of size notation are employed in this manual With this machine refer to the inch version For ...

Page 4: ...nt off and on the user is encouraged to try to correct the interference by one more of the following measures Reorient or relocate the receiving antenna Increase the separation between the equipment and receiver Connect the equipment into an outlet on a circuit different from that to which the receiver is connected Consult the dealer or an experienced radio TV technician for help Warning Changes o...

Page 5: ...ns might not be available in some countries For details please contact your local dealer Two kinds of size notation are employed in this manual With this machine refer to the inch version For good copy quality Standard recommends that you use genuine Standard masters and ink Standard shall not be responsible for any damage or expense that might result from the use of parts other than genuine Stand...

Page 6: ...nt off and on the user is encouraged to try to correct the interference by one more of the following measures Reorient or relocate the receiving antenna Increase the separation between the equipment and receiver Connect the equipment into an outlet on a circuit different from that to which the receiver is connected Consult the dealer or an experienced radio TV technician for help Warning Changes o...

Page 7: ...ult in minor or moderate injury or damage to property Connect the power cord directly into a wall outlet and never use an ex tension cord Disconnect the power plug by pulling the plug not the cable if the power cable or plug becomes frayed or otherwise damaged To avoid hazardous electric shock do not remove any covers or screws other than those specified in this manual Turn off the power and disco...

Page 8: ... allow paper clips staples or other small metallic objects to fall inside the machine For environmental reasons do not dispose of the machine or expended supply waste at household waste collection points Disposal can take place at an authorized dealer Be careful not to cut yourself on any sharp edges when you reach inside the machine to remove misfed sheets of paper or masters Our products are eng...

Page 9: ...iii Position of Label for R R R RCAUTION This machine has a RCAUTION label at the position indicated below For your own safety always adhere to the instructions on the label ZJVH060E ...

Page 10: ...structions under this symbol Be sure to read the instructions all of which are described in the Safety Information section The statements above are notes for your safety Important If this instruction is not followed paper might be misfed originals might be damaged or data might be lost Be sure to read this Preparation This symbol indicates the prior knowledge or preparations required before op era...

Page 11: ...Image Density See p 23 Adjusting the Print Im age Density Making Halftone Prints See p 24 Tint Mode Changing the Printing Speed See p 25 Changing the Printing Speed Reducing and Enlarging by Preset Ra tios See p 27 Preset Reduce Enlarge Fine tuning the Reproduction Ratio See p 29 Zoom Erasing Margins See p 30 Edge Erase Printing on Thick or Thin Paper See p 31 Printing on Thick or Thin Paper Selec...

Page 12: ... Feed Printing Storing Print Settings See p 53 Program Printing Confidential Documents See p 55 Security Mode Entering a User Code to Use the Ma chine See p 56 Entering a User Code to Use the Machine Restoring Image Quality See p 57 Quality Start Mode On Line Printing See p 58 On Line Printing Making Color Prints See p 67 Making Color Prints Printing in Two Colors See p 68 Printing in Two Colors 1...

Page 13: ...ument Feeder B B B B Place the original face down on the exposure glass The original should be aligned with the refer ence mark and the left corner scale A Left corner scale B Reference mark C C C C Lower the exposure glass cover D D D D Specify your print settings E E E E Enter the number of prints with the number keys F F F F Press the Start key Printing starts automatically after the trial prin...

Page 14: ...e key before pressing the Start key in order to disable Auto Cycle mode See p 17 When Auto Cycle mode is off G G G G When the print job is finished press the Clear Modes Energy Sav er key Your print settings are cleared and the machine returns to its initial condition ZLKS036N ...

Page 15: ...tting Up the Paper Delivery Tray 12 After Printing 14 Standard Printing 16 Energy Saver Mode 19 Auto Reset 20 Adjusting the Print Image Position 21 Forwards or Backwards 21 Right or Left 22 Adjusting the Print Image Density 23 Tint Mode 24 Changing the Printing Speed 25 Stopping a Multi print Run 26 Stopping a Multi print Run to Print Another Original 26 Changing the Number of Prints and Checking ...

Page 16: ...inting 52 Program 53 Storing Print Settings 53 Recalling a Program 54 Security Mode 55 Entering a User Code to Use the Machine 56 Quality Start Mode 57 On Line Printing 58 Auto On Line 59 2 Optional Functions Optional Document Feeder 61 Originals 61 Placing Originals in the Document Feeder 62 Using the Document Feeder when Combining Originals 63 Using the Document Feeder in Memory Mode 64 Color Pr...

Page 17: ...ng Problems 93 Printing Problems When Using Combine Mode 93 x x x x Clearing Misfeeds 94 When x lights and P is indicated 94 When x lights and A is indicated 96 When x lights and B is indicated 97 When x lights and C is indicated 98 When x lights and D is indicated 101 When x lights and A B are indicated 102 When x lights and B E are indicated 103 When the Open Cover Unit Indicator M M M M Lights ...

Page 18: ...arks Operation Notes 117 General Cautions 117 Print Paper 119 Originals 119 Where to Put the Machine 120 Environmental Conditions 120 Power Connection 121 Access to Machine 121 Maintaining the Machine 122 Main Frame 122 Optional Document Feeder 123 Combination Chart 124 7 Specifications Main Frame 125 Document Feeder Option 128 Consumables 129 INDEX 130 ...

Page 19: ...he master roll or to clear a master misfeed 5 Lower master tray Pull out this tray to clear a master mis feed 6 Feed roller pressure lever Use to adjust the contact pressure of the paper feed roller according to paper thickness 7 Paper feed side plates Use to prevent paper skew 8 Paper feed tray Set paper on this tray for printing 9 Paper feed side plate lock lever Use to lock or unlock the paper ...

Page 20: ...he leading edge of the prints 4 Paper delivery tray Completed prints are delivered here 5 Main switch Use to turn the power on or off 6 Drum unit The master is wrapped around this unit 7 Drum unit lock lever Lift to unlock and pull out the drum unit 8 Ink holder Set the ink cartridge in this holder 9 Exposure glass Position originals face down on the expo sure glass 10 Master eject box Used master...

Page 21: ...ptions Document feeder 1 Document feeder Exposure glass cover 1 Exposure glass cover Note Other options A3 11 17 Color Drum A4 81 2 17 Black Drum Tape Dispenser Key Counter PC Controller ZLKH010E ZLKH020E ...

Page 22: ... Job Reset key Press to stop the optional PC controller 9 Type of Original key Press to select Letter Photo or Let ter Photo mode See p 32 Type of Orig inal 10 Reduce Enlarge key Press to reduce or enlarge the image by preset ratios See p 27 Preset Re duce Enlarge 11 Full Size key Press to make full size prints 12 Combine Repeat key Press to combine two originals onto one print See p 49 Combine Pr...

Page 23: ...ey See p 59 Auto On Line 23 Cancel key Press to cancel a selection or an entry and to return to the previous display 24 keys Press to select an item on the panel dis play 25 OK key Press to confirm a selection or an entry 26 Program key Press to store print settings or to recall stored print settings See p 53 Program 27 Clear Modes Energy Saver key Clear Modes Press to clear previously entered pri...

Page 24: ...nk indicator See p 85 When the Add Ink Indicator j Lights C Master End indicator See p 88 When the Master End Indicator C Lights See p 106 When the Master End Indica tor C Lights and a Message is Dis played k Master Eject indicator See p 107 When the Master Eject Indica tor k Lights M Open Cover Unit indicator See p 105 When the Open Cover Unit Indicator M Lights and a Message is Displayed x Misfe...

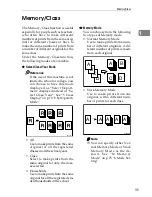
Page 25: ...explained below Understanding their meaning helps you use this machine s features quickly and easily Sample display when selecting the Reduce Enlarge key 1 Machine status or messages When the Reduce Enlarge key is pressed the following display is shown 1 Functions and settings available Press the keys to select an item Press the OK key to confirm your settings Press the Cancel key to return to the...

Page 26: ...8 ...

Page 27: ...n Short grain paper Thin and flimsy paper Paper that is prone to generate a lot of paper dust Grained paper loaded with the direction of the grain perpendicular to the feed direction Certain types of long thin envelopes e g international mail envelopes Paper Size Paper Weight Metric Inch Paper feed tray A3L B4 JIS Japanese Industrial Standard L A4 L K B5 JIS L K A5 L B6 JIS L A6 L Oth ers Vertical...

Page 28: ...m print areas are as follows Metric version 290 410mm 11 4 16 1 Inch version 290 420mm 11 4 16 5 When you use A3 11 17 and 209 3g m2 55 6 lb paper slow the printing speed down to Setting 1 2 or 3 Important Correct curls in the paper before placing it in the machine When you are un able to correct the paper curl stack the paper with the curl either face up or face down as shown below If paper is cu...

Page 29: ... paper delivery tray Place originals on the exposure glass only after the ink or correction fluid on them is completely dry Not taking this precaution could stain the exposure glass and cause the stains to be printed As a general rule place originals on the exposure glass as shown below The first 5mm 0 2 of the leading edge cannot be printed When using the op tional document feeder the first 5mm 0...

Page 30: ...er size 1 Paper feed side plate lock lever C C C C Load paper onto the paper feed tray D D D D Make sure that the paper feed side plates touch the paper light ly Shift the lock lever back to its original position Setting Up the Paper Delivery Tray A A A A Raise the paper delivery tray slightly before lowering it down gently TSLH026E TSLH01BE B5 A4 B4 A5 B5 F 1 ZFRY020E TSLY015E ZBHH050E ...

Page 31: ...er the paper alignment wings Note Depending on the type of pa per that you are using you might not be able to load up to full capacity 1 000 sheets when the wings are lifted Lift the paper alignment wings when B5 JISLK or A4K prints are delivered curled up D D D D Turn on the main switch Reference When the prints are not deliv ered in a neat stack see p 109 When the Prints are Thrown Over the Pape...

Page 32: ...ose the paper feed tray C C C C Remove the prints from the paper delivery tray D D D D Move the paper delivery end plate until its handle is flush with the end of the tray E E E E Lower the paper delivery end plate F F F F Move the side plates to each side and then lower them ZFRY030E TSLH020E TSLH01WE ZFRH190E ZFRH200E ZFRH170E ...

Page 33: ...After Printing 15 1 G G G G Close the paper delivery tray H H H H Turn off the main switch ZBHH051E ZFRH100E ...

Page 34: ...er Code mode has been set to On enter your user code with the number keys and then press the OK key Reference See p 56 Entering a User Code to Use the Machine C C C C Make sure that previous print set tings have been cleared Note To clear previous print settings press the Clear Modes Energy Saver key D D D D Lift the exposure glass cover Reference For details on how to place orig inals in the opti...

Page 35: ...s Note If you have made a wrong en try press the Clear Stop key and then enter the number again When Auto Cycle mode is on A Check that Auto Cycle mode is on B Press the Start key Printing starts automatically af ter the trial print When Auto Cycle mode is off A Check that Auto Cycle mode has been disabled ZFRH061E ZLKS032N ZLKS035N ZLKS030N ZLKS035N ...

Page 36: ...is not correct adjust it using the Image Position key See p 21 Adjusting the Print Image Position D Press the Print key I I I I When the print job is finished press the Clear Modes Energy Sav er key Your print settings are cleared and the machine returns to its initial condition ZLKS030N ZLKS031N ZLKS033N ZLKS036N ...

Page 37: ... to shift to Energy Saver mode is 3 minutes You can change the waiting time within a range of 1 to 120 minutes See 6 Energy Saving on p 72 1 System In the following cases the machine will not shift automatically to Energy Sav er mode If there is no ink If originals are or paper is jammed If the machine has not finished making masters or prints If the machine is printing the second page of a Combin...

Page 38: ... Reset is Off In the following cases Auto Reset will not take place If there is no ink If originals are or paper is jammed If the machine has not finished making masters or prints If the machine is printing the second page of a Combine print If there is no paper If there is no master If the master eject box is full If there is an original in the optional document feeder If the cover open indicator...

Page 39: ...A A Press the left Image Position key to move the image forwards the right key to move it backwards Note One push of either Image Posi tion key shifts the image posi tion by 0 5mm 0 02 up to a maximum of 15mm 0 6 in each direction When you shift the image for wards leave a margin of more than 5mm 0 2 on the leading edge If there is no margin pa per might wrap around the drum and cause a misfeed B ...

Page 40: ...own below Shifting the image to the right Shifting the image to the left Note The image position can be shift ed up to 10mm 0 4 in each di rection Each division on the scale represents a shift of 2mm 0 08 Adjust the paper delivery side plates to match the new image position C C C C Press the Proof key to check the image position GRLEFT0E ZFRH031E TSLH02IE TSLH02JE ZLKS031N ...

Page 41: ...y Note If your original has a colored background such as red or blue select a lighter image density to prevent the prints from appear ing dirty B B B B Set your original C C C C Enter the number of prints with the number keys D D D D Press the Start key Printing starts automatically after the trial print Note If you wish to check the image before printing press the Auto Cycle key before pressing t...

Page 42: ...he number of prints with the number keys D D D D Press the Start key Printing starts automatically after the trial print Note If you wish to check the image before printing press the Auto Cycle key before pressing the Start key in order to disable Auto Cycle mode See p 17 When Auto Cycle mode is off GRTINT0E ZLKS08AN ZLKS032N ZLKS030N ...

Page 43: ...suit the type of printing paper A A A A Press the V V V V key to increase the speed or the W W W W key to reduce the speed Note The following speeds are avail able Setting 1 60 sheets minute Setting 2 75 sheets minute Setting 3 90 sheets minute Setting 4 105 sheets minute Setting 5 120 sheets minute The default is Setting 3 ZLKS041N ...

Page 44: ...rints and press the Start key Changing the Number of Prints and Checking the Completed Prints A A A A Press the Clear Stop key B B B B Change the number of prints or check the completed prints Note To change the number of prints press the Clear Stop key and then enter the new number with the number keys C C C C Press the Print key to resume printing ZLKS034N ZLKS030N ZLKS034N ZLKS033N ...

Page 45: ... margins will appear on prints You can choose from 7 preset ra tios 3 enlargement ratios and 4 re duction ratios Metric version Inch version You can specify the reproduction ratio that is selected by default when the power is turned on See 3 Ratio Priority on p 74 3 Initial Setting GRRATI0E GCRATI0E Ratio Original Print paper size 141 A4 A3 A5 A4 B5 JIS B4 JIS 122 A4 B4 JIS A5 B5 JIS 115 B4 JIS A3...

Page 46: ...re of the correct size D D D D Set your original E E E E Enter the number of prints with the number keys F F F F Press the Start key Printing starts automatically after the trial print Note If you wish to check the image before printing press the Auto Cycle key before pressing the Start key in order to disable Auto Cycle mode See p 17 When Auto Cycle mode is off ZLKS051N ZLKS032N ZLKS030N ...

Page 47: ...ich is near to your desired ratio then fine adjust it with the or key B B B B Set your original C C C C Enter the number of prints with the number keys D D D D Press the Start key Printing starts automatically after the trial print Note If you wish to check the image before printing press the Auto Cycle key before pressing the Start key in order to disable Auto Cycle mode See p 17 When Auto Cycle ...

Page 48: ...rea on p 74 3 Ini tial Setting The default is 5mm 0 2 A A A A Press the Edge Erase key B B B B Use the keys to select the original size and orientation and then press the OK key C C C C Set your original D D D D Enter the number of prints with the number keys E E E E Press the Start key Printing starts automatically after the trial print Note If you wish to check the image before printing press th...

Page 49: ...sition Note Choose the correct lever posi tion according to the paper weights as shown in the follow ing table 1 When the paper is smaller than B5 JIS 51 2 81 2 and heavier than 81 4g m2 21 6 lb use the Thin paper position B B B B Make sure that paper feed side plates touch the paper lightly C C C C After you have finished printing return the feed roller pressure le ver to the Standard paper posi ...

Page 50: ...Letter mode Moire patterns may occur when you are printing from screened originals When using Photo mode to print originals with both text and photo graphs the text might appear faint To avoid this use Letter Photo mode instead A A A A Press the Type of Original key B B B B Use the keys to select the type of original and then press the OK key C C C C Set your original D D D D Enter the number of p...

Page 51: ...itial Setting A A A A Press the Economy Mode key B B B B Set your original C C C C Enter the number of prints with the number keys D D D D Press the Start key Printing starts automatically after the trial print Note If you wish to check the image before printing press the Auto Cycle key before pressing the Start key in order to disable Auto Cycle mode See p 17 When Auto Cycle mode is off ZLKS083N ...

Page 52: ... whether Auto Cy cle mode is enabled or not when the power is turned on See 1 Auto Cycle ON OFF on p 75 4 Mode Setting A A A A If Auto Cycle is Off press the Au to Cycle key to enable it B B B B Set the original and enter the number of prints C C C C Press the Start key Printing starts immediately after the master is made ZLKS035N ZLKS030N ...

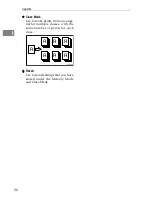
Page 53: ...Set Operat n Mode All Use to make prints from the same original for all the registered classes in all the school years Class Select to make prints from the same original for only the class es selected Households Use to make prints from the same original for all the registered stu dent households in the school Memory Mode You can choose from the following two types of Memory mode Normal Memory Mode...

Page 54: ... Mode Use to make prints from one origi nal for multiple classes with the same number of prints for each class Recall Use to recall settings that you have stored under the Memory Mode and Class Mode GRCLAS0E R R R R R R R ...

Page 55: ... Use the keys to select 3 Initial Setting and then press the OK key C C C C Use the keys to select 9 ProgChnge Clss Yr and then press the OK key D D D D Use the keys to select the desired school year and then press the OK key E E E E With the number keys enter the number of prints for a class and then press the q q q q key Note Repeat Steps D and E to register all your classes F F F F Press the OK...

Page 56: ...nting starts automatically after the trial print Note If you wish to check the image before printing press the Auto Cycle key before pressing the Start key in order to disable Auto Cycle mode See p 17 When Auto Cycle mode is off Printing for Selected Classes A A A A Press the Memory Class key B B B B Use the keys to select Se lect Class Year and then press the OK key C C C C Use the keys to select...

Page 57: ...elected the wrong class indicate it again using the keys and then press the q q q q key to cancel its selec tion E E E E Press the OK key F F F F Set your original G G G G Press the Start key Printing starts automatically after the trial print Note If you wish to check the image before printing press the Auto Cycle key before pressing the Start key in order to disable Auto Cycle mode See p 17 When...

Page 58: ...Note Repeat this step until you have entered for all the originals D D D D Press the OK key E E E E If you are using the optional tape dispenser turn on the tape dis penser switch Note The optional tape dispenser au tomatically feeds out strips of paper to separate the prints made from each original F F F F Set your original Note Set the originals in the same or der as you have registered them in ...

Page 59: ... Stack using the user tools See 12 Memory Mode on p 75 4 Mode Setting Note You can make prints for up to 30 classes at one time A A A A Press the Memory Class key B B B B Use the keys to select Memory and then press the OK key C C C C With the number keys enter the desired number of prints for each class and then press the q q q q key Note Repeat this step until you have entered for all your class...

Page 60: ...e Auto Cycle key before pressing the Start key in order to disable Auto Cycle mode See p 17 When Auto Cycle mode is off Reference For details on how to use the optional document feeder when printing in Stack Memory mode see p 65 Using the Doc ument Feeder in Stack Memory Mode ...

Page 61: ...ith the number keys enter the desired number of prints and the press the q q q q key D D D D With the number keys enter the desired number of classes and then press the q q q q key Note Repeat Steps C to D as desired E E E E Press the OK key F F F F If you are using the optional tape dispenser turn on the tape dis penser switch Note The optional tape dispenser au tomatically feeds out strips of pa...

Page 62: ...y Printing starts automatically after the trial print Note If you wish to check the image before printing press the Auto Cycle key before pressing the Start key in order to disable Auto Cycle mode See p 17 When Auto Cycle mode is off ZLKS030N ...

Page 63: ... press the OK key C C C C Use the keys to select 8 Prog Change Mem and then press the OK key D D D D Use the keys to select a number and then press the OK key Note If the number is already in use a message will be displayed asking if you wish to overwrite the settings stored To over write press the OK key Oth erwise press the Cancel key to return to the previous display and then select another num...

Page 64: ...the keys to select a number and then press the OK key Note If the number is already in use a message will be displayed asking if you wish to overwrite the settings stored To over write press the OK key Oth erwise press the Cancel key to return to the previous display and then select another number E E E E With the number keys enter the number of prints for each class and then press the q q q q key...

Page 65: ...played asking if you wish to overwrite the settings stored To over write press the OK key Oth erwise press the Cancel key to return to the previous display and then select another number E E E E With the number keys enter the number of prints and then press the q q q q key F F F F With the number keys enter the number of classes and then press the q q q q key Note Repeat Steps D to F to register a...

Page 66: ...ect and then press the OK key Note To change the stored settings use the keys to select the item that you wish to change and then overwrite us ing the number keys E E E E Set your original F F F F Press the Start key Printing starts automatically after the trial print Note If you wish to check the image before printing press the Auto Cycle key before pressing the Start key in order to disable Auto...

Page 67: ... not be printed When the image is too close to the leading edge make duplicates of the origi nals with the image shifted away from the leading edge and then print from the duplicates You can select different image set tings for the first and second origi nals Make sure that the paper feed side plates touch the paper lightly If they do not then the two images will not be properly aligned on the pri...

Page 68: ...with its lead ing edge towards you as shown above D D D D Press the Start key E E E E After the first original has been scanned place the second origi nal in the same way F F F F Press the Start key Printing starts automatically after the trial print Note If you wish to check the image before printing press the Auto Cycle key before pressing the Start key in order to disable Auto Cycle mode See p ...

Page 69: ... on p 75 4 Mode Setting A A A A Press the Combine Repeat key B B B B Use the keys to select 2 Repeat and then press the OK key C C C C Set your original D D D D Enter the number of prints with the number keys E E E E Press the Start key Printing starts automatically after the trial print Note If you wish to check the image before printing press the Auto Cycle key before pressing the Start key in o...

Page 70: ... also choose whether or not to change the number of rotations temporarily when the Skip Feed key is pressed See 8 No of Skip Feed on p 75 4 Mode Setting The number of rotations can be set from 2 to 9 The default is 2 A A A A Press the Skip Feed key B B B B Set your original C C C C Enter the number of prints with the number keys D D D D Press the Start key Printing starts automatically after the t...

Page 71: ...Original Printing Speed Auto Cycle Combine Repeat You cannot store settings for Secu rity mode nor for the Program function itself Storing Print Settings A A A A First specify the print settings that you wish to store B B B B Press the Program key C C C C Use the keys to select Store and then press the OK key D D D D Use the keys to select a number Note If the number is already in use a message wi...

Page 72: ...are displayed D D D D Confirm that the settings are cor rect and then set your original E E E E Enter the number of prints with the number keys F F F F Press the Start key Printing starts automatically after the trial print Note If you wish to check the image before printing press the Auto Cycle key before pressing the Start key in order to disable Auto Cycle mode See p 17 When Auto Cycle mode is ...

Page 73: ...After you have made your prints press the Security key B B B B Press the OK key Note Once Security mode is set you will not be able to press the Proof key or the Print key nor will you be able to pull out the drum unit Security mode cannot be cleared by turning off the main switch Security mode will be cancelled when you set a new original and press the Start key ZLKS086N ...

Page 74: ...55 164 173 182 191 200 219 228 237 246 255 264 273 282 291 300 319 328 337 346 355 364 373 382 391 400 419 428 437 446 455 464 473 482 491 500 519 528 537 546 555 564 573 582 591 600 619 628 637 646 655 664 673 682 691 700 719 728 737 746 755 764 773 782 791 800 819 828 837 846 855 864 873 882 891 900 919 928 937 946 955 964 973 982 991 A A A A Enter your 3 digit user code with the number keys Not...

Page 75: ...tart key B B B B Set your original C C C C Press the Start key Printing starts automatically after the trial print Note If you wish to check the image before printing press the Auto Cycle key before pressing the Start key in order to disable Auto Cycle mode See p 17 When Auto Cycle mode is off Auto Quality Start You can program the machine to au tomatically carry out idle spins This is called Auto...

Page 76: ...If a print job is still in progress it has to be cancelled before the ma chine can accept the data coming from the PC A Press the OK key The messages Print is not fin ished Online and Press OK to start the next master are displayed alternately When printing on A5K 51 2 81 2 K paper A Press the User Tools key B Use the keys to select 6 Online Paramet s and then press the OK key C Use the keys to se...

Page 77: ...of a size 200 280mm 7 9 11 the nearest size would be A4 81 2 11 E Press the OK key Auto On Line You can select whether or not the ma chine automatically switches to On Line mode when it receives data from a PC Preparation The default is On If the Auto On Line indicator is lit then Auto On Line is active Press the Auto On Line key to switch it on or off When the Auto On Line mode is on the machine ...

Page 78: ...Operation 60 1 ...

Page 79: ...als written in pencil Thin and flimsy originals Originals with index tabs Transparent originals such as OHP transparencies or translucent pa per This machine can detect the following original sizes when the original is placed in the optional document feed er Note Set originals only after the ink or correction fluid on them is com pletely dry Not taking this precau tion could stain the exposure gla...

Page 80: ...above the limit mark To prevent a double feed or an original misfeed fan the origi nals before placing them in the document feeder Both guides should touch the originals lightly C C C C Specify the print settings and then enter the number of prints with the number keys D D D D Press the Start key Printing starts automatically after the trial print Note If you wish to check the image before printin...

Page 81: ... the originals face up in the document feeder Note The first top original will be printed on the left side of the print D D D D Enter the number of prints with the number keys E E E E Press the Start key Printing starts automatically after the trial print Note If you wish to check the image before printing press the Auto Cycle key before pressing the Start key in order to disable Auto Cycle mode S...

Page 82: ...h original and then press the q q q q key Note Repeat this step until you have entered for all the originals D D D D Press the OK key E E E E If you are using the optional tape dispenser turn on the tape dis penser switch Note The optional tape dispenser au tomatically feeds out strips of paper to separate the prints made from each original F F F F Place the originals face up in the document feede...

Page 83: ...elect Mem ory and then press the OK key C C C C With the number keys enter the desired number of prints for each class and then press the q q q q key Note Repeat this step until you have entered for all your classes D D D D Press the OK key E E E E If you are using the optional tape dispenser turn on the tape dis penser switch F F F F Place the original face up in the document feeder G G G G Press...

Page 84: ...ints a separate drum unit is needed for each color Changing the Color Drum Unit A A A A Open the front door B B B B Lift to unlock the drum unit lock lever C C C C Pull out the drum unit by its han dle Note If you cannot pull out the drum unit push the drum unit handle once before pulling D D D D Hold the upper drum stay and re move the drum unit from the ma chine Note Be careful not to let the dr...

Page 85: ...l display lights Making Color Prints A A A A Make sure that the color drum in dicator on the panel display is lit B B B B Set your original C C C C Specify the print settings and en ter the number of prints with the number keys D D D D Press the Start key Printing starts automatically after the trial print Note If you wish to check the image before printing press the Auto Cycle key before pressing...

Page 86: ...e the roller with a cloth Note You cannot print in two colors at a time A A A A Prepare two originals Place the first on the exposure glass or in the optional document feeder B B B B Enter the number of prints with the number keys C C C C Press the Start key Printing starts automatically after the trial print Note If you wish to check the image before printing press the Auto Cycle key before press...

Page 87: ... drum unit Reference See p 66 Changing the Color Drum Unit F F F F Place the second original and then press the Start key Printing starts automatically after the trial print Note If you wish to check the image before printing press the Auto Cycle key before pressing the Start key in order to disable Auto Cycle mode See p 17 When Auto Cycle mode is off ZFRY040E ZFRH340E ZLKS030N ...

Page 88: ...Optional Functions 70 2 ...

Page 89: ...ols Menu C C C C Enter a number or select the de sired mode using the number keys D D D D Press the OK key Quitting User Tools A A A A To quit the User Tools menu press the User Tools key Note Changes made to the following user tools become effective when you press the Clear Modes Energy Saver key Prog Change Clss Prog Change Mem ProgChnge Clss Yr No of Skip Feed Changes made to the following user...

Page 90: ...will not be counted as part of the total 3 Reset R Counter You can select whether or not to reset the total number of masters and prints Note Default Do not clear 4 mm inch You can select the units of measurement used on the panel dis play Note Default Metric version mm Inch version inch 5 Language on LCD You can select the language for the panel display Note Default English 6 Energy Saving You ca...

Page 91: ...able settings ALL OFF The beeper does not sound at all STD The beeper sounds only when warning messages are shown on the panel display and not when you press a key ALL ON The beeper sounds either when you press a key or when warning messages are shown on the panel dis play 4 LCD Contrast You can adjust the brightness of the panel display 5 Class Display Under the Memory Class function you can sele...

Page 92: ...de as either ON or OFF when the power is turned on or after mode settings have been cleared Note Default OFF 5 Margin Eras Area You can specify the edge erase margin Note Default 5 mm 0 2 Reference To specify the edge erase margin see p 80 3 5 Edge Erase Ar ea 6 Margin Non S Size You can use the number keys to specify the edge erase margin for an original of custom size Note Default 70 165mm 2 8 6...

Page 93: ...ty In this case you can select Back Correction to improve the clarity of your prints Note Default W O back correction 5 Longer Paper You can select Use to allow the use of paper longer than 432mm 17 0 Note Default Do not use 6 Combine Repeat You can choose to have either Combine or Repeat selected by de fault when the power is turned on Note Default Use Combine 7 Cancel Comb You can specify whethe...

Page 94: ...rt You can specify the number of times that the drum idles when in Auto Quality Start mode To increase the print image density increase the number of drum rotations Note Default See p 80 4 14 No of Q Start Reference To change the number of idle spins see p 80 4 14 No of Q Start 12 Memory Mode You can choose to have either Memory mode or Stack Memory mode as the default Note Default Normal Memory m...

Page 95: ...ode 2 Reset Counters You can clear each or all user code counters Note Default Single Reference To clear the number of masters and copies see p 81 5 2 Re set Counters 3 Set User Code You can select whether or not to use User Code mode Note Default Do not use 4 Key Counter Adj Normally the optional key counter counts the number of prints regardless of the number of masters used You can however add ...

Page 96: ...ress the On Line key Note Default Auto 3 List Test Print You can print a list of the current settings in this machine Note Default System Print 4 Print PS Errors You can select whether or not to print an error report when a PostScript error occurs Note Default On 5 IP Address You can set the IP address Reference For further details see Printer Reference 1 6 Ethernet Speed You can set the Ethernet ...

Page 97: ...o short time might run out while data is still being received As a result data from another in terface may cut in or the emulation detector may be activat ed to switch to a different emulation Note Default 30Sec 9 I O Buffer You can specify the capacity of the reception buffer Note Default 32KB 10 Menu Reset You can reset the Online Print settings back to their defaults However settings for IP Add...

Page 98: ... D D D Enter the margin to be erased us ing the number keys E E E E Press the OK key 4 14 No of Q Start Note The defaults are as follows 1 10 18 C 50 64 4 F 2 18 28 C 64 4 82 4 F 3 28 C 82 4 F A A A A Press the User Tools key B B B B Use the keys to select 4 Mode Setting and then press the OK key ZLKS084N Time interval 0 2 hours 2 4 hours 4 24 hours More than 24 hours Temperature Low Tmp 1 0 2 3 3...

Page 99: ...t the length of time for which the ma chine has not been used and then press the OK key F F F F Use the keys to select the number of times that the drum unit idles G G G G Press the OK key 5 2 Reset Counters A A A A Press the User Tools key B B B B Use the keys to select 5 Admin Mode and then press the OK key C C C C Use the keys to select 2 Reset Counters and then press the OK key To clear only o...

Page 100: ...he user code that you wish to clear C Press the OK key Note If you have selected the wrong user code press the Cancel key to return to the previous display D Press the OK key To clear all counters A Use the keys to select All B Press the OK key ...

Page 101: ... A A A A Press the Clear Stop key Note This step is necessary only if you wish to pause a print run to replenish paper B B B B Load paper on the paper feed tray Note Correct paper curl before set ting the paper C C C C Press the Print key to resume printing Changing the Paper Size A A A A Press the paper feed tray down key ZLKS034N ZFRY020E ZLKS033N ZFRH031E ...

Page 102: ...D D Load paper onto the paper feed tray Note Correct any paper curl before setting the paper E E E E Make sure that the paper feed side plates touch the paper light ly Shift the lock lever back to its original position F F F F Adjust the side plates of the paper delivery tray to match the new pa per size G G G G Adjust the end plate to match the new paper size ZFRY030E TSLH01BE B5 A4 B4 A5 B5 F 1 ...

Page 103: ... comes into contact with your eyes rinse immediately in running water For other symptoms consult a doctor Keep the ink or ink container out of reach of children If ink is ingested induce vomiting by drinking a strong saline solution Con sult a doctor immediately Our products are engineered to meet high standards of quality and function ality and we recommend that you use only the expendable suppli...

Page 104: ... C C C Remove the used ink cartridge D D D D Remove the cap of the new ink cartridge Note Hold the cartridge upright to prevent ink from spilling out E E E E Insert the new cartridge into the ink holder ZFRH400E ZFRH500E ZFRH410E ...

Page 105: ... until it clicks Note Always supply ink of the same color Make sure to firmly insert the part indicated by the arrow mark into the guide G G G G Close the front door The machine will start idling to supply ink to the drum Note It will stop when a sufficient amount of ink reaches the drum ZFRH490E ...

Page 106: ...ss the release button to open the master feeding cover C C C C Unwrap the tape from the new master roll D D D D Remove the used master roll and pull out both spools Then insert both spools into a new master roll Note It is necessary to replace the master roll even if some master remains on the old roll E E E E Set the new master roll in the master tray ZFRH220E ZJVH070E ZJVH120E TSLT010E ZFRH260E ...

Page 107: ... F F Insert the master until its leading edge hides the indicators com pletely Note Rotate the spools backward to take up any slack in the master G G G G Close the master feeding cover firmly H H H H Close the master tray ZJVH080E ZFRH250E ZFRH230E ...

Page 108: ...penser B B B B Set the roll in the dispenser Note Make sure that the tape is in the correct direction If not the tape dispenser will not work proper ly C C C C Insert the tape into the slot as far as it can go Close the cover of the tape dispenser D D D D Turn on the power of the tape dis penser E E E E Press the manual cut button to trim off the leading edge of the tape TSLP010E TSLP011E TSLP012E...

Page 109: ...peatedly contact your service representative When the open cover unit indicator M M M M lights and a message is displayed Indicator Page x and P p 94 When x lights and P is indicated x and A p 96 When x lights and A is indicated x and B p 97 When x lights and B is indicated x and C p 98 When x lights and C is indicated x and D p 101 When x lights and D is indicated x A and B p 102 When x lights an...

Page 110: ...tor C Lights and a Message is Displayed C Master tray is not set Set master tray C Cover Open Close Lower master Tray Indicator Meaning Page B Load more paper p 83 Replenishing Paper j Load new ink cartridge p 85 When the Add Ink Indicator j Lights C Load new master roll p 88 When the Master End Indicator C Lights k Remove the used masters p 107 When the Master Eject Indicator k Lights Indicator M...

Page 111: ...ctly Make sure that the paper feed side plates touch the paper lightly Printing in a second color is unsatisfactory The first color is still wet Wait until the first color be comes dry An uneven solid image ap pears Large solid image wrinkles the master Increase the printing speed or use Photo mode Problem Cause Action Prints are blank or parts of the image are not printed Original size and orient...

Page 112: ...eared When x x x x lights and P is indicated An original misfeed has occurred in the optional document feeder Note This indicator will only be displayed when the machine is equipped with the optional document feeder A A A A Open the document feeder cover B B B B Pull out the original gently C C C C If you are unable to remove the misfed original in Step B B B B lift the document feeder ZDCY090E ZD...

Page 113: ...Originals heavier than 128g m2 34 lb Originals lighter than 52g m2 14 lb Originals smaller than 148mm 210mm 5 9 8 3 Originals larger than 297mm 864mm 11 6 34 0 Stapled or clipped originals Perforated or torn originals Curled folded or creased originals Originals with any kind of coating such as thermal fax paper art paper alu minum foil carbon paper or conductive paper Bound originals such as book...

Page 114: ...e originals lightly Do not stack originals above the limit mark When x x x x lights and A is indicated A paper misfeed has occurred in the paper feed section R CAUTION A A A A Slowly but firmly pull out the paper B B B B If the indicators remain lit open the front door and close it firmly Reference See p 99 To prevent paper misfeeds Be careful not to cut yourself on any sharp edges when you reach ...

Page 115: ...d the drum A A A A Unlock the lever and pull out the drum unit B B B B Remove the misfed paper C C C C Insert the drum unit until it locks in position and then lower the drum unit lock lever D D D D Close the front door Reference See p 99 To prevent paper misfeeds ZFRH360E ZFRH440E ZFRH350E ...

Page 116: ...livery end plate and side plates are at their cor rect positions If a jam occurs because the current printing speed is too fast reduce the speed B B B B If the misfeed is still not cleared take out the drum unit and remove the pa per from the inside Be careful not to cut yourself on any sharp edges when you reach inside the machine to remove misfed sheets of paper or masters ZFRH110E ZJVH040E ...

Page 117: ... misfeeds If paper is curled or the margin on the leading edge of the original is too narrow the following action is necessary Before using the paper correct the curl as shown below If you are unable to correct the paper curl place the paper in the paper feed tray with it curling either upward or downward as shown in the illustration below ZFRH350E GRCURL0E TPEY990E ...

Page 118: ...the original is less than 5mm 0 2 or when there is a solid image on the leading edge feed the original from the edge with the widest margin Alternately create a leading edge margin on a dupli cate of the original and then print from the duplicate GRLEAD0E ...

Page 119: ...ay B B B B Open the master feeding cover and then remove the misfed master inside C C C C Close the feeding cover and the master tray D D D D Open the lower master tray and remove the misfed master E E E E Close the lower master tray Note If x remains lit and B is indicated see p 104 When the master is wrapped around the drum ZFRH220E ZJVH070E ZJVH051E ...

Page 120: ... between the drum and the paper feed section A A A A Unlock the lever and then pull out the drum unit B B B B Remove the misfed paper from inside C C C C Insert the drum until it locks into position and then lower the lock lever D D D D Close the front door ZFRH360E ZFRH421E ZFRH350E ...

Page 121: ... occurred either in the master eject section or the master is wrapped around the drum unit A A A A Open the master eject box B B B B Remove the misfed master Note Be careful not to stain your hands with ink when you touch used masters C C C C Close the master eject box ZJVH091E ZFRH120E ZFRH140E ...

Page 122: ... B B Pull out the misfed master from the clamp Note If you still cannot remove the master release the lock lever at the back of the drum unit to open the clamp while pulling the master out C C C C Insert the drum until it locks into position and then lower the lock lever D D D D Close the front door ZFRH360E ZFRH462E ZFRH350E ...

Page 123: ... M M M M Lights and a Message is Displayed A message is displayed explaining the place where the doors covers are not properly closed Front Door is Open A A A A Close the front door completely Cover of Optional Document Feeder is Open A A A A Close the document feeder until it clicks into place ZFRH290E ZDCY100E ...

Page 124: ...ing the place in the master feed section that is not properly set Master Feeding Cover is Open A A A A Close the feeding cover firmly with both hands Master Tray is Not Set Properly A A A A Push in the master tray complete ly Lower Master Tray is Open A A A A Close the lower master tray com pletely ZFRH250E ZFRH230E ZJVH050E ...

Page 125: ...dicator k lights when it is time to empty master eject box A A A A Pull out the master eject box and remove the used masters Note Spread out an old newspaper and then pour the used masters onto the newspaper Throw away the used masters B B B B Return the master eject box to its original position ZJVH091E ZFRH140E ...

Page 126: ...Troubleshooting 108 5 When Other Indicators Light u Set Key Counter The key counter option is not set Slot in the key counter ZFRH150E ...

Page 127: ...er Delivery Tray 109 5 When the Prints are Thrown Over the Paper Delivery Tray A A A A Reduce the printing speed by pressing the W W W W Speed key Note If a jam occurs with the current printing speed reduce the paper delivery speed ZLKS042N ...

Page 128: ...lect the proper reduction ra tio Otherwise you might get dirty background prints When you use postcards the background might be dirty because postcards do not absorb ink well You might get prints with dirty background when printing at high speed un der high temperature A A A A Turn off the main switch GRDIRT0E ZFRH100E ...

Page 129: ...or details about how to remove the drum unit see p 66 Changing the Color Drum Unit C C C C Clean the pressure roller with a clean cloth D D D D With a clean cloth remove any ink that has accumulated on the trailing edge of the drum unit ZFRH370E ZFRH430E ZFRH470E ...

Page 130: ...Troubleshooting 112 5 E E E E Insert the drum unit until it locks in position and then lower the drum unit lock lever F F F F Close the front door G G G G Turn on the main switch ZFRH350E ZFRH090E ...

Page 131: ...sure glass cover and clean it if dirty See p 122 Exposure Glass Cover Check the exposure glass and clean it if dirty See p 122 Exposure Glass When black lines or stains still appear on prints even if you clean the above contact your service representative Blank Prints or Incomplete Prints Make sure that the paper feed side plates touch the paper lightly Shift the lock lever backward When you use t...

Page 132: ...ut the drum unit Reference For details about how to remove the drum unit see p 66 Changing the Color Drum Unit B B B B Remove any paper wrapped around the drum C C C C Remove the master from the drum Note If you still cannot remove the master release the lock lever at the back of the drum unit to open the clamp while pulling the master out ZFRH370E ZFRH440E ZFRH462E ...

Page 133: ...Poor Printing 115 5 D D D D Insert the drum unit until it locks in position and then lower the lock lever E E E E Close the front door ZFRH350E ZFRH290E ...

Page 134: ...Troubleshooting 116 5 ...

Page 135: ...ers caught in the machine or the machine might be damaged because for exam ple dust or the like might get inside Since some parts of the machine are sharp and might cause injury touch only the parts specified in this manual If you clean rubber parts with benzine wipe them with a dry cloth after wards Always turn the machine off when you have finished printing for the day If the machine must be tra...

Page 136: ... the prints In this case increase the printing speed or make a new master with a lighter image density If you are unable to pull out the drum close the front door again to rotate the drum Pull out the drum after it has stopped at the position The leading edge of the prints might become stained if the edge touches the image of prints on the paper delivery tray The ink of the print on the paper deli...

Page 137: ...verse side of a printed sheet or printing over a printed sheet be sure that the ink on the first print is completely dry See p 122 Paper Feed Roller paper feed tray Print Paper When paper is curled correct the curl before printing or else the paper might wrap around the drum or stains might appear Postcards and the like do not absorb ink well Offset images might appear on the rear side of subseque...

Page 138: ...ed to direct sunlight or strong light more than 1500 lux Locations directly exposed to cool air from an air conditioner or heated air from a heater Sudden temperature changes might cause condensation with in the machine Places where the machine might be subjected to frequent strong vibration Dusty areas Areas with corrosive gases Keep the machine away from humidity and dust Otherwise a fire or an ...

Page 139: ...de front cover of this manual Connect the power cord directly into a wall outlet and do not use an extension cord Do not damage break or make any modifications to the power cord Do not place heavy objects on it Do not pull it hard nor bend it more than necessary These actions could cause an electric shock or fire Unplug the power cord from the wall outlet before you move the machine While moving t...

Page 140: ...posure glass marks on the glass will be printed Exposure Glass Cover A A A A Lift the exposure glass cover B B B B Clean the exposure glass cover with a damp cloth and wipe it with a dry cloth Note If you do not clean the exposure glass cover marks on the cover will be printed Paper Feed Roller paper feed tray A A A A Wipe off the paper dust on the pa per feed roller with a damp cloth then wipe it...

Page 141: ... 6 Optional Document Feeder Cleaning the Sheet A A A A Lift the document feeder B B B B Clean the sheet with a damp cloth and wipe it with a dry cloth Note If you do not clean the sheet marks on the sheet will be print ed AM1D600 ...

Page 142: ...cannot be used together Function chosen later Image Density Type of Original Tint mode Economy mode Auto Cycle Preset Reduce Enlarge Zoom Combine Repeat Edge Erase Memory Class Skip Feed On Line Function selected first Image Density Type of Original Tint mode Economy mode Auto Cycle Preset Reduce En large Zoom Combine Repeat Edge Erase Memory Class Skip Feed On Line ...

Page 143: ...mm 432mm 12 0 17 0 Pixel Density 400dpi 400dpi Image Mode Photo mode Letter mode Letter Photo mode Tint mode Reduction Ratios Inch version 93 77 74 65 Metric version 93 87 82 71 Enlargement Ratios Inch version 155 129 121 Metric version 141 122 115 Printing Area A3 11 17 drum More than 290mm 410mm 11 4 16 2 A4 81 2 17 drum More than 290mm 200mm 11 4 7 8 ...

Page 144: ... unit replacement system red blue green brown yellow purple na vy maroon orange teal and grey Image Position Adjustment Forwards or backwards 15mm 0 6 Right or left 10mm 0 4 on either side Paper Feed Tray Capacity 1 000 sheets 80g m2 20 lb Paper Delivery Tray Capacity 1 000 sheets 80g m2 20 lb Master Eject Box Capacity 65 masters Dimensions W D H Width Depth Height Stored 790mm 31 1 700mm 27 6 640...

Page 145: ...ipment A3 11 17 Color Drum A4 81 2 17 Black Drum Key Counter Tape Dispenser Document Feeder Exposure Glass Cover PC Controller Mainframe only Complete System 3 During printing Speed 1 75dB A 75dB A During printing Speed 3 78dB A 78dB A During printing Speed 5 80dB A 80dB A Stand by 43dB A 43dB A Mainframe only Complete System 3 During printing Speed 1 60dB A 60dB A During printing Speed 3 63dB A 6...

Page 146: ...7 Document Feeder Option Original Type Sheet Original Weight 52 3g m2 to 127 9g m2 13 9 lb to 34 lb Original Size Max 297mm 864mm 11 7 34 0 Min 149mm 210mm 5 9 8 3 Original Capacity 50 sheets 80g m2 20 lb 7 5mm 0 3 height ...

Page 147: ...0ml pack 5 packs case Environmental conditions 5 to 40 C 10 to 95 RH Ink Red 600ml pack 5 packs case Ink Blue 600ml pack 5 packs case Ink Green 600ml pack 5 packs case Ink Brown 600ml pack 5 packs case Ink Yellow 600ml pack 5 packs case Ink Purple 600ml pack 5 packs case Ink Navy 600ml pack 5 packs case Ink Maroon 600ml pack 5 packs case Ink Orange 600ml pack 5 packs case Ink Teal 600ml pack 5 pac...

Page 148: ...misfeed 94 specifications 128 drum unit 2 Changing the Drum Unit 66 drum unit lock lever 2 E Eco Mode ON OFF 74 Economy mode 33 Economy Mode key 4 Edge Erase 30 Edge Erase key 4 30 Energy Saver mode 19 Energy Saving 72 Enlarging 27 Enter key 5 Environmental Conditions 120 Ethernet Speed 78 exposure glass 2 cleaning 122 exposure glass cover 1 cleaning 122 F feed roller pressure lever 1 adjusting th...

Page 149: ...de 35 40 76 Stack Memory Mode 65 Menu Reset 79 Min quantity 73 Misfeed 94 misfeed location indicators 94 misfeed indicators 91 mm inch 72 Mode Setting 75 Monitor indicators 6 MSTR Makg Density 74 multi print run 26 N Network 78 No of Q Start 76 80 No of Skip Feed 75 Normal Memory Mode 40 number keys 5 O OK key 5 On Line Printing 58 Open Cover Unit indicator M 105 Open Cover Unit indicator M Docume...

Page 150: ...de 57 R Ratio Priority 74 R Counter Display 72 Recall 36 45 Reduce Enlarge key 4 Reducing 27 Repeat 51 Reset Counters 77 81 Reset R Counter 72 S Safety Information i Security key 4 Security mode 55 Select Class Year 35 37 Set Operat n Mode 73 Setting Q Mode 76 Set User Code 77 Side tray fine adjusting dial 22 side tray fine adjusting dial 1 Skip Feed key 4 Skip feed Printing 52 Special feature ind...

Reviews: