


GE M
EDICAL
S
YSTEMS
- K
RETZTECHNIK
DRAFT
V
OLUSON
® 730P
RO
/ 730P
RO
V (BT´04)
D
IRECTION
KTI105947, R
EVISION
2
S
ERVICE
M
ANUAL
Chapter 4 - Functional Checks
4-5
4-3-3-2
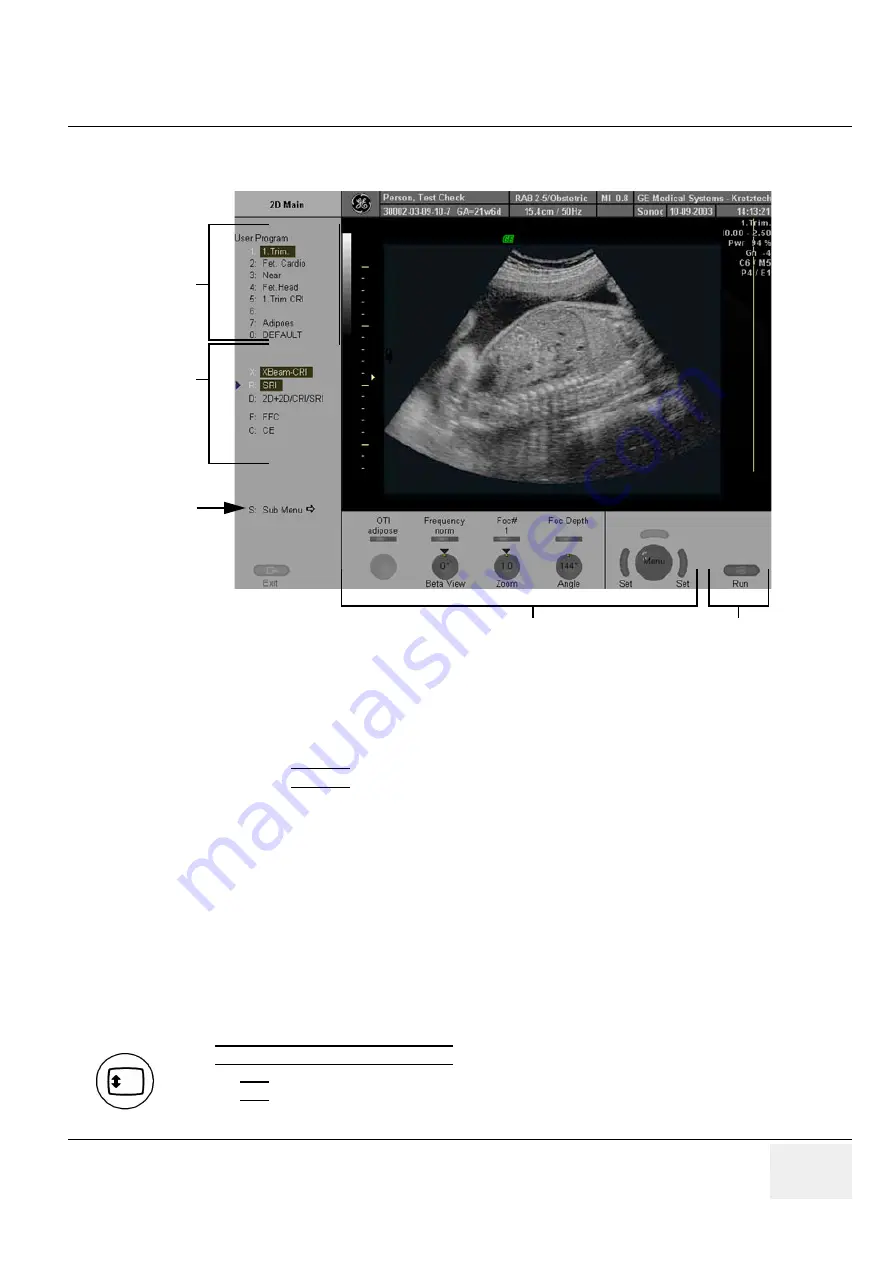
Menu Control
1.) User Program: shows all setting for the active application. The active one is highlighted
2.) Additional functions which are supported by the selected Mode.
3.) Sub Menu: to adjust settings of the selected Scan mode.
4.) Status Area: shows the current functionality of the digipots, toggle switch controls and the trackball
5.) Status of the
FREEZE
key
NOTE:
Different menus are displayed depending on which Menu and which Mode is selected.
DIGIPOTS, TOGGLE SWITCH CONTROLS and TRACKBALL
Activated functions are easily controlled by these controls. By rotating resp. switching, they deliver
digital pulses and can be selected by program call-up.
They are displayed in the status area by their location, their function, and their actual value of setting.
NAVIGATION WHEEL and corresponding KEYBOARD-SHORTCUT FUNCTIONS
The available menus are shown in the menu area on the left side of the screen. The current menu
selection is highlighted. Roll the navigation wheel and the blue arrow moves to another selection.
Press the navigation wheel to select the desired item.The corresponding keyboard shortcuts (1, 2, 3,
etc.) are shown to the right of the actual function.
Figure 4-5 Menu Control Area- 2D Main Menu
If the
TRACKBALL MENU NAVIGATION
key is illuminated, the trackball is consequently assigned to
select the menu items in the menu area on the left side of the screen.
Pressing
SET
(the left or right trackball key) starts selected menu function.
1
2
3
4
5


