GE H
EALTHCARE
D
IRECTION
FQ091013, R
EVISION
1
V
IVID
I
N
AND
V
IVID
Q
N S
ERVICE
M
ANUAL
Chapter 8 - Replacement Procedures
8-29
Section 8-3
Internal Component Replacement Procedures
NOTE:
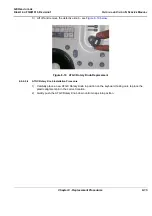
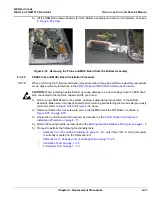
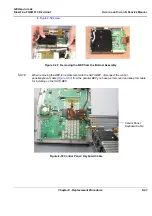
When performing Internal Component Replacement Procedures, generally it is not necessary to
disconnect and completely remove the Control Panel and Keyboard from the system. Simply remove it
from the Bottom Assembly and lay it next to the Vivid i n/Vivid q N portable ultrasound scanner, as
shown in
NOTE:
When tightening screws,
do not overtighten or use excessive force
.
CAUTION:
DO NOT TOUCH ANY BOARDS WITH INTEGRATED CIRCUITS PRIOR TO
TAKING THE NECESSARY ESD PRECAUTIONS:
1.ALWAYS CONNECT YOURSELF, VIA AN ARM-WRIST STRAP, TO THE ADVISED ESD
CONNECTION POINT LOCATED ON THE REAR OF THE SCANNER (TO THE RIGHT OF
THE POWER CONNECTOR).
2.FOLLOW GENERAL GUIDELINES FOR HANDLING OF ELECTROSTATIC SENSITIVE
EQUIPMENT.
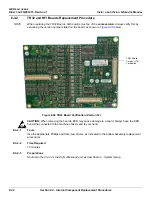
8-3-1
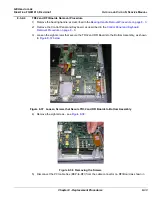
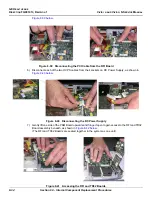
P&M (Probe and MUX) Board Replacement Procedure
8-3-1-1
Tools
Use the appropriate Phillips and flat screw drivers, as indicated in the bottom assembly replacement
procedures.
8-3-1-2
Time Required
15 minutes
8-3-1-3
Preparations
Shut down the Vivid
i
n/ Vivid q N ultrasound unit, as described in
Summary of Contents for FL000090
Page 2: ......
Page 30: ...GE HEALTHCARE DIRECTION FQ091013 REVISION 1 VIVID I N AND VIVID Q N SERVICE MANUAL xxviii ...
Page 739: ......

