SymDec 16 plus 4
User Manual
28
Example
•
The DVR
IP address
is 168.125.115.010
•
The Camera
IP address
is 168.125.115.025 (both in the camera itself and SymDec 16 camera menu)
•
The
Multicast/Streaming
address on both the camera and SymDec 16 should be 230.125.115.025
•
If you have a second IP camera: The Camera
IP Address
could be 168.125.115.026 and the
Multicast/
Streaming
address would still be 230.125.115.025
How to setup a KTD-405 keypad to work with the SymDec 16
To setup and connect a KTD-405 keypad and a Symdec 16 follow the steps below. You will need to refer to the
KTD-405 user manual (part number 1036547D).
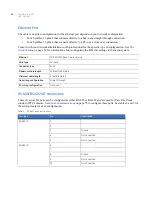
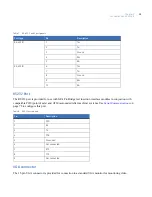
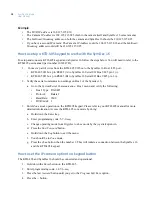
1. Connect a pair of wires from the KTD-405 I/O box to the SymDec 16 Bus 1/485 port.
•
KTD-405 I/O box pin RS485 (A) to SymDec 16 Serial I/O Bus 1/485 pin 1 (+).
•
KTD-405 I/O box pin RS485 (B) to SymDec 16 Serial I/O Bus 1/485 pin 2 (-).
2. Verify the serial communication settings on Bus 1 of the Symdec 16;
a.
Go to the
System/Serial Communication
Bus 1 menu and verify the following:
•
Bus 1 Type: RS-0485
•
Protocol: Kalatel
•
Baud Rate: 9600
•
DVR Addr: 1
3. Enter
Zone mode
operation on the KTD405 keypad. Please refer to your KTD-405 manual for more
detailed information. Access the KTD-405 zone mode by doing:
a.
Hold down the
Enter
key.
b. Enter programming code: 5-7-9-seq.
c.
Change operating mode from
Digiplex
to
Zone
mode by the joystick up/down.
d. Press the
Fast Forward
button.
e.
Hold down the
Seq
button to exit the menu.
f.
You should be in
Zone
mode.
g. Press the
Zone
button, then the number
1.
This will initiate a connection between the SymDec 16
and the KTD-405 keypad.
How to set the IP camera option to a keypad button
The KTD-405 and SymDec 16 should be connected and operational.
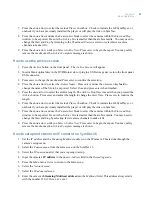
1. Hold down the
Enter
button on the KTD-405.
2. Enter programming code: 1-4-7-6-seq.
3. Press the
fast forward
button until you get to the
Program Soft Keys
option.
4. Press the
+
button.
Summary of Contents for SymDec 16 plus 4
Page 1: ...SymDec 16 plus 4 User Manual ...
Page 10: ...SymDec 16 plus 4 User Manual x ...
Page 18: ...SymDec 16 plus 4 User Manual 8 ...
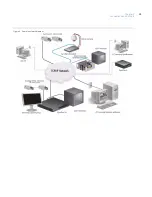
Page 29: ...Chapter 2 Connections and Controls 19 Figure 6 Sample network diagram ...
Page 99: ...Chapter 5 SymNav and SymBrowser 89 Figure 63 The SymNav main operation screen ...
Page 134: ...SymDec 16 plus 4 User Manual 124 ...
Page 144: ...SymDec 16 plus 4 User Manual 134 ...
Page 150: ...SymDec 16 plus 4 User Manual 140 ...

