- 38 -
November 12, 2016
Installation Manual for SX-4000 Standalone
Integrated Media Block™
with Enterprise Storage/Enterprise Storage Plus
8. TIME ZONE SETUP
8. TIME ZONE SETUP
The SX-4000 may or may not arrive with the local time zone set. The following steps show how
to change the time zone on the server.
1. From
[SMS],
click
[Control Panel]
to access the control panel.
2. From the Control Panel, click
[Admin Panel]
to access the Admin Panel.
3. Click
[Focus]
at the far bottom right of the keyboard, then click the cursor in the
[Password]
text box to enter the password.
4. Click
[Diagnostics/Maintenance]
[Configure Time Zone]
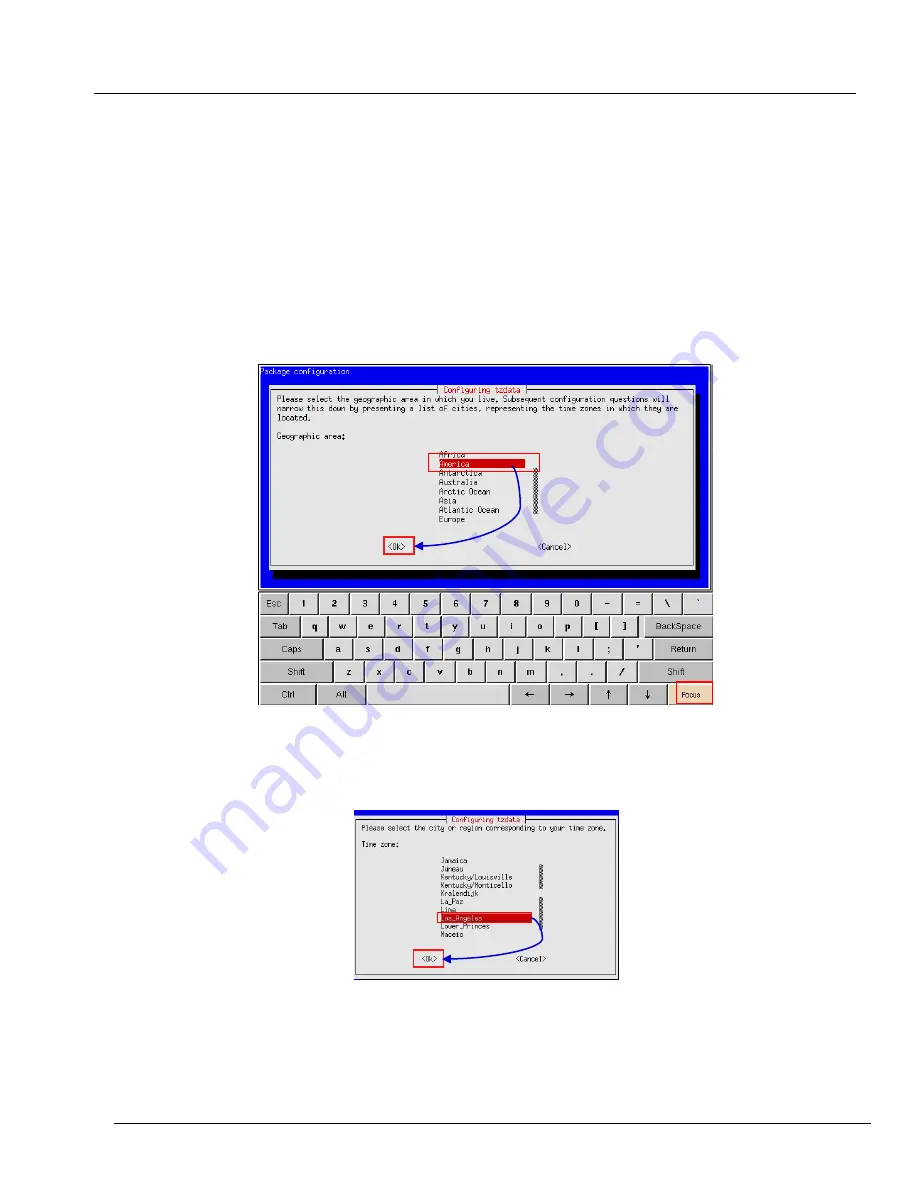
to access the Time zone
Selection Page. A new window will appear as seen in Figure 30.
Figure 30 Time Zone
–
configure geographic area.
5. Click
[Focus]
and tap the section above the keypad to bring the pointer into focus.
6. Use
[↑]
and
[↓]
to highlight the desired Country (as shown in Figure 31).
7. Click
[OK].
Figure 31 Time Zone
–
configure country/region.
8. Repeat Steps 5-7 to select the City/Region.


