CHAPTER 3: Replacing notebook components
62
5
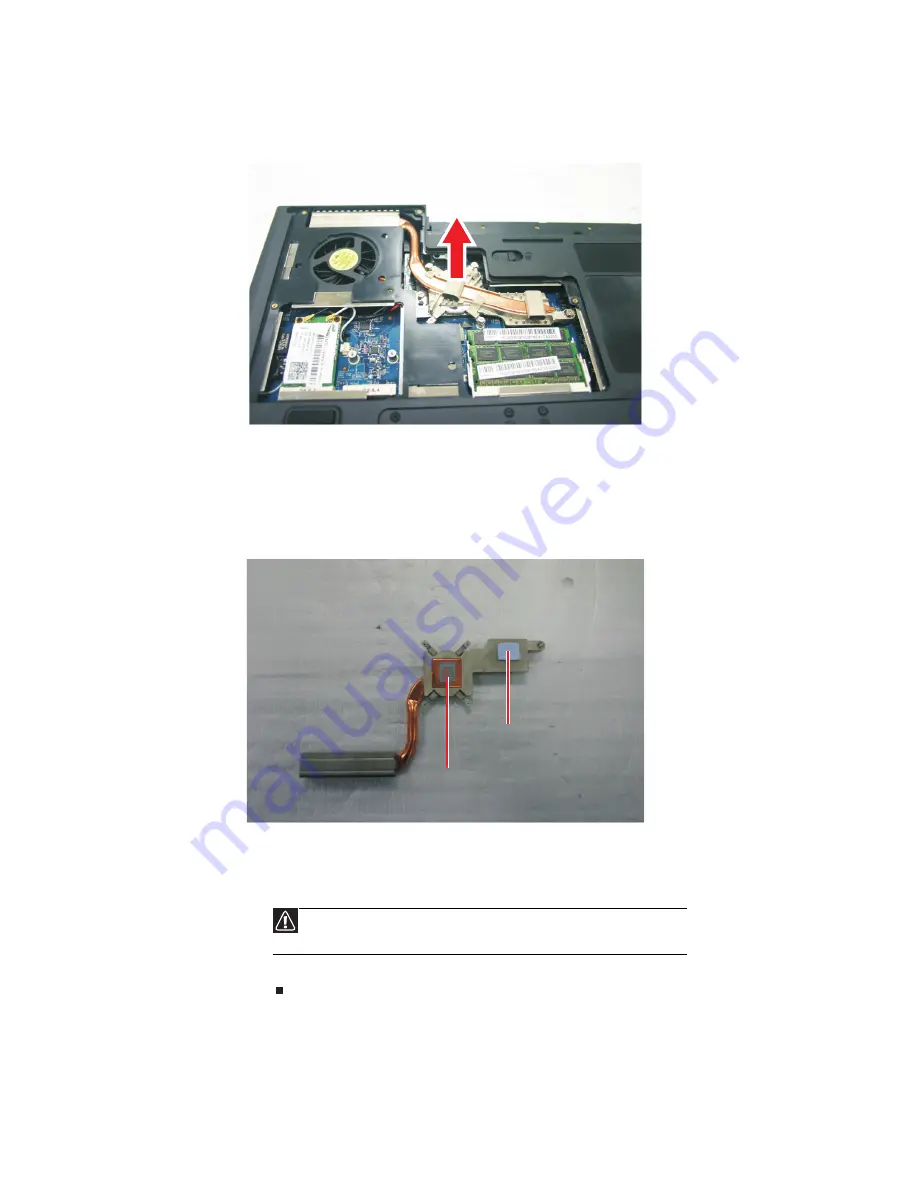
At the same time as you lift, move the main cooling assembly away from the side
of the notebook, then remove the main cooling assembly.
6
Remove any thermal grease residue from the processor using a soft cloth and
isopropyl alcohol.
7
Place new thermal grease on the processor. Use only enough to cover the CPU die.
8
Make sure a thermal pad is placed between the main cooling assembly and other
components as shown.
9
Insert the new main cooling assembly into the notebook.
10
Tighten the screws that secure the main cooling assembly to the system board.
Reverse the order shown in Step 4.
11
Replace the cooling assembly bay cover, then tighten the cover screws.
Caution
When tightening the main cooling assembly’s screws into the numbered
holes, tighten them in numerical order.
Thermal Grease
Thermal Pad
Summary of Contents for P-79
Page 1: ...P 79 SERVICEGUIDE...
Page 5: ...iii www gateway com...
Page 6: ...Contents iv...
Page 11: ...www gateway com 5 System block diagram...
Page 40: ...CHAPTER 1 System specifications 34...
Page 144: ...CHAPTER 3 Replacing notebook components 138...
Page 163: ...CHAPTER5 157 Connector locations System board top connectors System board bottom connectors...
Page 164: ...CHAPTER 5 Connector locations 158 System board top connectors...
Page 165: ...www gateway com 159 System board bottom connectors...
Page 166: ...CHAPTER 5 Connector locations 160...
Page 167: ...CHAPTER6 161 FRU Field Replaceable Unit list Introduction Exploded diagram FRU list...
Page 169: ...www gateway com 163 Exploded diagram Notebook chassis...
Page 185: ...APPENDIXA 179 Model definition and configuration...
Page 186: ...APPENDIX A Model definition and configuration 180 TBD...
Page 187: ...APPENDIXB 181 Test compatible components Introduction Microsoft Windows Vista Environment Test...
Page 191: ...APPENDIXC 185 Online support information...
Page 196: ...Index 190...
Page 197: ......
Page 198: ...MAN P 79 SVC GDE R1 06 09...


