32
Replacing and Adding System Components
7
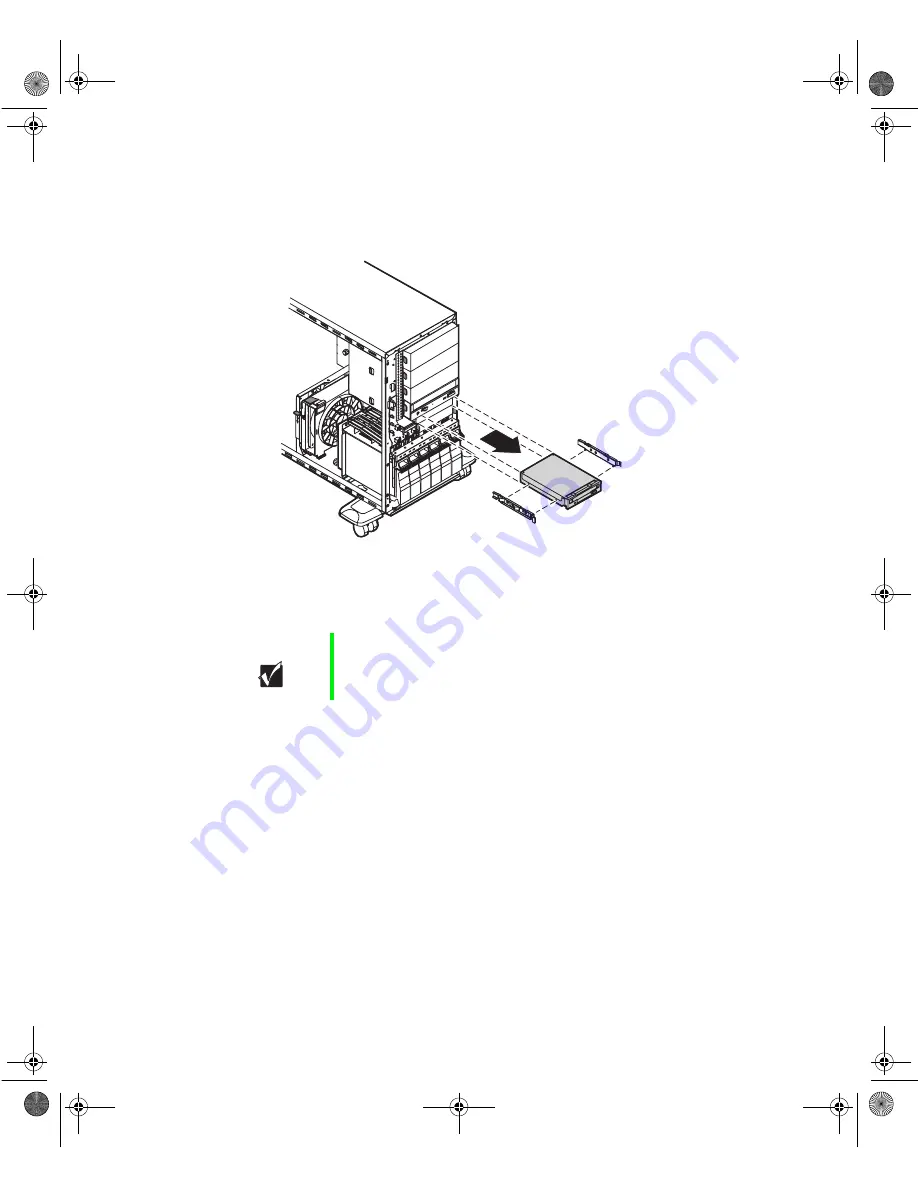
Disengage the rail locking tabs by pressing in on both front rail
extensions, then move the drive slightly out of the bay by pushing on
the back of the drive. Pull the drive out of the chassis.
8
Remove the rails on both sides of the drive and snap them onto the new
drive in the same positions. Make sure the front rail extensions are
towards the front of the drive.
9
Set the drive jumpers to the appropriate settings (refer to your drive
documentation for jumper settings.)
10
Align the rails with the diskette drive bay, then slide the drive into the
bay until the locking tabs snap into place.
11
Connect the power and data cables, making sure the cables are in their
original positions.
12
Replace the bezel. (See “Replacing the bezel” on page 28.)
13
Close the case. (See “Closing the case” on page 27.)
14
Reconnect the power cord, the modem cord, and all other external
peripheral devices, then turn on the system.
Important
The rails on the 3.5-inch diskette drive are different from
those on the hard drive and the CD drive. Make sure you
install the correct rails on each drive.
8508088.book Page 32 Thursday, November 1, 2001 9:35 AM
Summary of Contents for 930 series
Page 6: ...iv Gateway 930 Series System Manual 8508088 book Page iv Thursday November 1 2001 9 35 AM ...
Page 22: ...14 System Features 8508088 book Page 14 Thursday November 1 2001 9 35 AM ...
Page 96: ...88 Using the BIOS Setup Utility 8508088 book Page 88 Thursday November 1 2001 9 35 AM ...
Page 136: ...128 Troubleshooting 8508088 book Page 128 Thursday November 1 2001 9 35 AM ...
Page 152: ...144 System Specifications 8508088 book Page 144 Thursday November 1 2001 9 35 AM ...
Page 160: ...152 Gateway 930 Series System Manual 8508088 book Page 152 Thursday November 1 2001 9 35 AM ...


