background image

____________________________________________________________________ 

Page 4-4 


G1000 System Maintenance Manual 

Rev. A 


190-00903-00 


Table 4-1. Configuration Page Groups (example) 

SYSTEM 

System Status 
Date/Time Setup 
Main Lighting 
Audio Alert Configuration 
System Upload 
File Manager 
Diagnostics Terminal  
Maintenance Log  
OEM Diagnostics 
Terminal 
System Configuration 
System Data Paths 
System Setup 
Manifest Configuration


GDU 

RS-232/ARINC 429 Config 
GDU Status 
GDU Test 
Diagnostics  
Serial / Ethernet I/O 
Alert Configuration 
Airframe Configuration 


GDC 

GDC Configuration


GIA  

RS-232/ARINC 429 Config 
CAN/RS-485 Configuration 
GIA I/O Configuration 
COM Setup 
GIA Status 
CAN Configuration 


GSD  

GSD ARINC Configuration 
GSD RS-485 Configuration 
GSD I/O Configuration 
GSD Status 


GDL 

GDL69 Configuration


GTX 

RS-232/ARINC 429 Config 
Transponder Configuration 


GRS 

AHRS/AIR Data Input 
GRS/GMU Calibration 


OTHER 

STORMSCOPE 
S-TEC

®


GFC 

GFC Configuration 
GFC Status


GMA   

GMA Configuration


GWX  

GWX Configuration


RMT  

Remote Status


CAL  

Fuel Tank Calibration 
Flaps & Trim Calibration 
HSCM Calibration  
Airframe Calibration  


GEA  

Engine Data 
GEA Status 
GEA Configuration 
Fuel Calibration 


Summary of Contents for Cessna Caravan G1000

Page 1: ...190 00903 00 May 2008 Rev A G1000 SYSTEM MAINTENANCE MANUAL LJ VLJ AIRCRAFT...

Page 2: ...or printed copy of this manual or revision must contain the complete text of this copyright notice and provided further that any unauthorized commercial distribution of this manual or any revision her...

Page 3: ...a charge shall be discharged only when such grounding does not result in equipment damage If a test connection to energized equipment is required make the test equipment ground connection before prob...

Page 4: ...special anti reflective coating which is very sensitive to skin oils waxes and abrasive cleaners CLEANERS CONTAINING AMMONIA WILL HARM THE ANTI REFLECTIVE COATING It is very important to clean the len...

Page 5: ...2 GDU 1040A 3 2 3 1 3 GDU 1240A 3 2 3 2 GMA 1347 1347D Audio Panel 3 3 3 3 GIA 63 63W Integrated Avionics Unit 3 3 3 4 GRS 77 Attitude Heading and Reference Unit AHRS 3 4 3 5 GMU 44 Magnetometer 3 4...

Page 6: ...nd ACTIVE Softkeys 4 8 4 6 Configuration Status 4 9 4 7 Data Transmission Indicators 4 9 SECTION 5 TROUBLESHOOTING 5 1 Troubleshooting Methods 5 1 5 1 1 Visual Hardware Inspection 5 1 5 1 2 LRU Failur...

Page 7: ...1 6 5 6 12 GSM 85 A 6 6 6 13 GSD 41 6 6 6 14 GRT 10 6 6 6 15 GDL 59 GSR 56 6 7 6 16 GCU 475 477 6 7 6 17 GMC 710 715 6 7 6 18 GWX 68 6 7 6 19 GTA 82 6 8 6 20 Configuration Module 6 9 6 21 GEA 71 Backp...

Page 8: ...00 Visual Inspection Procedure 9 3 9 6 GSA 809 x Greasing Procedure 9 3 9 7 GSM Slip Clutch Checking and Adjustment Procedure 9 4 9 8 GSM 85 A Servo Gearbox Semi Automated Slip Clutch Test 9 4 9 8 1 A...

Page 9: ...13 APPENDIX A CONNECTOR PIN ASSIGNMENTS A 1 P601 COM A 1 A 2 P602 VOR ILS A 3 A 3 P603 MAIN SERIAL A 5 A 4 P604 MAIN DISCRETE A 7 A 5 P605 I O 1 A 8 A 6 P606 I O 2 A 10 A 7 P10001 GDU 1xxx A 12 A 8 P7...

Page 10: ...5 3 9 GEA 71 Engine Airframe Unit 3 5 3 10 GDL 69 69A Satellite Data Link Receiver 3 6 3 11 GDL 90 Universal Access Transceiver GPS Receiver 3 6 3 12 GSA 80 Servo 3 7 3 13 GWX 68 Weather Radar 3 7 3 1...

Page 11: ...5 16 Serial Ethernet I O Page 5 93 5 17 Alert Configuration Page 5 94 5 18 Airframe Configuration Page 5 94 5 19 RS 232 ARINC 429 Configuration Page 5 95 5 20 CAN RS 485 Configuration Page 5 96 5 21 G...

Page 12: ...ctor P691 5 128 5 51 GCU 475 Backplate Connector P4751 5 128 5 52 GMC 710 Backplate Connector P7101 5 128 5 53 GWX 68 Backplate Connector P400 5 128 5 54 GSD 41 Backplate Connector P411 5 128 5 55 GSD...

Page 13: ...190 00903 00 Rev A TABLES 4 1 Configuration Page Groups 4 4 5 1 LRU Failure Annunciations and Recommended Actions 5 2 5 2 AFCS Annunciations 5 104 7 1 GRS 77 GMU 44 Calibration 7 12 7 2 Magnetometer I...

Page 14: ...______________________________________________________________ Page xii G1000 System Maintenance Manual Rev A 190 00903 00 Blank Page...

Page 15: ...e following is a brief description of each section in the manual Section 1 Introduction This section discusses the scope of the manual content and describes manual organization Section 2 System Overvi...

Page 16: ...000 System Maintenance Manual Rev A 190 00903 00 Section 10 System Reconfiguration This section explains how to completely reconfigure the system should it become necessary Appendix A Connector Pin As...

Page 17: ...directly to the PFD via ARINC 429 Additional communications paths connect the GRS and GDC 74B to GIA 63W units providing quadruple redundant capability The GRS 77 receives GPS data from both GIAs air...

Page 18: ...tenance Manual Rev A 190 00903 00 Figure 2 2 shows a top level G1000 interconnect block diagram NOTE The block diagrams shown in this section are not aircraft specific Refer to the OEM maintenance doc...

Page 19: ..._________________________________________________ G1000 System Maintenance Manual Page 2 3 190 00903 00 Rev A Figure 2 3 shows a G1000 flight instruments block diagram Figure 2 3 G1000 Flight Instrume...

Page 20: ...V and WAAS GPS receivers COM and NAV digital audio is sent to the GMA 1347D Audio Panel GPS data is sent to the GRS 77 and both displays for processing The GTX 33 and GTX 33D Mode S Transponders commu...

Page 21: ..._______________________________ G1000 System Maintenance Manual Page 2 5 190 00903 00 Rev A 2 3 GFC 700 INTERCONNECT Figure 2 5 shows a GFC 700 Autopilot interconnect block diagram Figure 2 5 GFC 700...

Page 22: ...The GDU 1xxx provides display and control interface for the G1000 and functions interchangeably as a PFD or an MFD Typical VLJ LJ installations involve 3 GDUs and optional remote control devices In a...

Page 23: ...ion via RS 232 Dimming The GDU provides dimming of the displays and other integrated control display LRUs such as the audio panels and remote controllers via its monitoring of an aircraft dimming bus...

Page 24: ...____________________________________________________________________ Page 2 8 G1000 System Maintenance Manual Rev A 190 00903 00 Blank Page...

Page 25: ...cific model of aircraft Refer to OEM maintenance documentation for the exact quantity of LRUs used in a specific installation 3 1 DISPLAYS MFD PFD 3 1 1 GDU 1500 Figure 3 1 GDU 1500 Display The GDU 15...

Page 26: ...t through a High Speed Data Bus HSDB connection 3 1 3 GDU 1240A In certain VLJ configurations three GDU 1240As are utilized Each unit is configured as one of two PFDs or one MFD The GDU 1240A features...

Page 27: ...on is also controlled by the GMA 1347D The GMA 1347D is normally installed between the MFD and PFD The GMA 1347D can also be installed in dual audio panel applications usually paired with a dual PFD s...

Page 28: ...ther directly 3 4 GRS 77 ATTITUDE HEADING AND REFERENCE UNIT AHRS Figure 3 6 GRS 77 AHRS Unit The GRS 77 provides aircraft attitude and heading information via ARINC 429 to both the on side GDU and th...

Page 29: ...sure altitude airspeed vertical speed and OAT information to the G1000 system and communicates with the on side GIA 63W on side GDU and on side GRS 77 using an ARINC 429 digital interface The GDC 74B...

Page 30: ...as digital audio entertainment The GDL 69A communicates with the MFD via HSDB connection A subscription to the XM Satellite Radio service is required to enable the GDL 69A capability 3 9 GDL 90 GPS W...

Page 31: ...d for the automatic control of pitch roll and yaw These units interface with each GIA 63W The GSM 85 A servo gearbox is responsible for transferring the output torque of the GSA 80 servo actuator to t...

Page 32: ...GDC 74A Communication interface to the G1000 is through the GDC 74A B 3 13 GTX 33 33D MODE S TRANSPONDER Figure 3 15 GTX 33 33D Transponder The GTX 33 and GTX 33D are solid state transponders that pro...

Page 33: ...Unit In certain VLJ aircraft configurations the GCU 475 provides the Flight Management System FMS controls for the MFD through an RS 232 digital interface 3 15 GMC 715 AFCS CONTROL UNIT Figure 3 17 GM...

Page 34: ...d output capabilities of the G1000 system Communication is through the High Speed Data Bus 3 17 GRC10 GRT10 Figure 3 19 GRT 10 Remote Controller and GRC 10 Wireless Transceiver 3 17 1 GRC 10 XM Remote...

Page 35: ...n to the GRC 10 remote control via RF 3 18 GCU 477 Figure 3 20 GCU 477 Remote Controller The GCU 477 is a panel mounted user control interface that enables the aircraft s flight crew to control the Ga...

Page 36: ...und The GDL 59 can also provide a flight data logger function When paired with the GSR 56 Iridium data link the GDL 59 can provide in flight voice calling and short burst data communications to ground...

Page 37: ...ing calibrating and troubleshooting the G1000 is performed in the configuration mode To enter configuration mode 1 Press and hold the ENT key on the PFD while applying power Release the ENT key after...

Page 38: ...o cycle through the different configuration pages to change page groups and to change pages in a group The FMS knob is also used to perform the following To activate the cursor press the small FMS kno...

Page 39: ...st be entered manually Use care when using the card during maintenance The G1000 is designed to immediately initialize the card upon power up On screen prompts must be given careful attention in order...

Page 40: ...Serial Ethernet I O Alert Configuration Airframe Configuration GDC GDC Configuration GIA RS 232 ARINC 429 Config CAN RS 485 Configuration GIA I O Configuration COM Setup GIA Status CAN Configuration G...

Page 41: ...configures GMA audio and serial communication settings GTX1 GTX2 configures GTX transponder and serial communications settings GEA1 GEA2 configures GEA engine airframe parameters GDC1 GDC2 configures...

Page 42: ...____________________________________________________________________ Page 4 6 G1000 System Maintenance Manual Rev A 190 00903 00 Figure 4 4 GRS GDC Configuration File Storage 3 Display...

Page 43: ...____________________________________________________________________ G1000 System Maintenance Manual Page 4 7 190 00903 00 Rev A Figure 4 5 System Configuration File Storage 3 Display...

Page 44: ...s settings to the specific LRU from the PFD this can also be accomplished by reloading the configuration files for the LRU using the G1000 SW Loader Card Use the ACTV SET softkey with care If an impro...

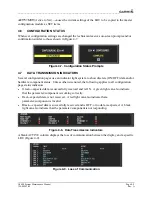
Page 45: ...ight system to show discrete ON OFF data and or hardware component status Unless otherwise noted the following applies to all configuration page status indicators Green expected data is successfully r...

Page 46: ...____________________________________________________________________ Page 4 10 G1000 System Maintenance Manual Rev A 190 00903 00 Blank Page...

Page 47: ...lace any damaged parts as required Inspection may require the temporary removal of a unit or units to gain access to connectors Follow the guidance given in Section 6 for LRU replacement Refer to the...

Page 48: ...problem If problem follows GIA1 replace GIA1 Check Ethernet interconnect from GIA1 to MFD or PFD1 based on aircraft configuration and unit connector pins for faults If problem persists replace PFD1 N...

Page 49: ...have a clear view of the sky Verify the aircraft is not parked in close proximity to a hanger with the doors open equipped with a GPS repeater On the MFD AUX GPS STATUS page check for erratic GPS Sig...

Page 50: ...e the GTX 33 33D If problem persists replace the GIA AIRSPEED FAIL ALTITUDE FAIL VERT SPEED FAIL GDC 74B Ensure that a cell phone or a device using cell phone technology is not turned on even in a mon...

Page 51: ...it connecter is secure and proper wire harness strain relief is provided Ensure the GRS 77 is fastened down tightly in it s mounting rack and that the mounting rack is not loose CAUTION do not loosen...

Page 52: ...a cell phone or a device using cell phone technology is not turned on even in a monitoring state in the cabin Cycle power after moving aircraft away from metal objects to determine if metal objects we...

Page 53: ...shorted sensors that receive 5V 10V or 12V power from the GEA If the calibration status boxes are red replace the GEA 71 Verify internal external and reference voltages listed in the Main Analog and...

Page 54: ...sages can also be used to help identify a faulty LRU The following message indicates that a data path connected to the GDU MFD or PFD or the GIA 63 GIA 63W 1 or 2 has failed FAILED PATH A data path ha...

Page 55: ...of the channel is indicated by the following colors Red data path has failed Black data path status is unknown Green data path is good 5 1 5 1 GDU RS 232 ARINC 429 Configuration Page PFD1 2 and MFD Fi...

Page 56: ...wered on by pressing the ANN TEST softkey on the MFD AUX SYSTEM STATUS page to see if the key indicators turn on If GMC indicator lights do not come on remove unit and verify power and ground are pres...

Page 57: ...he AUX SYSTEM STATUS PAGE on the MFD If it has a Red X troubleshoot why the GRS is offline before proceeding Ensure GRS connecter is secure and proper wire harness strain relief is provided Swap GRS1...

Page 58: ...software error messages Correct any errors before proceeding Verify GDC 74B 1 status is OK using the System Status Page on the MFD If it has a Red X troubleshoot why the GDC is offline before proceedi...

Page 59: ...GMC is powered on by pressing the ANN TEST softkey on the MFD AUX SYSTEM STATUS page to see if the key indicators turn on If GMC indicator lights do not come on remove unit and verify power and groun...

Page 60: ...he AUX SYSTEM STATUS PAGE on the MFD If it has a Red X troubleshoot why the GRS is offline before proceeding Ensure GRS connecter is secure and proper wire harness strain relief is provided Swap GRS1...

Page 61: ...software error messages Correct any errors before proceeding Verify GDC 74B 2 status is OK using the System Status Page on the MFD If it has a Red X troubleshoot why the GDC is offline before proceedi...

Page 62: ...YSTEM STATUS PAGE on the MFD If it has a Red X troubleshoot why the GRS is offline before proceeding Ensure GRS connecter is secure and proper wire harness strain relief is provided Swap GRS1 and GRS2...

Page 63: ...ect any errors before proceeding Verify GDC 74B 1 status is OK using the AUX SYSTEM STATUS page on the MFD If it has a Red X troubleshoot why the GDC is offline before proceeding Swap MFD and PFD1 if...

Page 64: ...guration Page GIA1 and GIA2 Figure 5 4 GIA RS 232 ARINC 429 Configuration Page The following GIA RS 232 ARINC 429 Configuration Page troubleshooting tables which follow show display status for the var...

Page 65: ...turns green after swapping units Check the GIA1 GDC 74B 1 interconnect wiring and unit connector pins for faults Replace GDC 74B 1 CHNL 1 GDC 74B 1 GIA1 GDC 74B 1 data path functionality is unknown Re...

Page 66: ...a Red X troubleshoot why the GRS is offline before proceeding Ensure GRS connecter is secure and proper wire harness strain relief is provided Swap GIA1 and GIA2 reconfigure both GIA s to their new l...

Page 67: ...t has a Red X troubleshoot why the GMA is offline before proceeding Swap GMA 1347D 1 and GMA 1347D 2 reconfigure both GMA s to their new locations to confirm if the problem is in the original GMA 1347...

Page 68: ...tware error messages Correct any errors before proceeding Verify GDC 74B 1 status is OK using the AUX SYSTEM STATUS page on the MFD If it has a Red X troubleshoot why the GDC is offline before proceed...

Page 69: ...ot why the GRS is offline before proceeding Ensure GRS connecter is secure and proper wire harness strain relief is provided Swap GIA1 and GIA2 reconfigure both GIA s to their new locations to confirm...

Page 70: ...eeding Verify GDC 74B 2 status is OK using the AUX SYSTEM STATUS page on the MFD If it has a Red X troubleshoot why the GDC is offline before proceeding Swap GIA1 and GIA2 reconfigure both GIA s to th...

Page 71: ...A or GTX configuration or software error messages Correct any errors before proceeding Swap GIA1 and GIA2 reconfigure both GIA s to their new locations to confirm if the problem is in the original GIA...

Page 72: ...a Red X troubleshoot why the GRS is offline before proceeding Ensure GRS connecter is secure and proper wire harness strain relief is provided Swap GIA1 and GIA2 reconfigure both GIA s to their new lo...

Page 73: ...t has a Red X troubleshoot why the GMA is offline before proceeding Swap GMA 1347D 1 and GMA 1347D 2 reconfigure both GMA s to their new locations to confirm if the problem is in the original GMA 1347...

Page 74: ...tware error messages Correct any errors before proceeding Verify GDC 74B 2 status is OK using the AUX SYSTEM STATUS page on the MFD If it has a Red X troubleshoot why the GDC is offline before proceed...

Page 75: ...oot why the GRS is offline before proceeding Ensure GRS connecter is secure and proper wire harness strain relief is provided Swap GIA1 and GIA2 reconfigure both GIA s to their new locations to confir...

Page 76: ...Configuration Page GIA1 and GIA2 Figure 5 5 GIA RS 485 Configuration Page The following GIA RS 485 Configuration Page troubleshooting tables which follow show display status for the various pages Note...

Page 77: ...us is OK using the AUX SYSTEM STATUS PAGE on the MFD If it has a Red X troubleshoot why the GEA is offline before proceeding Swap GIA1 and GIA2 reconfigure both GIA s to their new locations to confirm...

Page 78: ...E on the MFD If it has a Red X troubleshoot why the GEA is offline before proceeding Swap GIA1 and GIA2 reconfigure both GIA s to their new locations to confirm if the problem is in the original GIA1...

Page 79: ...ges Correct any errors before proceeding Verify all GSA servo statuses are OK using the AUX SYSTEM STATUS PAGE on the MFD If one or all have a Red X troubleshoot why the servos are offline before proc...

Page 80: ...us is OK using the AUX SYSTEM STATUS PAGE on the MFD If it has a Red X troubleshoot why the GEA is offline before proceeding Swap GIA1 and GIA2 reconfigure both GIA s to their new locations to confirm...

Page 81: ...roblem is in the original GEA2 Replace original GEA2 if box turns green after swapping units Check the GIA2 GEA2 interconnect wiring and connector pins for faults CHNL 2 GEA2 GIA2 GEA2 data path funct...

Page 82: ...messages are intended to aid in isolating failures to a defective LRU They are not listed in their order of importance Figure 5 6 Advisory Messages 5 1 6 1 GDU Cooling Advisory Messages Advisory Messa...

Page 83: ...etermined a key is stuck on the MFD PFD1 key KEYSTK key is stuck The G1000 has determined a key is stuck on PFD1 PFD2 key KEYSTK key is stuck The G1000 has determined a key is stuck on PFD2 a Select t...

Page 84: ...Basemap database error exists PFD1 has encountered an error in the Basemap database PFD2 DB ERR PFD1 Basemap database error exists PFD2 has encountered an error in the Basemap database Confirm supplem...

Page 85: ...tabase MFD DB ERR MFD airport terrain database error exists The MFD has encountered an error in the airport terrain database PFD1 DB ERR PFD1 airport terrain database error exists PFD1 has encountered...

Page 86: ...sts PFD 2 has encountered an error in the safe taxi database Confirm supplemental data card is inserted fully in the bottom slot of the display Move the datacard to the top slot of the display If the...

Page 87: ...rt and remove a SD card multiple times to clean the contacts If the card still does not work in the bottom slot leave the card in the top slot or replace the display Reload ChartView from Jeppesen s l...

Page 88: ...lled Insert three identical version terrain database cards in the PFD s and MFD CAS INOP The G1000 has found the PFDs and or MFD software versions do not match No Dispatch Software correction needed C...

Page 89: ...for damage inside the GDU connector backplate Replace master configuration module wiring and pins If problem persists replace master configuration module NOTE New Terrain Obstacle cards Jeppesen Aviat...

Page 90: ...M2 push to talk key is stuck The COM2 external push to talk PTT switch is stuck in the enabled or pressed state Press the push to talk switch s again to cycle its operation Check push to talk switch s...

Page 91: ...remote transfer key is stuck The NAV1 external remote transfer switch is stuck in the enabled or pressed state Press the NAV1 external remote transfer switch again to cycle its operation Check NAV1 re...

Page 92: ...nit replace GIA If problem does not follow unit check G S2 antenna and cabling 5 1 6 7 GPS Advisory Messages NOTE Ensure that no cell phones or devices in the cabin using cell phone technology are tur...

Page 93: ...ing Advisory Messages Advisory Message Possible Cause Recommended Actions GIA1 COOLING GIA1 temperature too low GIA1 operating temperature is too low Allow unit to warm up GIA2 COOLING GIA2 temperatur...

Page 94: ...ID number will change to a new number when installing a new master config module The old Terrain and other cards will no longer work as they will remain locked to the old System ID number GIA1 CONFIG...

Page 95: ...ions MANIFEST GDC 74B 1 software mismatch Communication halted The system has detected an incorrect software version loaded in the GDC 74B 1 MANIFEST GDC 74B 2 software mismatch Communication halted T...

Page 96: ...ving any GPS information GRS 77 2 is not receiving GPS data from either GIA 63W Troubleshoot the possible loss of either GPS receiver per Section 5 1 2 1 GPS INTEG or Time failure Replace the GRS 77 A...

Page 97: ...MANIFEST GMU2 software mismatch Communication Halted The G1000 has detected an incorrect software version loaded in GMU 44 2 Load correct software version in the GMU44 HDG FAULT AHRS1 magnetometer fau...

Page 98: ...ess for faults and replace if necessary NOTE New Terrain Obstacle cards Jeppesen Aviation Database and other optional features i e TAWS unlock card will need to be replaced if the master configuration...

Page 99: ...oad correct software version GMA1 SERVICE GMA1 needs service Return unit for repair The G1000 has determined GMA 1347D 1 needs service Replace GMA 1347D 1 GMA2 SERVICE GMA2 needs service Return unit f...

Page 100: ...stem ID number will change to a new number when installing a new master config module The old Terrain and other cards will no longer work as they will remain locked to the old System ID number GMA2 CO...

Page 101: ...rror in the communication between GMA 1347D 1 and GMA 1347D 2 Ensure both units are receiving power Ensure both units are configured Check interconnect wiring and connector pins for faults Replace GMA...

Page 102: ...lace if necessary NOTE New Terrain Obstacle cards Jeppesen Aviation Database and other optional features i e TAWS unlock card will need to be replaced if the master configuration module is changed The...

Page 103: ...nd replace if necessary NOTE New Terrain Obstacle cards Jeppesen Aviation Database and other optional features i e TAWS unlock card will need to be replaced if the master configuration module is chang...

Page 104: ...d other optional features i e TAWS unlock card will need to be replaced if the master configuration module is changed The G1000 System ID number will change to a new number when installing a new maste...

Page 105: ...PFD1 with a known good unit to verify location of problem e If problem persists reinstall original PFD1 and replace PFD2 f If problem persists reinstall PFD2 and replace MFD SIMULATOR Sim mode is acti...

Page 106: ...are not above 50 apply light to the photocell and observe if the CCFT level rises If the CCFT level rises disregard the message If the CCFT level does not rise replace the MFD Replace the MFD PFD1 SER...

Page 107: ...Ensure the PFD connector is fully seated and locked If the unit was started in a very dark environment the photocells may not have enough light to initially raise the CCFT level Go to the GDU STATUS p...

Page 108: ...UPDT CFG softkey on the Configuration Upload Page in the System Page Group to load configuration files into the configuration module Check PFD1 configuration module wiring for faults and replace if ne...

Page 109: ...Configuration Upload Page in the System Page Group to load configuration files into the configuration module Check PFD1 configuration module wiring for faults and replace if necessary Replace PFD1 con...

Page 110: ...Replace the MFD NOTE New Terrain Obstacle cards Jeppesen Aviation Database and other optional features i e TAWS unlock card will need to be replaced if the master configuration module is changed The G...

Page 111: ...the MFD AUX SYSTEM STATUS page Verify GPS has a position lock Ensure an Airport Terrain Obstacle Terrain Aviation Database or GDU SW mismatch has not occurred Correct any database and software errors...

Page 112: ...G1000 System Maintenance Manual Rev A 190 00903 00 5 1 6 19 GDL 69 69A Advisory Messages Advisory Message Possible Cause Recommended Actions GDL 69 FAIL GDL 69 has failed The G1000 has detected a fai...

Page 113: ...ange to a new number when installing a new master config module The old Terrain and other cards will no longer work as they will remain locked to the old System ID number MANIFEST GTX1 software mismat...

Page 114: ...k display dimmer input to verify voltage is present Replace display if dimmer voltage is present Display is blank Display resets Display flickers a Ensure that a cell phone or a device using cell phon...

Page 115: ...nsure the SD card is from SanDisk Use of other SD Cards is not recommended A button knob joystick does not appear to function Go to the GDU TEST page in configuration mode and verify button knob or jo...

Page 116: ...llows unit replace GIA If problem does not follow unit check COM antenna and cabling for faults No COM sidetone Swap GIA1 and GIA2 reconfigure both GIA s to their new locations to verify the unit or a...

Page 117: ...heir new locations to verify location of problem If problem follows unit clear the GPS almanac by performing the following steps Using the PFD in config mode go to the GIA RS 232 ARNIC 429 Config Page...

Page 118: ...blem If problem follows unit replace GlA If problem does not follow unit check NAV antenna coupler and cabling for faults 5 1 7 6 GDC 74B Symptom Recommended Actions Altitude is different than standby...

Page 119: ...damage can be found replace GRS 77 configuration module f If problem persists replace the GRS 77 Attitude appears unstable a Ensure that a cell phone or a device using cell phone technology is not tu...

Page 120: ...place temperature probe s One or more CHT EGT or TIT temperatures drift up and flag Check for an open temperature probe or open wiring and replace and or correct Fuel quantity flags intermittently Che...

Page 121: ...ch is not open Master squelch level can be adjusted on the 1347D CONFIGURATION page for higher noise environments Replace unit only after all possible external sources of noise are eliminated Buttons...

Page 122: ...uration mode and go to the GDL page Verify unit is active Verify the Signal number is 2 or 3 If it is 0 or 1 check the GDL 69 69A antenna and cabling for faults Reseat the GDL 69 69A to verify the coa...

Page 123: ...Configuration Page The following information describes how the GDL 69 Configuration Page is arranged CONFIGURATION this window contains the following fields a SELECT GDL ANTENNA selects the GDL antenn...

Page 124: ...peration of all GDL69 69A audio and weather options Levels 0 and 1 are likely indications of problems with availablity A 204 message in the signal field indicates that signal information has not initi...

Page 125: ...cted GMA 1347 audio panel HEADSET VOLUME Adjustable range is between 31 and 31 for the following a MUSIC 1 2 sets the music input volume levels b UNSWITCHED IN 1 2 3 sets unswitched input volume level...

Page 126: ...nected h DISABLE PLAY disables PLAY button for situations where no play input is connected i DISABLE MUSIC disables music input j DISABLE REC not used in certian installations CONFIGURATION INPUTS the...

Page 127: ...ot used in certian installations p DSBL ICS SIDETONE not used in certian installations q MUS 2 MUTE ON RAD mute music 2 on radio when passengers hear radios r PASS HANDSET INST passenger handset insta...

Page 128: ...s d X ACC X Axis acceleration value expressed in m s e Y ACC Y Axis acceleration value expressed in m s f Z ACC Z Axis acceleration value expressed in m s AIR DATA 1 2 a SAT Static Air Temperature mea...

Page 129: ...RS Displays engine time in hours as measured by the engine tachometer input f TACH SENSOR 1 2 Tachometer sensor measurement expressed in revolutions per minute RPM g D ICE PRESS De Ice system pressure...

Page 130: ...03 00 p ITT ENG 1 2 Interstage Turbine Temperature expressed in degrees Celsius Turbine aircraft only q TIT ENG 1 2 Turbine Intake Temperature expressed in degrees Celsius Turbine aircraft only r OT E...

Page 131: ...ys status of GEA 71 calibration b CONFIG Displays status of GEA 71 configuration c INT PWR SUPPLY Displays status of the GEA 71 5 10 and 12 sensor power supply voltages If it is red troubleshoot as fo...

Page 132: ...are pre established for a particular installation and are loaded from the appropriate G1000 Loader Card Input Outputs are categorized by groups and are brought on screen by the pressing appropriate s...

Page 133: ...us Page Figure 5 x displays various items relating to the GDU and its operation Use this page to help diagnosis and troubleshoot the GDU Figure 5 13 GDU Status Page The following information describes...

Page 134: ...through the display backlight bulbs Number does not reflect actual current value and is not useful for troubleshooting d LGHT BUS AC Displays the input value of the AC lighting bus if enabled Disrega...

Page 135: ...hould have a black box if it is green check for connector miswiring or a bent pin d TEST DEMO MODE SLCT A green box indicates Pin 53 54 is grounded These inputs should have a black box if either box i...

Page 136: ...Figure 5 14 shows a graphical layout of all display buttons in red Each red button turns green when the button is pressed indicating correct operation of the button Figure 5 14 GDU Test Page GDU Test...

Page 137: ...500 2 500 Vdc for 28V Field 3633 36 33 Vdc They need to be within 10 of desired voltages Replace the display if these values are more than 10 from the desired voltage e LGHT BUS DC AC Displays input v...

Page 138: ...if installed Reversionary 1 input is a ground on Pin 58 reversionary 2 input is a ground on Pin 15 b PULSE PER SEC 1 2 Displays status of GPS time synchronization inputs from GIA 63 GIA 63W to the GD...

Page 139: ...________________________________________ G1000 System Maintenance Manual Page 5 93 190 00903 00 Rev A 5 1 8 10 Diagnostics Page Information on the Diagnostics Page is protected and cannot be changed F...

Page 140: ...f there are a substantial growing number of errors logged it indicates an Ethernet communication issue Use the FMS knob to check all three Ethernet ports There should generally be a continually increa...

Page 141: ...ew alerting system CAS messages and their causes The information on this page is protected and cannot be changed Figure 5 17 Alert Configuration Page 5 1 8 13 Airframe Configuration Page The Airframe...

Page 142: ...2 configuration files contain the settings shown on this page Windows a SELECT UNIT displays the currently selected GIA 63 GIA 63W unit b RS 232 displays active RS 232 configuration settings for curr...

Page 143: ...2 configuration files contain the settings shown on this page Figure 5 20 CAN RS 485 Configuration Page Windows a SELECT GIA UNIT displays the currently selected GIA 63 GIA 63W b CAN displays active C...

Page 144: ...files contain the settings shown on this page Windows SELECT GIA UNIT displays the currently selected GIA 63 GIA 63W unit SELECT INPUT OUTPUT displays input output type that is displayed for the curre...

Page 145: ...ction Description 25 0 kHz Selects the traditional 25 kilohertz spacing 760 channel 8 33 kHz Selects 8 33 kilohertz channel spacing required in certain areas of the world d SQ 250 sets the squelch thr...

Page 146: ...not be an indication of a failed unit c GS STATUS ROM SYN LOCK EEPROM displays the condition of various Glideslope receiver hardware components Black boxes may indicate the GS is not locked onto valid...

Page 147: ...the condition of the GIA calibration Green Valid Analog Calibration e OVER TEMP informs the technician of an over temperature condition on the GIA 63 GIA 63W main board Red Over temperature Green Nor...

Page 148: ...OTE All settings made on the GFC Configuration Page are contained in the GFC configuration file Figure 5 24 GFC Configuration Page SELECT GIA UNIT This box displays the currently selected GIA CONFIGUR...

Page 149: ...x indicates the GIAs and servos are no longer receiving the 28 VDC AP DISC power switch open or other fault MONITOR CONTROL BOARD STATUS Displays the condition of various monitor board components SERV...

Page 150: ...RV SRVO softkeys to drive the servo NOTE The flight controls must be clear and safe to operate before manually driving the servo SLIP CLUTCH TEST RESULTS GFC Status Page This window is used during the...

Page 151: ...and review for failure information If the OAT and TAS is Red X d and the attitude indication is present troubleshoot per Section 5 1 2 1 Emergency Descent Mode AP engaged when aircraft altitude above...

Page 152: ...FT failure fault is logged in the GIA Maintenance Log and not in the Servo Maintenance Logs unless the GIA log fault identifies a servo problem NOTE Thoroughly understanding the operation of the G1000...

Page 153: ...ective actions AHRS MON invalid STATE The AHRS monitor has detected that the AHRS data is invalid The possible values for STATE are Mon Prmtr Invalid The ARINC 429 data used by one of the monitors has...

Page 154: ...fy cross GIA valid This step checks to ensure the cross side GIA is online and communicating with all servos from ARINC 485 data lines The cross side GIA must also pass its AHRS monitoring Ensure both...

Page 155: ...during the GSA unit pre flight test PFT If there is a fault during PFT the unit will not be able to transition to normal mode and the only way to clear this state would be to cycle unit power b The s...

Page 156: ...Pitch Servo 5 Roll Servo 7 Yaw 9 Pitch Trim Servo 11 Roll Trim Servo 13 Yaw Trim Servo There are two main groupings of faults that can occur in the control processor a The first grouping of faults can...

Page 157: ...nnect power HALL 5 FAIL Check unit power and AP Disconnect power HALL 6 FAIL Check unit power and AP Disconnect power CURR OFFST FAIL Check unit power and AP Disconnect power SVO TYPE FAIL Check unit...

Page 158: ...w Maintenance Log in the drop down menu then press the ENT key The error log data will be displayed in the OUTPUT box If you see the more press any key to continue text at the bottom of the screen you...

Page 159: ...ystem to save the data from the download to the SD card 16 While you are waiting for the data to be saved to the SD card record the order of the LRU s and or Servos were downloaded so that you can pro...

Page 160: ...The Field Calibration Utility should only be used to correct errors due to altitude drift If the drift is greater than the limits defined in the utility at any of the test points the utility will not...

Page 161: ...the file NOTE Set the airspeed to zero or unset during calibration If the airspeed is 80 knts SSEC corrections start to apply and could change the results 5 2 1 4 Procedure 1 Connect the GDC 74B to t...

Page 162: ...to a file named BKUP_ serial_num _YYYYMMDD_ HHMMSS txt This file can be used by Garmin to restore the unit to the original settings if necessary 10 After the full backup file has been created the Prep...

Page 163: ...et altitude to 41 000 ft screen is displayed 20 Set the pressure control system to a pressure altitude of 41 000 feet 21 Allow the on screen altitude reading to stabilize then click OK 22 After the al...

Page 164: ...2 Program Calibration to Unit Screen 23 Ensure that the pop up cal result window shows PASSED press OK to confirm message Figure 5 33 Field Calibration Result Screen 24 Return the pressure control sys...

Page 165: ...it and click Open Figure 5 34 Calibration Files Screen 4 Select the Serial Port on the PC that will be used to communicate with the GDC 74B and click OK A progress bar screen appears while the calibra...

Page 166: ...directory where the GDC_FieldCal exe file resides E mail copies of these files to avionics garmin com Please enter GDC 74B Field Calibration Data in the subject line as shown in Figure 5 35 Figure 5 3...

Page 167: ...173 01 obtained from the dealer section of Garmin s website In the Aircraft 1 Apply power to the aircraft using an external 28 volt cart 2 Arm the STBY BATT Switch and verify the PFD comes on 3 Verify...

Page 168: ...he HSCM exe program verify interface resembles Figure 5 44 Figure 5 38 HSCM Offset Tool User Interface Display 6 Choose the applicable aircraft in the Select Aircraft field Standby Battery Ammeter is...

Page 169: ...the Configuration Files in the AIRFRAME field 5 Select the Offset Error Correction File in the FILE field 6 Verify the configuration box is checked 7 Press the LOAD softkey Figure 5 39 Configuration U...

Page 170: ...elect Aircraft field Standby Battery Ammeter is the only selection available in the Select Channel field 4 Enter the value of READING 2 in the Input Offset Error in Amps field 5 Verify the drive lette...

Page 171: ...1 Verify the BATT S current indication on the bottom corner of the EIS strip reads 0 0 Amps If the BATT S current indication does not read 0 0 repeat procedure ensuring all steps have been followed If...

Page 172: ...25 26 27 28 29 30 31 32 33 34 35 36 37 38 39 40 41 42 43 44 45 46 47 48 49 50 51 52 53 54 55 56 57 58 59 60 61 62 63 64 65 66 67 68 69 70 71 72 73 74 75 76 77 78 1 2 3 4 5 6 7 8 9 10 11 12 13 14 15 16...

Page 173: ...ckplate Figure 5 49 The only difference is the Keyplate Figure 5 44 The GSD 41 Backplate contains the B Keyplate the GEA 71 Backplate contains the A Keyplate Refer to Figures 5 59 and 5 60 the GSD 41...

Page 174: ...0 21 22 23 24 25 26 27 28 29 30 31 32 33 34 35 36 37 38 39 40 41 42 43 44 45 46 47 48 49 50 51 52 53 54 55 56 57 58 59 60 61 62 TOP ANTENNA CONNECTOR BOTTOM ANTENNA CONNECTOR P3301 COOLING PORT Figure...

Page 175: ...Backplate Connector P4751 Figure 5 52 GMC 710 or GMC 715 Backplate Connector P7101 Figure 5 53 GWX 68 Backplate Connector P400 1 2 3 4 5 6 7 8 9 10 11 12 13 14 15 16 17 18 19 20 21 22 23 24 25 26 27 2...

Page 176: ...ance Manual Rev A 190 00903 00 1 2 3 4 5 6 7 8 9 10 11 12 13 14 15 16 17 18 19 20 21 22 23 24 25 26 27 28 29 30 31 32 33 34 35 36 37 38 39 40 41 42 43 44 45 46 47 48 49 50 51 52 53 54 55 56 57 58 59 6...

Page 177: ...tart the system in configuration mode 2 The System Status Page Figure 6 1 shows a list of LRUs in the LRU window Activate the cursor and use the FMS knob to scroll through the list in the window and s...

Page 178: ...may require applying a small amount of forward pressure to engage the quarter turn sockets 6 2 GMA 1347D To remove Insert a 3 32 hex drive tool into the access hole on the unit face and rotate counte...

Page 179: ...not loosen mounting rack bolts To install 1 Inspect connector s for damaged pins 2 Fasten unit to mounting rack 3 Attach connector to the back of the unit Verify locking tabs are engaged on both ends...

Page 180: ...1 Inspect connector s for damaged pins 2 Gently push unit into the rack and engage the connectors 3 Push the GEA 71 lever down towards the bottom of the unit avoiding the use of excessive force 4 If l...

Page 181: ...he handle into the GDL body and tighten the Phillips screw 6 10 GDL 90 Refer to the applicable aircraft maintenance manual for removal and installation information 6 11 GSA 81 To remove 1 Disconnect t...

Page 182: ...the dogleg slot To install 1 Inspect connector s for damaged pins 2 Gently push unit into the rack to engage the connectors 3 Push the GSD 41 lever down towards the bottom of the unit avoiding the use...

Page 183: ...mounting bolts Note shims or washers behind each mounting bolt location To install 1 Place the same shims or washers in the same location 2 Install the bolts 3 Install the connector If the GWX 68 uni...

Page 184: ...remove 1 Remove four screws securing the GTA 82 adapter to the panel Refer to aircraft installation drawings for exact location of the Trim Adapter 2 Disconnect servo connector 3 Remove unit To instal...

Page 185: ...s replaced proceed to Section 6 6 5 If GDC 74 configuration module is replaced proceed to Section 6 5 6 If master configuration module is replaced 7 Turn the PFD on in configuration mode press and hol...

Page 186: ...shell Thermocouple Item Description Qty Needed Garmin Part Number 1 3 Thermocouple K type 1 925 L0000 00 2 Pins 22 AWG 2 336 00021 00 3 Screw 1 211 60234 08 To remove 1 Remove GEA 71 2 Remove GEA conn...

Page 187: ...d wire length is 1 8 prior to crimping 2 Insert newly crimped pins and wires into the appropriate connector housing location item 6 3 Place thermocouple body item 1 onto the backshell boss item 5 Plac...

Page 188: ...__________________________________________________________________________ Page 6 12 G1000 System Maintenance Manual Rev A 190 00903 00 Blank Page...

Page 189: ...w power to be removed from the system when loading software Remove power only when told to do so by the procedure As a general rule all displays should be in the same mode configuration or normal unle...

Page 190: ...f the MFD or PFD1 and PFD2 are installed in opposite locations for troubleshooting no software or configuration loading is required New or Repaired Display s Installed If a new or repaired GDU is inst...

Page 191: ...files for optional equipment must be loaded in order for the options to be activated 16 Turn off the system and reinsert the supplemental database cards in the bottom slot of each display Be sure to...

Page 192: ...n PFD1 With GIA1 displayed in the Select Unit box press the SET ACTV softkey 3 Press ENT to select OK in the Activate Parameter Settings box 4 Press ENT to select OK when GIA1 configuration is complet...

Page 193: ...units normally acquire a 3D GPS navigation solution within 5 10 minutes of startup provided the aircraft is outside or indoors with a GPS repeater NOTE In some rare instances when the GPS receiver is...

Page 194: ...n on the MFD 7 Repeat steps 5 6 and re transmit while monitoring GPS 2 signal levels on the MFD 8 Repeat steps 4 through 7 for the following frequencies 121 175 MHz 121 200 MHz 131 250 MHz 131 275 MHz...

Page 195: ...ts that were returned for repair as their software and configuration files are deleted during the repair testing process Original GMAs Installed in Opposite Locations for Troubleshooting If the origin...

Page 196: ...for each pilot position Select the audio source corresponding to each installed avionics unit i e NAV1 NAV2 COM1 COM2 and check for audio over the headsets Press the SPKR key and verify that the sele...

Page 197: ...Reinstalled If the original GRS 77 is reinstalled no software loading is required This does not include units that were returned for repair as their software and configuration files are deleted during...

Page 198: ...configuration file loads are complete GMU Software GRS GMU Calibration System Software for certain VLJ aircraft allows valid outputs from the AHRS prior to completion of the AHRS and magnetometer cali...

Page 199: ...nd C are not required and should not be performed on certain aircraft When ready to perform the procedures shut both PFDs and MFD off by pulling the PFD and MFD circuit breakers Restart all displays i...

Page 200: ...None Required Procedure A1 Pitch Roll Offset Calibration Figure 7 3 Pitch Roll Offset This procedure must be performed for both GRS 77 units installed in the aircraft This procedure must be carried o...

Page 201: ...g The result of the pitch roll offset compensation is displayed on the PFD If successful the AHRS records the required pitch and roll offsets informs the operator of a successful conclusion and retur...

Page 202: ...es instructions for calibrating both GRS 77 magnetometer s separately It is acceptable to calibrate both GRS 77 magnetometer s simultaneously This is accomplished by putting both PFD1 and PFD2 in conf...

Page 203: ...instead use outside references to complete the approximate 30 turn Instead of using the PFD instruction to turn as a real time indication of when to turn simply judge the 30 5 turn increments of the a...

Page 204: ...procedure 5 The PFD display instructs the operator to gradually increase power from idle to full throttle and back to idle over a period of 2 4 minutes 6 When the operator has completed the engine ru...

Page 205: ...ly attached to unit g Cabling leading to GRS77 or GMU44 not firmly secured to supporting structure h An engine propeller that is significantly out of balance In some aircraft attempting the engine run...

Page 206: ...7 6 2 This page is protected and requires a keystroke password to perform this test Press the following softkeys in sequence 9 10 11 and 12 3 Select GRS unit and press the ENT key 4 Select MAG INTERFE...

Page 207: ...ts off 3 00 Landing Taxi lights on 3 10 Landing Taxi lights off 3 20 Strobes on 3 30 Strobes off 3 40 Recognition lights on 3 50 Recognition lights off 4 00 Turn on all wing tip lights simultaneously...

Page 208: ...tometer interference test are 1 new equipment is installed in close proximity to the GMU 44 magnetometer and 2 an existing or new electronic device has become grounded through the aircraft structure i...

Page 209: ...does not drop below 50 knots or rise above 450 knots It is acceptable to connect pitot and static ports together using either the pressure control system or external plumbing so long as the leak speci...

Page 210: ...of the GDC 74B selected on the MFD The copilot s display can be ignored After completing the tests specified by 91 411 and Part 43 Appendix E return both the MFD and PFD1 to normal mode NOTE The follo...

Page 211: ...71 Installed If a new or repaired GEA 71 is installed load the following files after removing the Supplemental Database cards from the bottom slots of each display GEA1 Software GEA2 Software GEA1 Co...

Page 212: ...onfiguration loading is complete It contains a FliteChart or Chartview database which is only used in the MFD Reinstall all the cards after the software and configuration file loads are complete GTX1...

Page 213: ...removing the Supplemental Database cards from the bottom slots of each display Note which card was removed from the MFD so it may be identified later for reinsertion in the MFD when software and conf...

Page 214: ...y used by the MFD Reinstall all the cards after the software and configuration file loads are complete GSA Pitch GSA Pitch TR GSA Roll GSA Yaw GSA Pitch Gains GSA Pitch TR Gains GSA Roll Gains GSA Yaw...

Page 215: ...ngagement and the trim wheel should stop moving and rotate freely when moved manually A single disconnect tone will be heard and a flashing amber AP and YD will be visible on the PFD 7 Engage the auto...

Page 216: ...rque settings 3 Apply force to the rudder pedals to determine if the Autopilot clutch can be overpower in yaw If the Autopilot clutch cannot be overpowered check the servo clutch torque settings 4 Act...

Page 217: ...ol wheel begins moving forward 11 Hold the controls and press CWS to re center the command bars and stop control wheel movement 12 With the Autopilot still engaged and the CWS button pressed move the...

Page 218: ...tem Maintenance Manual Rev A 190 00903 00 24 Press the rudder pedals and verify that the yaw servo is resisting movement of the rudder pedals 25 Press the AP DISC button and verify that a flashing yel...

Page 219: ...ting process New or Repaired GCU 475 or GCU 477 Installed If a new or repaired GCU 475 or GCU 477 is installed load the following files after removing the Supplemental Database cards from the bottom s...

Page 220: ...ting process New or Repaired GMC 710 or GMC 715 Installed If a new or repaired GMC 710 or GMC 715 is installed load the following files after removing the Supplemental Database cards from the bottom s...

Page 221: ...for reinsertion in the MFD when software and configuration loading is complete It contains a FliteChart or Chartview database which is only used by the MFD Reinstall all the cards after the software a...

Page 222: ...D press the following softkey sequence 11 11 1 1 2 2 The Radar Trim window will now appear see Figure 7 7 3 Use the FMS knob to highlight and adjust the pitch and roll trim Pitch and roll trim can be...

Page 223: ...iguration mode The System Status Page displays a list of LRUs in the LRU window Figure 8 1 2 Activate the cursor and highlight the LRU window 3 Use the FMS knob to scroll through the list in the windo...

Page 224: ...hroud from the GIA 2 GPS antenna GPS Failure For each of the specified GPS failure conditions the following should remain valid on the PFD throughout the procedure a Attitude and Heading from AHRS b A...

Page 225: ...he following should flag invalid a COM NAV 1 field b NAV 1 CDI loses deviation bar c GIA 2 Power Failure For a GIA 2 failure only the following should flag invalid COM NAV 2 field NAV 2 CDI loses devi...

Page 226: ...n power is removed from PFD2 a PFD2 goes blank b PFD1 and MFD remain in normal display formats The following illuminate on PFD1 HDG NO COMP illuminates on PFD1 ROLL NO COMP illuminates on PFD1 PIT NO...

Page 227: ...S ADC path check 1 Remove power from PFD2 2 Remove power from GIA2 3 Check for desired results 4 Restore power to the PFD and GIA2 The following should occur on the MFD when power is removed from the...

Page 228: ...O FROM flag indications on the CDI Check the VOR accuracy It may be required by the governing regulatory agency to verify operation of the VOR receiver at the extents of a ground facility s service vo...

Page 229: ...is determined by on ground and off ground states within the G1000 When the aircraft is determined to be airborne the timer starts Figure 9 1 Total Time In Service 9 2 MAINTENANCE INTERVALS Refer to t...

Page 230: ...9 Airspeed Function Test GDC 74B PFD Check for correct indication Vertical Speed Indicator GDC 74B PFD Check for correct indication GTX 33 Mode S Transponder Test according to Title 14 CFR 91 411 and...

Page 231: ...o fraying corrosion or other damage exists Replace the cable if the condition is questionable Check the tension of each servo control cable Refer to the OEM Maintenance documentation for cable tension...

Page 232: ...semi automated slip clutch test procedure is to be used as a baseline only Aircraft specific customization will be required based on the actual number and configuration of GSM 85 A gearboxes installe...

Page 233: ...ng CAS messages 5 Select the desired servo on the GFC Status Page 6 Verify that the PFT status field on the GFC Status Page displays PASSED 7 Pin in place the aircraft control to be checked by followi...

Page 234: ...values displayed on the GFC Status Page should not be used to determine whether or not the test passed Only the appearance of the CAS message CLUTCH PIT ROL YAW PASS on the MFD should be relied on as...

Page 235: ...n order to reduce removals Garmin should be contacted to determine if this can be accomplished and if flight test data exists to substantiate such a reduction GSM 85 A Units with Ball Bearing no Idler...

Page 236: ...Upper limit Nominal Slip Clutch Setting 1 181 Lower limit Nominal Slip Clutch Setting 1 036 GSM 85 A Units with Bronze Bearing with Idler Pulley This determination method is applicable to the followin...

Page 237: ...ountered during the control surface travel a Engage the autopilot for the axis which reported torque too high Manually operate the controls and verify that the clutch can be overridden If the clutch c...

Page 238: ...ear troubleshoot the servo and it s wiring for the source of the failure c Repeat test when the source of the servo failure has been corrected LOAD CELL INVALID A special test monitor has detected an...

Page 239: ...stem to the currently approved system software version and configuration following the Long Term Power Interrupt Test 1 Before beginning the Category B Long Term Power Interrupt Annual Inspection Proc...

Page 240: ...on 16 Press the LOAD softkey to load the configuration file Press the ENT key to confirm upload completion 17 Remove the SD card from the PFD 18 Remove power to all GDUs 19 Power on the MFD and PFD in...

Page 241: ...____________________________________________________________________ G1000 System Maintenance Manual Page 9 13 190 00903 00 Rev A Figure 9 5 BKUP CAPS Checkbox on GDU TEST Page...

Page 242: ...____________________________________________________________________ Page 9 14 G1000 System Maintenance Manual Rev A 190 00903 00 Blank Page...

Page 243: ...before loading any software Supplemental data cards left inserted can become corrupt making them unusable Replacing corrupt cards is not covered under warranty 2 Refer to the appropriate OEM maintena...

Page 244: ...ailed or cancelled load could result 10 2 INITIAL G1000 SOFTWARE UPLOAD 1 Select the SYSTEM UPLOAD Page using the FMS knob 2 Activate the cursor and highlight the correct airframe in the AIRFRAME fiel...

Page 245: ...re continuing A table similar to one below can be used as a checklist Check off the items after the correct part number has been confirmed LRU SW OK LRU SW OK PFD1 _______ GTX1 GIA1 _______ PFD2 _____...

Page 246: ..._____________________________________________ Page 10 4 G1000 System Maintenance Manual Rev A 190 00903 00 10 4 FINAL CONFIGURATION ITEMS 10 4 1 Aircraft Registration Number Entry Figure 10 2 Transpon...

Page 247: ...ion number is entered press the ENT key The transponder is configured 5 The transponder then alerts the technician of the completed configuration 6 Press the ENT key on the PFD and deactivate the curs...

Page 248: ...r the applicable situation 2 Ensure that LRU is reporting data on the System Status page LRU is ONLINE Check data path wiring as needed 3 Restart MFD PFD in Configuration Mode and retry configuration...

Page 249: ...top slot of the PFD b PFD and MFD must be powered on c PFD and MFD must have correct software Load Software Configuration files to GIA 63 GIA 63Ws a G1000 SW Loader Card must be inserted in top slot o...

Page 250: ...uired to remain in the display after the update NOTE Do not use supplemental database cards to load the Jeppesen database To update the Jeppesen aviation database 1 With the G1000 system off insert th...

Page 251: ...in the SECTION field 9 Press the LOAD softkey 10 Select YES and press the ENT key to acknowledge the prompt 11 Monitor the status of the upload When the upload is finished press the ENT key to acknow...

Page 252: ...LIZING SYSTEM appear in the upper left corner of the PFD1 release the ENT key 4 Turn the MFD and PFD2 on in the same manner 5 On the PFD1 go to the SYSTEM UPLOAD page using the FMS knob 6 Activate the...

Page 253: ...to the PFD1 2 and MFD to reboot the system 15 Use the FMS Knob to display the AUX System Status Page 16 Activate the cursor and press the DBASE softkey to move the cursor to the Database window Scrol...

Page 254: ...a A supplemental data card is inserted into the bottom card slot of the PFD and MFD Expanded Basemap The expanded Basemap database contains data for the topography and land features such as rivers lak...

Page 255: ...s from both PFD and MFD In some cases it may be necessary to obtain an unlock code from Garmin in order to make the database product functional It may also be necessary to have the system configured b...

Page 256: ...____________________________________________________________________ Page 10 14 G1000 System Maintenance Manual Rev A 190 00903 00 Blank Page...

Page 257: ...n Name I O 1 RESERVED UNSQUELCHED AUDIO TEST 2 RESERVED 3 RESERVED 4 COM MIC KEY In 5 INTERCOM MIC IN HI In 6 INTERCOM MIC IN LO GROUND 7 COM MIC AUDIO IN HI In 8 COM MIC AUDIO IN LO GROUND 9 COM 500...

Page 258: ..._____________________ Page A 2 G1000 System Maintenance Manual Rev A 190 00903 00 Connector P601 continued 34 RESERVED 35 RESERVED 36 RESERVED 37 RESERVED 38 RESERVED 39 RESERVED 40 RESERVED 41 RESERV...

Page 259: ...TOR H GROUND 11 VOR OBS STATOR E VOR LOC COMMON 12 VOR OBS STATOR F In 13 VOR OBS STATOR D In 14 VOR OBS STATOR G VOR LOC COMMON 15 VOR LOC SUPERFLAG Out 16 VOR LOC 500 AUDIO OUT HI Out 17 VOR LOC 500...

Page 260: ...50 KHZ Out 44 SPARE 45 PARALLEL DME 1 MHZ A Out 46 PARALLEL DME 1 MHZ B Out 47 PARALLEL DME 1 MHZ C Out 48 RESERVED 49 SIGNAL GROUND 50 RESERVED 51 SPARE 52 SPARE 53 GLIDESLOPE FLAG GLIDESLOPE COMMON...

Page 261: ...485 4 B I O 8 MAIN ARINC 429 IN 3 A In 9 MAIN ARINC 429 IN 3 B In 10 MAIN ARINC 429 IN 4 A In 11 MAIN ARINC 429 IN 4 B In 12 MAIN ARINC 429 IN 5 A In 13 MAIN ARINC 429 IN 5 B In 14 MAIN ARINC 429 IN...

Page 262: ...0 MAIN RS 232 IN 4 In 51 SIGNAL GROUND 52 MAIN RS 232 OUT 4 Out 53 MAIN RS 232 IN 5 In 54 SIGNAL GROUND 55 MAIN RS 232 OUT 5 Out 56 MAIN RS 232 IN 6 In 57 SIGNAL GROUND 58 MAIN RS 232 OUT 6 Out 59 MAI...

Page 263: ...0 DISCRETE IN 15 In 11 AFCS DISCONNECT IN In 12 DISCRETE IN 4 In 13 DISCRETE IN 5 In 14 DISCRETE IN 6 In 15 DISCRETE IN 16 In 16 DISCRETE IN 17 In 17 DISCRETE IN 7 In 18 DISCRETE IN 8 In 19 DISCRETE I...

Page 264: ...DIRECTOR PITCH DOWN In 10 FLIGHT DIRECTOR ROLL RIGHT In 11 FLIGHT DIRECTOR ROLL LEFT In 12 DISCRETE IN 19A In 13 POTENTIOMETER SIGNAL IN In 14 POTENTIOMETER REF IN HI In 15 POTENTIOMETER REF IN LO In...

Page 265: ...11A In 50 DISCRETE IN 21A In 51 DISCRETE IN 22A In 52 DISCRETE IN 12A In 53 DISCRETE IN 13A In 54 DISCRETE IN 14A In 55 DISCRETE IN 15A In 56 OUTER MARKER LAMP IN In 57 MIDDLE MARKER LAMP IN In 58 AI...

Page 266: ...RO REF LO In 3 26 VAC ADF REF HI In 4 26 VAC ADF REF LO In 5 26 VAC AFCS REF HI In 6 26 VAC AFCS REF LO In 7 DIRECTIONAL GYRO MOTOR A In 8 DIRECTIONAL GYRO MOTOR B In 9 SIGNAL GROUND 10 ADF X COS In 1...

Page 267: ...ATUM LO GROUND Out 50 SIGNAL GROUND 51 26 VAC DIRECTIONAL GYRO REF HI In 52 26 VAC DIRECTIONAL GYRO REF LO In 53 REMOTE ANNUNCIATE CLOCK In 54 REMOTE ANNUNCIATE DATA In 55 REMOTE ANNUNCIATE SYNC In 56...

Page 268: ...t 7 ETHERNET OUT 2 B Out 8 ETHERNET IN 2 A In 9 ETHERNET IN 2 B In 10 ETHERNET OUT 3 A Out 11 ETHERNET OUT 3 B Out 12 ETHERNET IN 3 A In 13 ETHERNET IN 3 B In 14 FAN MONITOR VALID In 15 REVERSIONARY M...

Page 269: ...CLOCK Out 44 RS 232 OUT 1 Out 45 RS 232 IN 1 In 46 RS 232 OUT 2 Out 47 RS 232 IN 2 In 48 RESERVED 49 RESERVED 50 RESERVED 51 RESERVED 52 UNIT 1 REMOTE POWER OFF Out 53 RESERVED 54 DEMO MODE SELECT In...

Page 270: ...Out 11 GPS 1 RS 232 IN In 12 ARINC 429 OUT 3 A Out 13 ARINC 429 OUT 2 A Out 14 ARINC 429 OUT 1 A Out 15 ARINC 429 IN 1 A In 16 CONFIG MODULE DATA I O 17 CONFIG MODULE POWER OUT Out 18 AIRCRAFT POWER 1...

Page 271: ...G1000 System Maintenance Manual Page A 15 190 00903 00 Rev A A 9 P441 GMU 44 View of J441 connector looking at pigtail Pin Pin Name I O 1 SIGNAL GROUND 2 RS 485 OUT B Out 3 SIGNAL GROUND 4 RS 485 OUT...

Page 272: ...t 3 OAT PROBE IN HI In 4 OAT PROBE IN LO In 5 SIGNAL GROUND 6 ADC SYSTEM ID PROGRAM 1 In 7 SIGNAL GROUND 8 DISCRETE IN 6 In 9 SIGNAL GROUND 10 RS 232 IN 1 In 11 RS 232 OUT 1 Out 12 SIGNAL GROUND 13 RS...

Page 273: ...Out 48 ARINC 429 OUT 3 B Out 49 SIGNAL GROUND 50 DISCRETE IN 7 In 51 SIGNAL GROUND 52 DISCRETE IN 8 In 53 SIGNAL GROUND 54 SPARE 55 AIRCRAFT POWER 1 In 56 SPARE 57 SPARE 58 AIRCRAFT POWER 2 In 59 SPA...

Page 274: ...RAM 2 In 11 TRANSDUCER POWER OUT LO GROUND 12 TRANSDUCER POWER OUT LO GROUND 13 TRANSDUCER POWER OUT LO GROUND 14 10 VDC TRANSDUCER POWER OUT Out 15 5 VDC TRANSDUCER POWER OUT Out 16 12 VDC TRANSDUCER...

Page 275: ...n 52 ENGINE TEMP ANALOG IN 9 HI In 53 ENGINE TEMP ANALOG IN 9 LO In 54 ENGINE TEMP ANALOG IN 10 HI In 55 ENGINE TEMP ANALOG IN 10 LO In 56 ENGINE TEMP ANALOG IN 11 HI In 57 ENGINE TEMP ANALOG IN 11 LO...

Page 276: ...CIATE 7A Out 8 ANNUNCIATE 8A Out 9 ANNUNCIATE 9A Out 10 ANNUNCIATE 10A Out 11 TRANSDUCER POWER OUT LO GROUND 12 TRANSDUCER POWER OUT LO GROUND 13 TRANSDUCER POWER OUT LO GROUND 14 10 VDC TRANSDUCER PO...

Page 277: ...ENT MONITOR IN 3A LO In 50 ANALOG CURRENT MONITOR IN 4A HI In 51 ANALOG CURRENT MONITOR IN 4A LO In 52 ANALOG IN 1A HI In 53 ANALOG IN 1A LO In 54 ANALOG IN 2A HI In 55 ANALOG IN 2A LO In 56 ANALOG IN...

Page 278: ...DE COM AUDIO LO I O 9 PILOT HEADSET AUDIO OUT LEFT Out 10 PILOT HEADSET AUDIO OUT RIGHT Out 11 PILOT HEADSET AUDIO OUT LO Out 12 CROSS SIDE COM AUDIO IN HI In 13 CROSS SIDE COM AUDIO LO I O 14 CROSS S...

Page 279: ...In 52 COPILOT ICS KEY In 53 COCKPIT VOICE RECORDER LO Out 54 ALTITUDE WARN AUDIO IN HI In 55 ALTITUDE WARN AUDIO IN LO In 56 MUSIC IN 2 LEFT In 57 MUSIC IN 2 RIGHT In 58 COM 3 AUDIO IN HI In 59 COM 3...

Page 280: ...DE COM MIC DIGITAL AUDIO OUT Out 9 ON SIDE COM DIGITAL AUDIO IN In 10 ANALOG INSTALLATION SELECT In 11 PROGRAM GROUND 12 VOICE ALERT 1 SELECT HI In 13 VOICE ALERT 2 SELECT HI In 14 POWER GROUND 15 COM...

Page 281: ...CLOCK IN In 51 14 V LIGHTING HI In 52 28 V LIGHTING HI In 53 AIRCRAFT POWER 1 In 54 VOICE ALERT 5 SELECT HI In 55 AIRCRAFT POWER 1 In 56 REVERSIONARY MODE 2 Out 57 REVERSIONARY MODE COMMON 2 Out 58 D...

Page 282: ...DE B2 In 10 ALTITUDE B4 In 11 ALTITUDE D4 In 12 EXTERNAL IDENT SELECT In 13 EXTERNAL STANDBY SELECT In 14 NOT USED In 15 AUDIO OUT HI Out 16 AUDIO OUT LO Out 17 SQUAT SWITCH IN In 18 RESERVED 19 ALTIT...

Page 283: ...ND 44 CURRENT TEMPERATURE PROBE IN In 45 NOT USED In 46 XPDR SYSTEM ID PROGRAM In 47 AUDIO MUTE SELECT In 48 ARINC 429 IN 4 A In 49 ARINC 429 IN 4 B In 50 ALTITUDE COMMON GROUND In 51 SIGNAL GROUND 52...

Page 284: ...IN 2 In 6 RS 232 IN 3 In 7 RS 232 IN 1 In 8 RS 232 OUT 1 Out 9 DATA LINK SYSTEM ID PROGRAM 1 In 10 DATA LINK SYSTEM ID PROGRAM 2 In 11 SIGNAL GROUND 12 SPARE 13 SIGNAL GROUND 14 SPARE 15 SPARE 16 SPAR...

Page 285: ...Out 55 SPARE 56 ETHERNET IN 4 B In 57 ETHERNET IN 4 A In 58 ETHERNET OUT 4 B Out 59 ETHERNET OUT 4 A Out 60 CONFIG MODULE CLOCK Out 61 AUDIO SUPPRESSION HI 1 62 AUDIO SUPPRESSION HI 2 63 AUDIO SUPPRES...

Page 286: ...GSA 81 View of J801 connector looking at unit Pin Pin Name I O A SPARE B SPARE C SPARE D SPARE E RS 485 2 B I O F SERVO PROGRAM 3 In G SERVO PROGRAM 2 In H SERVO PROGRAM 1 In J RS 485 1 A I O K SPARE...

Page 287: ...THERNET OUT 2 A Out 10 ETHERNET IN 3 B In 11 ETHERNET IN 3 A In 12 ETHERNET OUT 3 B Out 13 ETHERNET OUT 3 A Out 14 ETHERNET IN 4 B In 15 ETHERNET IN 4 A In 16 ETHERNET OUT 4 B Out 17 ETHERNET OUT 4 A...

Page 288: ...SCRETE IN 14 In 55 DISCRETE IN 15 In 56 DISCRETE IN 16 In 57 DISCRETE IN 17 In 58 DISCRETE IN 18 In 59 DISCRETE IN 19 In 60 RESERVED 61 DISCRETE IN 20 In 62 DISCRETE IN 21 In 63 DISCRETE IN 22 In 64 D...

Page 289: ...422 5 A I O 10 MAIN2 RS 485 RS 422 5 B I O 11 MAIN2 RS 485 RS 422 6 A I O 12 MAIN2 RS 485 RS 422 6 B I O 13 MAIN2 RS 485 RS 422 7 A I O 14 MAIN2 RS 485 RS 422 7 B I O 15 MAIN2 RS 485 RS 422 8 A I O 1...

Page 290: ...AIN2 ARINC 429 IN 3 A In 56 MAIN2 ARINC 429 IN 3 B In 57 MAIN2 ARINC 429 IN 4 A In 58 MAIN2 ARINC 429 IN 4 B In 59 DISCRETE IN 16A In 60 MAIN2 ARINC 429 IN 5 A In 61 MAIN2 ARINC 429 IN 5 B In 62 MAIN2...

Reviews: