1. INSTALLATION
1-2
2. Make four pilot holes for self-tapping screws (diameter: 5 mm) in the location in-
dicated in the illustration on "Flush Mount" on page 1-1.
3. Insert the sponge to the display unit from the rear side.
4. Set the display unit to the cutout and fasten the display unit with four self-tapping
screws (5x20).
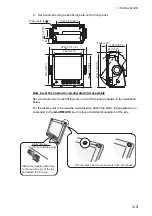
5. Set a cosmetic cap to each fixing hole on the front panel. See page 1-3.
Desktop or table underside mount
The display unit can be mounted on a desktop or on the underside of a table using the
optional hanger. See the outline drawing for details.
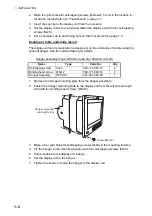
Hanger assembly (Type: OP26-8, Code No.: 000-016-313-00)
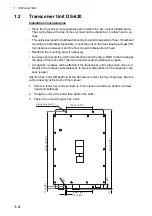
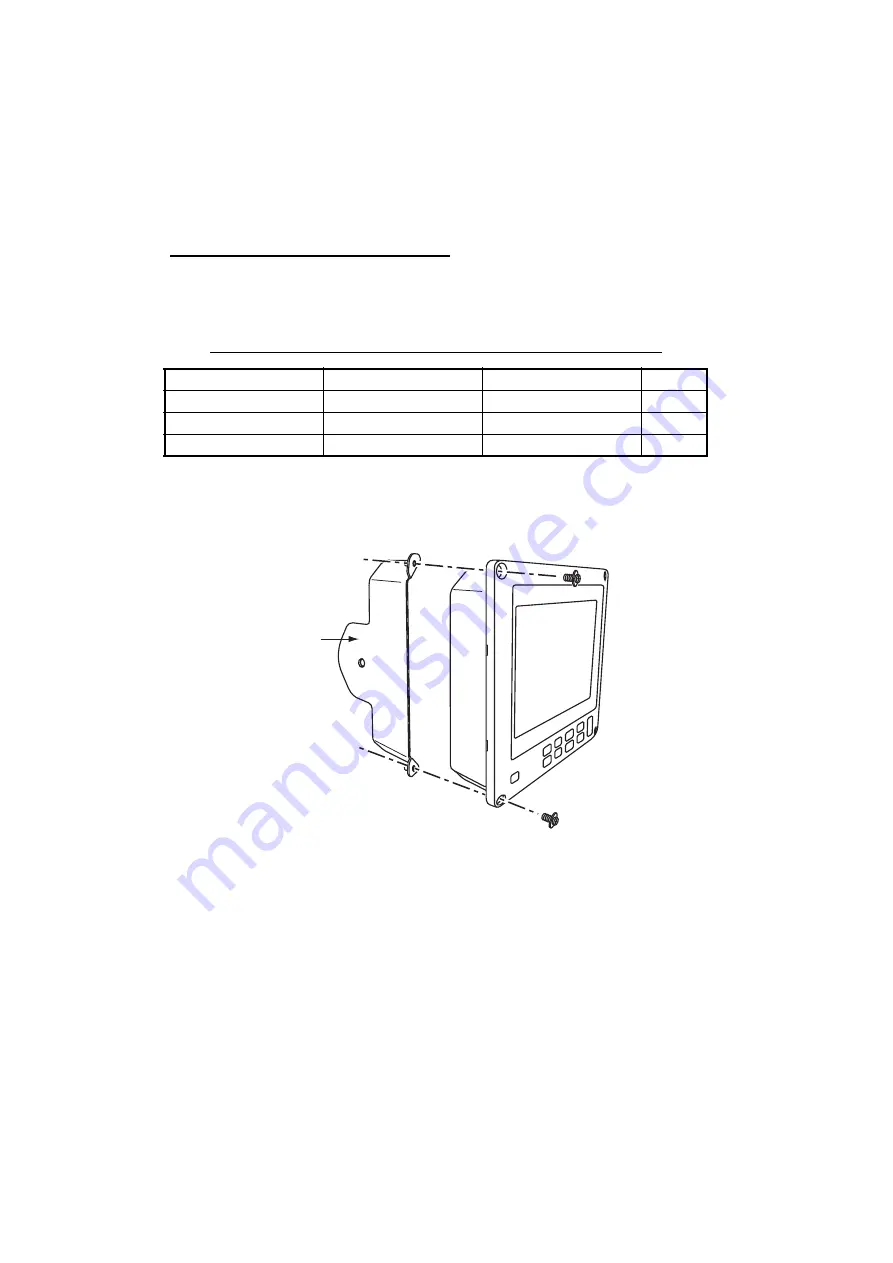
1. Remove the hanger mounting plate from the hanger assembly.
2. Fasten the hanger mounting plate to the display unit from the left side and right
side with four binding head screws (M5x12).
3. Make a four pilot holes for self-tapping screws (5x20) in the mounting location.
4. Fix the hanger to the mounting location with four self-tapping screws (5x20).
5. Screw knobs into the display unit loosely.
6. Set the display unit to the hanger.
7. Tighten the knobs to fasten the hanger to the display unit.
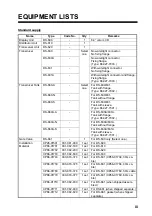
Name
Type
Code No.
Qty
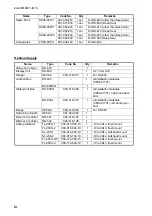
Self-tapping screw
5x20
000-171-997-10
4
Binding head screw
M5x12
000-171-999-10
4
Hanger Assembly
OP26-8-1
001-081-920-00
1
Screw (M5x12)
Hanger mounting
plate (left side)
Summary of Contents for DS-60
Page 51: ...APPENDIX 1 CALIBRATION AP 3 ...
Page 59: ...8 Mar 2010 Y NISHIYAMA D 1 ...
Page 60: ...18 Dec 2012 Y NISHIYAMA D 2 ...
Page 61: ...18 Dec 2012 Y NISHIYAMA D 3 ...
Page 62: ...D 4 30 Jun 2015 H MAKI ...
Page 63: ...D 5 30 Jun 2015 H MAKI ...
Page 64: ...1 Jul 2011 Y NISHIYAMA D 6 ...
Page 65: ...29 Mar 2011 Y NISHIYAMA D 7 ...
Page 66: ...29 Mar 2011 Y NISHIYAMA D 8 ...
Page 67: ...D 9 30 Jun 2015 H MAKI ...
Page 68: ...D 10 30 Jun 2015 H MAKI ...
Page 69: ...D 11 15 Apr 2016 H MAKI ...
Page 70: ...D 12 15 Apr 2016 H MAKI ...
Page 71: ...D 13 15 Apr 2016 H MAKI ...
Page 72: ...D 14 15 May 2015 H MAKI ...


