background image

2

EN

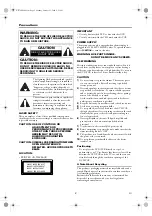
Precautions

.

LASER SAFETY

This unit employs a laser. Only a qualified service person 
should remove the cover or attempt to service this device, due 
to possible eye injury. 

CAUTION: USE OF CONTROLS OR 

ADJUSTMENTS OR 
PERFORMANCE OF PROCEDURES 
OTHER THAN THOSE SPECIFIED 
HEREIN MAY RESULT IN 
HAZARDOUS RADIATION 
EXPOSURE.

CAUTION: VISIBLE LASER RADIATION WHEN 

OPEN AND INTERLOCK 
DEFEATED. AVOID EXPOSURE TO 
BEAM.

LOCATION:

• PRINTED ON THE BACK

IMPORTANT

• Use only discs marked DVD or disc with this DVD.
• Use only cassettes with the VHS mark with this VCR.

POWER SUPPLY

The main power supply is engaged when the main plug is 
plugged in a 220-240V, 50Hz AC outlet. To operate the unit, 
press 

FUNCTION

 to turn on the unit.

WARNING: LIVE PARTS INSIDE. 

DO NOT REMOVE ANY SCREWS.

DEW WARNING

Moisture condensation may occur inside the unit when it is 
moved from a cold place to a warm place, or after heating a 
cold room or under conditions of high humidity. Do not use 
the DVD/VCR at least for 2 hours until its inside is dry.

CAUTION

1)

Do not attempt to open the cabinet. There are no parts 
you can service inside. Refer all servicing to qualified 
service personnel.

2)

Slots and openings in the cabinet and the sides or bottom 
are provided for ventilation. To ensure reliable operation 
and to protect the unit from overheating, these openings 
must not be blocked or covered.
Avoid installation in enclosed spaces such as bookcases 
unless proper ventilation is provided.

3)

Keep the unit away from radiators and other heat sources.

4)

Avoid use near strong magnetic fields.

5)

Do not push objects of any kind into the DVD/VCR 
through the cabinet slots or openings as they could touch 
electrically live parts or short circuit parts resulting in a 
fire or electric shock.

6)

Never spill liquid on this unit. If liquid is spilled and 
penetrates into the unit, consult qualified service 
personnel.

7)

Use this unit in a horizontal (flat) position only.

8)

Before attempting to operate the unit, make sure that the 
timer recording mode is “OFF”.

9)

This product is in Stand-by mode when it turns off while 
the power cord is connected.

10)

Do not place any combustible objects on the device 
(candles, etc.).

Positioning

• Do not place the DVD/VCR directly on top of, or 

underneath, your TV set. Ensure that there is at least 20 cm 
between the DVD/VCR and the TV set, and that air can 
circulate freely through the ventilation openings of the 
DVD/VCR.

A Note About Recycling

This product’s packaging materials are recyclable and can be 
reused. Please dispose of any materials in accordance with your 
local recycling regulations.
Batteries should never be thrown away or incinerated but 
disposed of in accordance with your local regulations 
concerning chemical wastes.

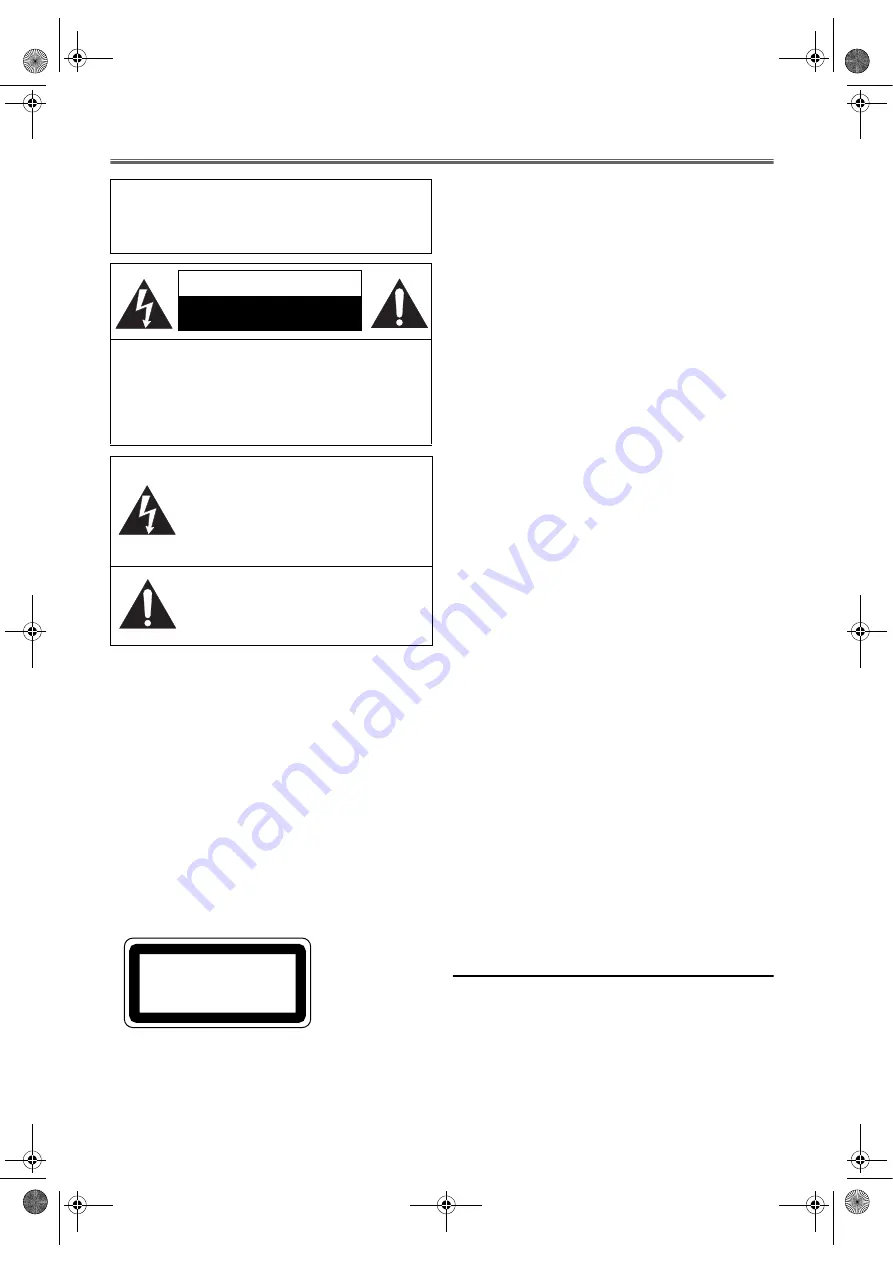
WARNING:

TO REDUCE THE RISK OF FIRE OR ELECTRIC 
SHOCK, DO NOT EXPOSE THIS APPLIANCE 
TO RAIN OR MOISTURE.

CAUTION:

TO REDUCE THE RISK OF ELECTRIC SHOCK, 
DO NOT REMOVE COVER (OR BACK). NO 
USER SERVICEABLE PARTS INSIDE. REFER 
SERVICING TO QUALIFIED SERVICE 
PERSONNEL.

The lightning flash with arrowhead symbol, 
within an equilateral triangle, is intended to 
alert the user to the presence of uninsulated 
“dangerous voltage” within the product’s 
enclosure that may be of sufficient magnitude 
to constitute a risk of electric shock to 
persons.

The exclamation point within an equilateral 
triangle is intended to alert the user to the 
presence of important operating and 
maintenance (servicing) instructions in the 
literature accompanying the appliance.

CAUTION

RISK OF ELECTRIC SHOCK 

DO NOT OPEN

CLASS 1 LASER PRODUCT
KLASSE 1 LASER PRODUKT
KLASS 1 LASER APPARAT
CLASSE 1 PRODUIT LASER

H9779ED(EN).fm  Page 2  Monday, October 25, 2004  4:21 PM

Summary of Contents for DDVR-5505V

Page 1: ...various drivers manuals software etc are available for free download 3 Before calling please have valid proof of purchase model type serial number and a precise description of the problem ready Servi...

Page 2: ...in a fire or electric shock 6 Never spill liquid on this unit If liquid is spilled and penetrates into the unit consult qualified service personnel 7 Use this unit in a horizontal flat position only 8...

Page 3: ...R6 AA batteries RF cable Scart cable Owner s Manual Timer Recording 15 Auto Return 16 Quick Find 16 Index Search 16 Time Search 16 Copying a Video Tape 17 Status Display 17 DVD Operation 18 Basic Pla...

Page 4: ...sound recorded on the high density Super Audio CD layer cannot be delivered Any other discs without compatibility indications Important Copyright Information DVD Unauthorized copying broadcasting publ...

Page 5: ...ck Press and hold this button for 1 5 seconds or more to search backward through the disc 15 CHANNEL VCR To change TV channels To adjust the tracking manually during playback 16 Remote Sensor 17 TIMER...

Page 6: ...tions 23 g To search forward through the disc DVD To fast forward the tape VCR 24 PLAY To begin playback 25 DVD Press this button before using the remote control for DVD features 26 PAUSE To pause pla...

Page 7: ...our TV conforms to RGB input signal the Euro AV scart connection ensures you the best picture and audio quality However if your TV does not conform to RGB input signal the S VIDEO OUT and ANALOG AUDIO...

Page 8: ...ows you to enjoy the surround sound while producing the effecting of being in a movie theater or a concert hall If output is Dolby Digital encoded audio connect to a Dolby Digital decoder and set DOLB...

Page 9: ...Use the remote control for this procedure 1 Press VCR then MENU 2 Press K or L to select INITIAL then press B 3 Press K or L to select LANGUAGE then press B 4 Press K or L repeatedly to select your d...

Page 10: ...ned channels Use the Manual channel presetting function to tune in the additional channels you require Manual Channel Preset Each channel is tuned manually and individually Follow the steps laid out i...

Page 11: ...essing CH K L Use the remote control for this procedure 1 Press VCR then MENU 2 Press K or L to select INITIAL then press B 3 Press K or L to select CH TUNING then press B 4 Press K or L to select MAN...

Page 12: ...tch to VCR mode 3 If playback does not start automatically press VCR then press PLAY Tracking adjustment will be activated automatically Digital Tracking function when you start playback To adjust the...

Page 13: ...number buttons or CH K L to select the channel to be recorded 3 Press SPEED SYSTEM to select the tape speed SP LP 4 Press REC OTR to begin recording The REC indicator on the front panel comes on 5 Pre...

Page 14: ...B 3 Press K or L to select AUTO REPEAT 4 Press B so that ON appears next to AUTO REPEAT on the TV screen When in Stop mode Auto Repeat mode will start automatically If the on screen menu still remains...

Page 15: ...atedly until the relevant end hour appears Next enter the minute digit 8 Press K or L repeatedly until the relevant channel number appears 9 Press K or L repeatedly until the desired tape speed appear...

Page 16: ...d if PAUSE is pressed and released during recording The time gap between index marks on the tape should be greater than 1 minute for SP recording and 2 minutes for LP recording Use the remote control...

Page 17: ...ate copyright laws and may not record clearly Status Display To check the Counter or Clock Channel number press DISPLAY Each time you press DISPLAY TV screen will change as illustrated When you select...

Page 18: ...deliver the picture or the sound This is not a malfunction Disc Menus 1 Press MENU The DVD main menu will appear 2 If the feature is not available symbol may appear on the TV screen 3 If disc menu is...

Page 19: ...Refer to page 24 Fast Forward Reverse Search 1 During playback press g or h repeatedly to select the required forward or reverse speed For DVDs and Video CDs fast forward or reverse search speed is d...

Page 20: ...d angle will be displayed on the display bar at the top of the screen 2 Press ANGLE repeatedly to select your desired angle Note If the ANGLE ICON setting is OFF in the DISPLAY menu the icon will not...

Page 21: ..._ _ _ _ _ _ _ appears in the display 3 When you reach the desired point press ENTER The Title or Track and elapsed time will appear on the TV screen 4 To return to a marker later press SEARCH MODE re...

Page 22: ...creen 2 Press PLAY to start random playback Note If you like to repeat the current track in the random selections press REPEAT repeatedly until TRACK appears during playback If you like to repeat the...

Page 23: ...ting Choose the appropriate audio settings for your equipment It only affects during the playback of DVDs 1 Press SETUP in Stop mode 2 Press s or B to select CUSTOM then press ENTER CUSTOM mode screen...

Page 24: ...R repeatedlly to select PAL or AUTO The default setting is AUTO Parental Control Parental Control limits the DVD viewing that exceeds your settings The password is required to change the PARENTAL LEVE...

Page 25: ...Malayalam 5958 Maltese 5966 Maori 5955 Marathi 5964 Moldavian 5961 Mongolian 5960 Nauru 6047 Nepali 6051 Norwegian NOR 6061 O R Occitan 6149 Oriya 6164 Oromo Afan 6159 Panjabi 6247 Pashto Pushto 6265...

Page 26: ...remote control Aim the remote control directly at the sensor on the front panel Reduce the distance to this unit Replace the batteries in the remote control Re insert the batteries with their polarit...

Page 27: ...ntistatic spray intended for analogue records Cleaning the disc lens After prolonged use dirt or dust may accumulate at the disc lens To ensure good playback quality clean the disc lens with CD Lens C...

Page 28: ...irective 89 336 EEC Low Voltage Directive 73 23 EEC CE Marking 93 68 EEC We declare that the following product DVD VCR Model DDVR 5505V Trade Name Funai is in compliance with following Regulations EN...

Reviews: