


124
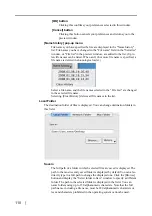
4. Click the [OK] button.
⇒
The "Scan to E-mail - Options" window is closed.
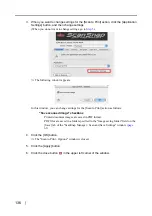
5. Click the [Apply] button.
6. Click the close button
in the upper left corner of the window.
⇒
The "ScanSnap Manager - Scan and Save Settings" window closes.
Operation
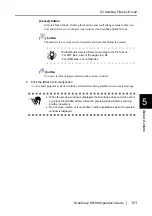
7. Load the document onto the ScanSnap.
8. Press the [SCAN] button
.
⇒
Scanning is started.
⇒
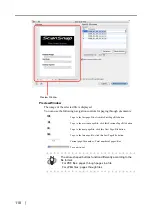
When scanning is complete, a preview window appears.
(You can change settings not to display a preview window.)
Operation
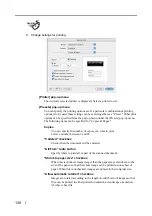
9. Verify a scanned image in the preview window.
You can also change file names and specify whether to save files sent by e-mail.
Window size is scaled up or down by dragging the lower right corner of the window with the
mouse cursor. The previewed image is also scaled up or down according to the window size.
HINT
•
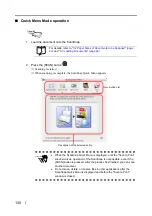
To start scanning right after selecting the profile, press the [SCAN]
button on the ScanSnap. Doing so also closes the "ScanSnap Manager
- Scan and Save Settings."
•
Changes you have made in the above procedure take effect from the
next time you scan documents using the profile.
For details on how to change settings, refer to
.
•
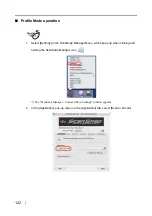
"Scan to E-mail" profile can be selected by selecting "Scan to E-mail" in
the "Select a Profile" window which pops up when clicking the ScanSnap
Manager icon
.
For details, refer to
"3.2 Paper Sizes of Documents to be Scanned" (page
Summary of Contents for S510M - ScanSnap - Document Scanner
Page 1: ...P3PC 1942 03ENZ0 ...
Page 2: ......
Page 22: ...xx ...
Page 46: ...24 ...
Page 108: ...86 4 When you finish changing the settings for the selected profile click the Apply button ...
Page 216: ...194 ...
Page 254: ...232 ...
Page 258: ...236 ...
Page 260: ...238 ...
Page 262: ...240 ...
Page 266: ...244 ...


