


312
Upgrade and Maintenance Manual
TX140
S2
Cabling
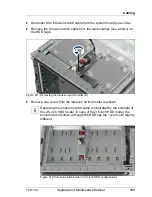
Figure 215: Installing the intrusion switch cable (A)
Ê
Place the new intrusion switch holder on the HDD bay top cover as shown
(1).
Ê
Slide the intrusion switch holder under the front chassis rim as far as it will
go (2).
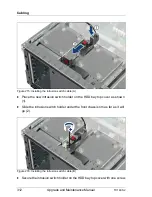
Figure 216: Installing the intrusion switch cable (B)
Ê
Secure the intrusion switch holder on the HDD bay top cover with one screw.
Summary of Contents for PRIMERGY TX140 S2
Page 30: ...30 Upgrade and Maintenance Manual TX140 S2 Before you start ...
Page 98: ...98 Upgrade and Maintenance Manual TX140 S2 Basic software procedures ...
Page 120: ...120 Upgrade and Maintenance Manual TX140 S2 Power supply ...
Page 148: ...148 Upgrade and Maintenance Manual TX140 S2 Hard disk drives solid state drives ...
Page 158: ...158 Upgrade and Maintenance Manual TX140 S2 System fan and air duct ...
Page 208: ...208 Upgrade and Maintenance Manual TX140 S2 Expansion cards and backup units ...
Page 216: ...216 Upgrade and Maintenance Manual TX140 S2 Main memory ...
Page 314: ...314 Upgrade and Maintenance Manual TX140 S2 Cabling ...
Page 332: ...332 Upgrade and Maintenance Manual TX140 S2 Appendix ...