42
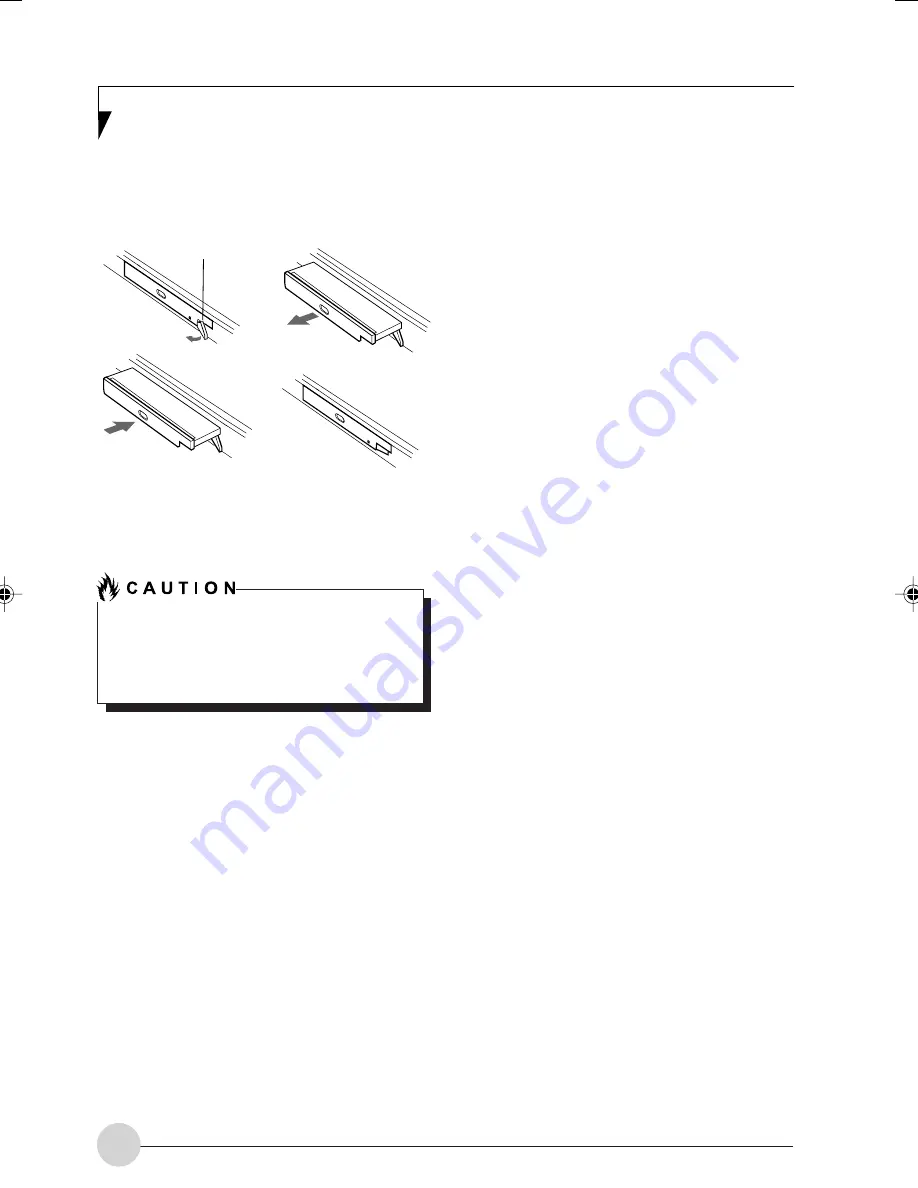
(a)
(b)
(d)
(c)
4. Slide your device out until it is clear of the bay.
This will require light force.
Figure 4-7 Removing/Installing a device in the
Modular Bay
You should never leave your Modular Bay
empty when the tablet is in operation. If left
empty, dust or foreign matter may
accumulate inside the tablet.
5. Slide the device you are installing into your
tablet until it clicks into place.
6. It is now safe to turn your tablet back on.
7. You can now access and use the device.
Your Tablet PC will automatically detect the new
device and activate it within your system. The
drive letters associated with the device will be
created and listed under My Computer and
Windows Explorer.
Hot-swapping
Hot-swapping is provided through the Unplug or
Eject Hardware utility. The icon for the utility
appears on the taskbar. Click on the icon and
follow the on-screen instructions.
Modular Bay
Eject Lever
LB_Soriel 06 (33-42)
26/11/04, 3:34 PM
42
Summary of Contents for LIFEBOOK T Series
Page 10: ...1 Preface 1 ...
Page 11: ...2 ...
Page 13: ...4 ...
Page 14: ...5 Getting to Know Your Tablet PC 2 ...
Page 15: ...6 ...
Page 34: ...Using Your Tablet PC 25 UsingYour Tablet PC 3 ...
Page 35: ...26 ...
Page 41: ...32 ...
Page 42: ...User Installable Features 33 User Installable Features 4 ...
Page 43: ...34 ...
Page 52: ...43 Troubleshooting 5 ...
Page 53: ...44 ...
Page 70: ...1 前言 1 ...
Page 71: ...2 ...
Page 73: ...4 ...
Page 74: ...5 筆記本概述 2 ...
Page 75: ...6 ...
Page 94: ...使用 Tablet PC 25 使用 Tablet PC 3 ...
Page 95: ...26 ...
Page 101: ...32 ...
Page 102: ...用戶自行安裝功能 33 用戶自行安裝功能 4 ...
Page 103: ...34 ...
Page 112: ...43 故障排除 5 ...
Page 113: ...44 ...
Page 130: ...1 前言 1 ...
Page 131: ...2 ...
Page 133: ...4 ...
Page 134: ...5 筆記本概述 2 ...
Page 135: ...6 ...
Page 154: ...使用 Tablet PC 25 使用 Tablet PC 3 ...
Page 155: ...26 ...
Page 161: ...32 ...
Page 162: ...用戶自行安裝功能 33 用戶自行安裝功能 4 ...
Page 163: ...34 ...
Page 172: ...43 故障排除 5 ...
Page 173: ...44 ...


