7.2 Paper jam in the paper processor section
7 – 30
33.
Check the processing racks.
Check the following items.
• Guide which is distorted or comes in contact with the roller
• Detached spring
• Loose screw
• Damaged or deformed roller
• Worn gear
• Detached C-ring
• Torn and scratched lower turn belt
I
MPORTANT
• If the processing rack lower turn belt is damaged, replace it.
• For details, see
☞
Maintenance Manual 11.3 Replacing the lower turn belt.
If there is any damage, consult your technical representative.
34.
Remove paper if it is in the processing tank.
35.
Attach the processing racks and secure them with the rack stopper.
I
MPORTANT
• Dry the processing racks before attaching. If the processing racks with excessive moisture are
attached, the processing solutions are diluted and it may adversely affect print quality.
• Slowly remove and attach the processing racks. If they are removed and attached roughly, solutions
in the tanks may splash.
• If the processing racks are not fixed with the rack stoppers, paper jam or other troubles may occur.
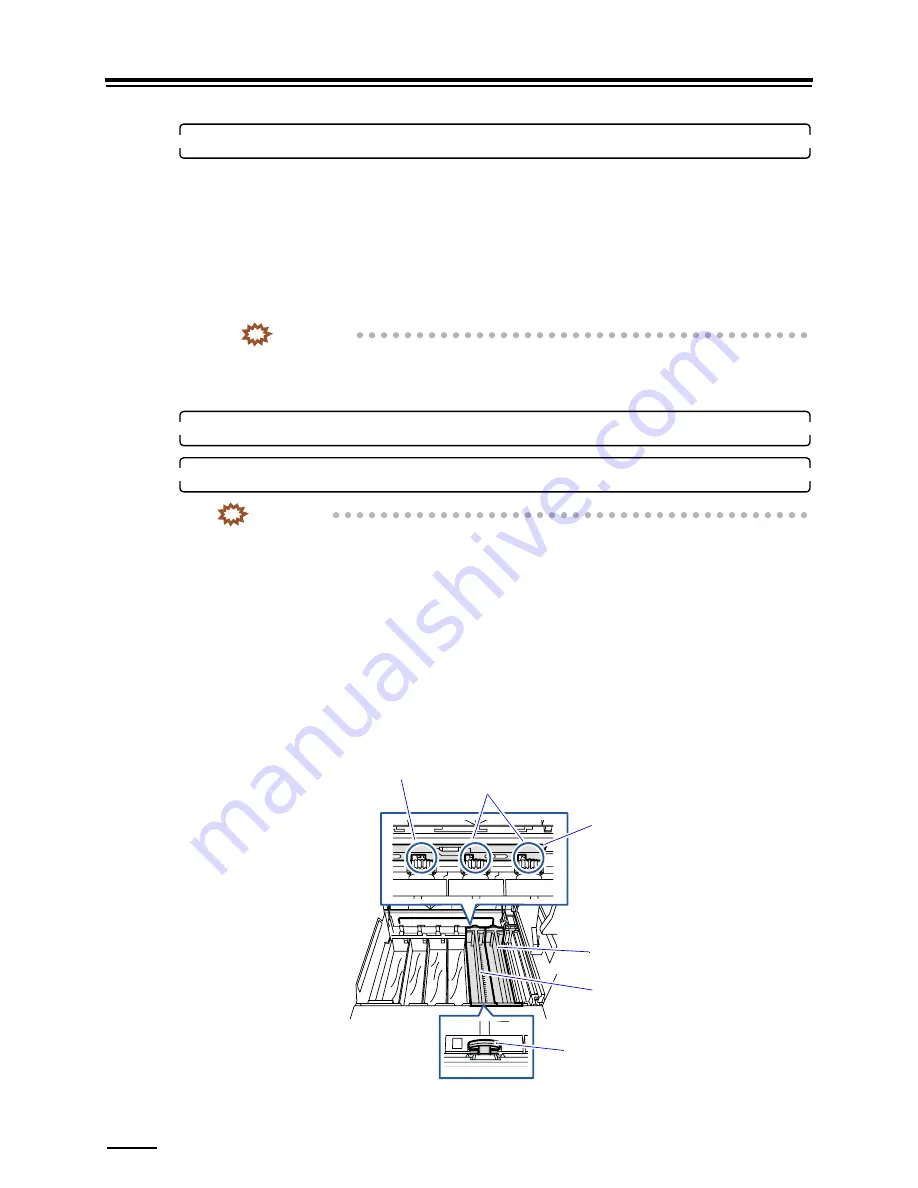
The processing racks in the processing solution tank will float to the surface. Therefore, you need to push them
down into the solution and secure them with the rack stopper (far). As all the processing racks cannot be pushed at
the same time, attach them by two by following the steps below.
(1)
Attach processing racks Nos. 6 and 5 into the tank and secure them with the rack stopper (near).
(2)
Push processing racks Nos. 6 and 5 down into the solution and move the rack stopper (far) slightly to
the left to secure them.
At this time, the rack stopper is released for processing racks Nos. 1 to 4.
(3)
Attach processing racks Nos. 4 and 3 into the tank and secure them with the rack stopper (near).
Secured
Released
Processing rack (No. 6)
Rack stopper (rear)
Processing rack (No. 5)
Rack stopper (near)
G069732
Summary of Contents for Frontier LP7500
Page 2: ......
Page 22: ...1 3 Safety precautions for operation 1 10 3 4 5 LP7500 7600 7700 7900 ...
Page 25: ...2 2 1 2 Getting Started This chapter explains each part name and paper advance path ...
Page 33: ...3 3 1 3 Turning power on off This chapter explains how to start and close down the system ...
Page 120: ...This page is intentionally blank ...
Page 160: ...This page is intentionally blank ...
Page 164: ...This page is intentionally blank ...


