3.2 Closing down the system
3 – 7
3.
T
u
rni
n
g pow
er
on
/off
3.2 Closing down the system
The way of closing down the system depends on how you want to start it next time.
To close down the system with the reasons below, refer to each reference.
"
Closing down the system due to an attention or error message
• See
☞
7.1.1 Turning off the power supply for troubleshooting.
"
Closing down the system in an emergency
• See
☞
7.1.4 Turning off the power supply in an emergency.
3.2.1 Closing down the system with the program timer
You can close down the system with the program timer to adjust solution temperature on a preset time when starting the
system.
N
OTE
• The program timer setting can be changed during the Close Down Checks.
• For details, see
☞
Maintenance Manual 2.2.2 Changing the setting of program timer and auto setup.
1.
Access the
Close Down Checks
display.
Bringing up the display
On the
Maintenance
display, click
Close Down Checks
.
• To access from the Controller display, see
Operator's Manual
of the Controller.
• When performing the Close Down Checks using a display module, see
☞
6.1 Display module.
2.
Perform Close Down Checks.
• For details, see
☞
Maintenance Manual 2.2 Close Down Checks.
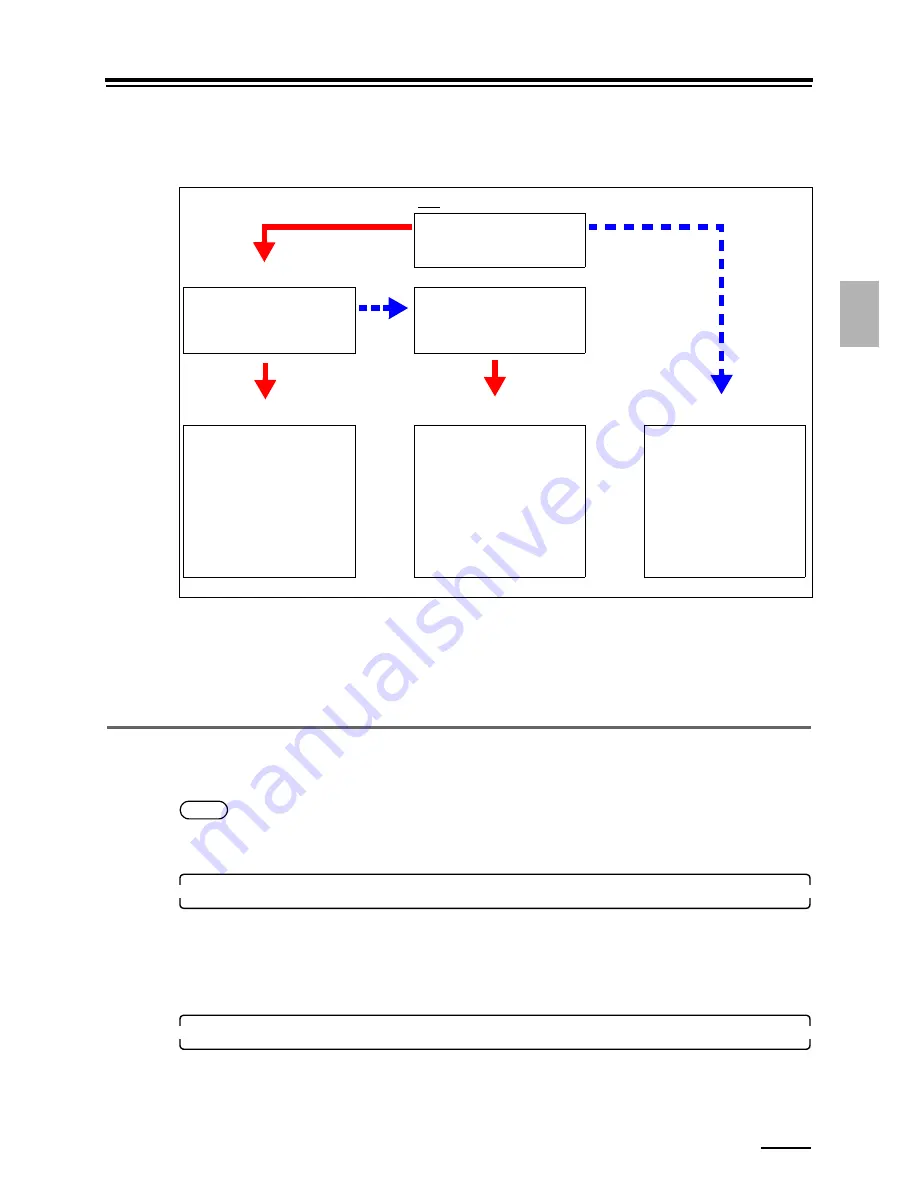
When you go to System End, the last item of the Close Down Checks,
Would you like to set the Program Timer?
is shown.
The system is started within
four days.
.
Wants to finish the processing
solution temperature adjustment
at the specified time.
Processing solution
temperature adjustment is not
performed until the system is
started.
Close the system down with the
program timer.
• See
☞
3.2.1 Closing down
the system with the
program timer.
Close the system down without
using the program timer.
• See
☞
3.2.2 Closing down
the system without using
the program timer.
Close the system down after
you make sure that no data in
the system will be lost or
solution will not get
contaminated.
• See
☞
3.2.3 Closing
down the system when
you do not use it over the
next five days.
.
Start
Yes
No
No
Yes
Yes
Summary of Contents for Frontier LP7500
Page 2: ......
Page 22: ...1 3 Safety precautions for operation 1 10 3 4 5 LP7500 7600 7700 7900 ...
Page 25: ...2 2 1 2 Getting Started This chapter explains each part name and paper advance path ...
Page 33: ...3 3 1 3 Turning power on off This chapter explains how to start and close down the system ...
Page 120: ...This page is intentionally blank ...
Page 160: ...This page is intentionally blank ...
Page 164: ...This page is intentionally blank ...


