49
Advanced
Features
3
48
◆
Area shot and quality setting
◆
Normal shooting provides an
aspect ratio of 4:3 and “
„
”
shooting provides an aspect ratio
of 3:2 (same aspect ratio as 35 mm
film and post card).
Area shot with “
„
”
NNN
10
10
10
10
10
10
Area shot excluding “
„
”
„
(3024
×
2016)
Printing at up to 4R (10.2
×
15.2 cm) / A6 size
2
(1600
×
1200)
To use for e-mail or web site
`
(640
×
480)
Printing at up to 6R (15.2
×
20.3 cm) / A5 size
3
(2048
×
1536)
Quality mode
5
N (2848
×
2136)
Printing at up to 10R (25.4
×
30.5 cm) / A4 size
For better quality, select “
5
F”
5
F (2848
×
2136)
Sample uses
Quality settings in Photography mode
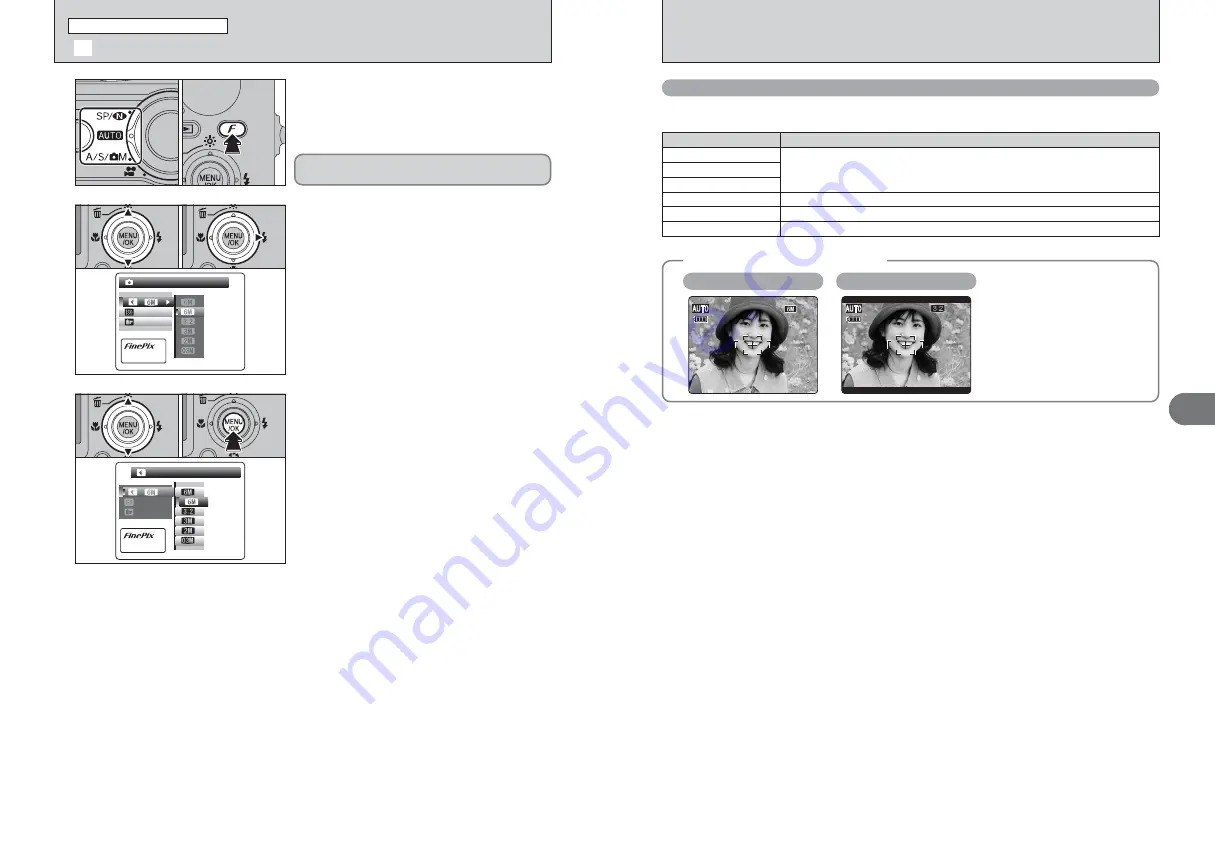
Choose from 6 settings. Using the table below as a guide, select the setting that best suits your
aims.
NN
F
N
QUALITY
QUALITY
AUTO
AUTO
STD
STD
PHOTO MODE
PHOTO MODE
PHOTO MODE
PHOTO MODE
:
:
:
1
1
Set the Mode switch to Photography mode.
2
Press the “
p
” button to display the menu on the
LCD monitor.
1
Press “
a
” or “
b
” to select “
˘
” QUALITY.
2
Press “
c
”.
The quality setting is retained even when the
camera is turned off or the mode setting is changed.
2
0
1
0
2
0
1
0
2
PHOTO MODE
PHOTO MODE
PHOTO MODE
PHOTO MODE
F
N
N
10
FRAMES
FRAMES
AUTO
AUTO
STD
STD
2848x2136:
:
:
:
1
Press “
a
” or “
b
” to change the setting.
2
Press the “MENU/OK” button to confirm the
setting.
●
!
The number in the top right corner of LCD monitor shows the
number of available frames.
●
!
When changing the quality setting, the number of available
frames also changes (
➡
P.24).
3
0
1
0
2
˘
QUALITY MODE (NUMBER OF RECORDED PIXELS)
p
PHOTO MODE PHOTOGRAPHY
Summary of Contents for FinePix F11
Page 66: ...130 Memo...


