


30
1 Printer Environment Settings
3.
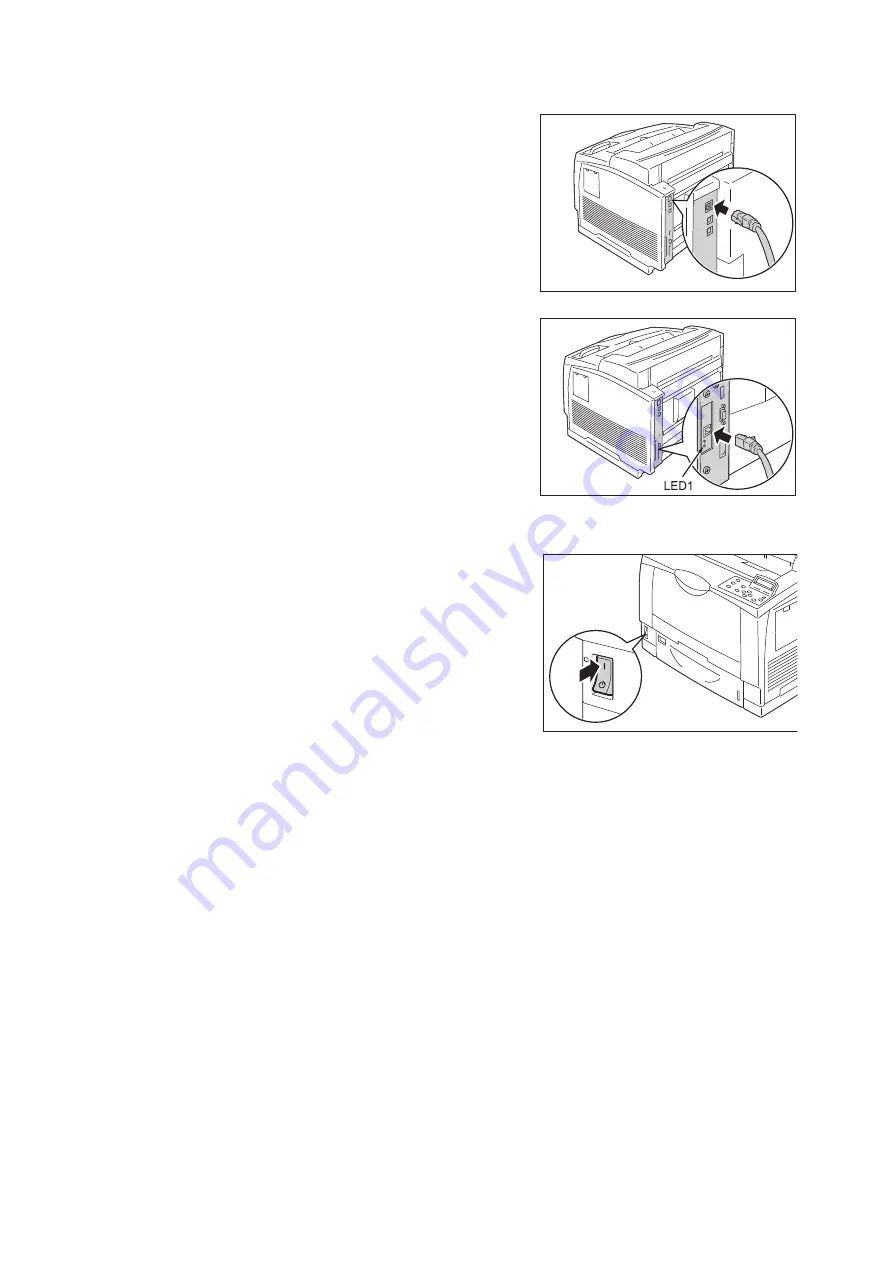
Connect the network cable to the interface
connector on the printer.
Note
• The location of the connector differs depending on
whether Gigabit Ethernet Board Card is installed or
whether the standard configuration is used. Connect
the appropriate connector for your environment.
• When the Gigabit Ethernet Board Card is installed, the
connector for the standard configuration cannot be
used.
• The MAC address is the same as in the standard
configuration when installing the Gigabit Ethernet
Board Card.
• LED1 on the Gigabit Ethernet Board Card lights up as
follows according to the network environment
connected.
10BASE-T environment: Off
100BASE-TX environment: Lights in yellow
1000BASE-T environment: Lights in blue
4.
Connect the other end of the network cable
into a network device such as a hub.
5.
Switch on the printer's power.
Note
• The interface connecter for standard network cannot be used when the Gigabit Ethernet Board Card is
installed to the printer.
• When installing both Gigabit Ethernet Board Card and Feature Enhance Kit, install the Feature Enhance
Kit first.
• Message [Ready to print IP Address failed] may be displayed on the control panel. To erase this
message, set to [STATIC] in [Network / Port] > [TCP/IP Settings] > [IPv4 Settings] > [Get IP Address] to
specify IP address (Example: 192.168.1.100) or [Disabled] for each port other than the USB port in
[Network / Port].
Refer to
• For setting method of IP address, refer to “1.4 Setting the Network Environment” (P. 33).
• For setting each port, refer to “1.5 Enabling Ports” (P. 37) “.
Standard configuration
Gigabit Ethernet Board Card
Summary of Contents for DocuPrint 3105
Page 1: ......
Page 44: ...68 3 Printing 3 Click Custom Paper Size 4 Click Setup 2 3 4...