


2.1 Main Components and Functions
47
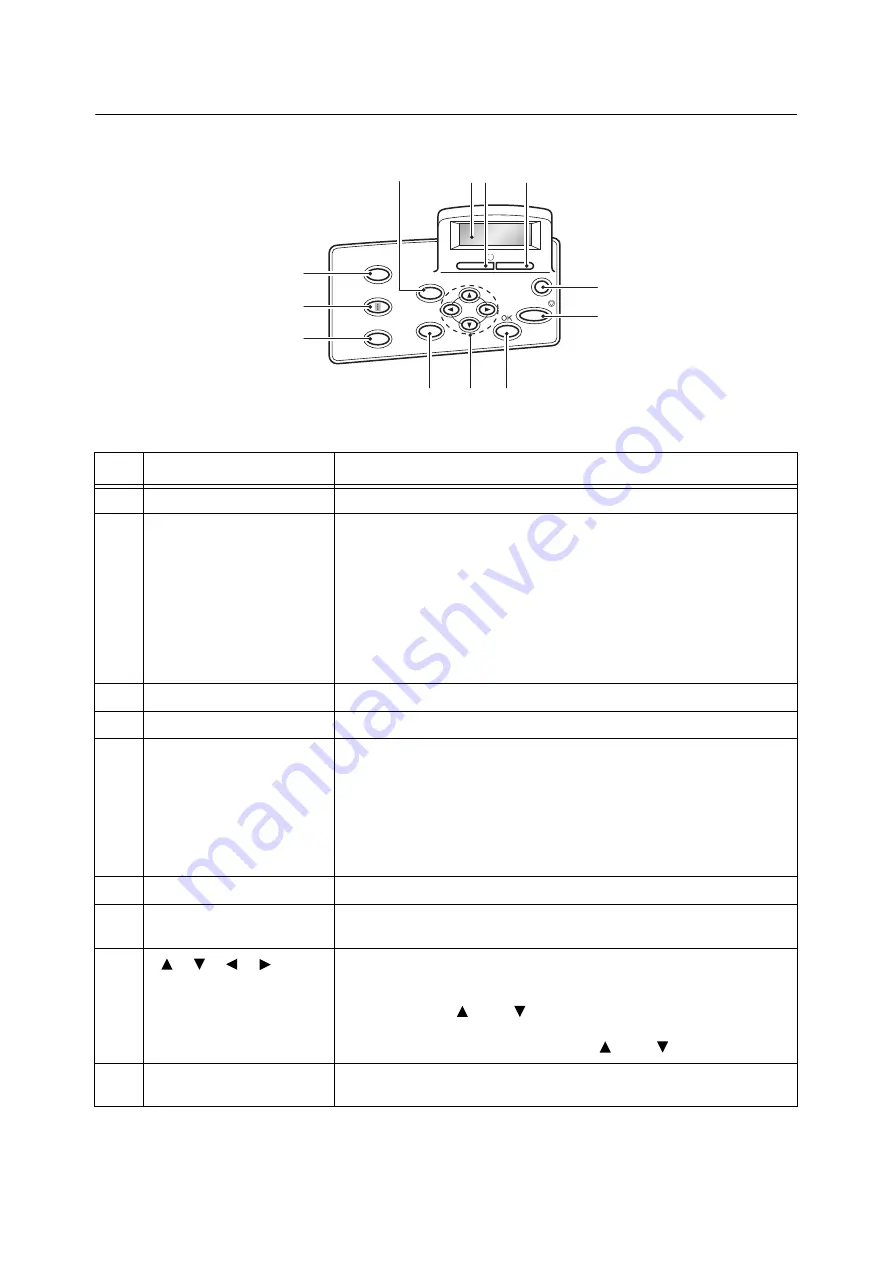
Control Panel
No.
Name
Description
1
<Printer Settings> button
Pressed to display the menu screen.
2
Display
Displays the status of the printer, menu options, and messages.
[Please Wait...] is displayed when the printer power is switched on. Print job is
available when the display message changes to [Ready to print].
It displays authenticated user ID for about 2 seconds when card authentication
is used.
Nothing will be displayed during Energy Saver Mode even if the printer power is
switched on.
Refer to
• “Control Panel Display” (P. 49)
3
<Ready> lamp
Lights when the printer is ready to print.
4
<Error> lamp
Blinks or lights when an error occurs.
5
<Energy Saver> button
The lamp lights while the printer is in Energy Saver mode.
The printer exits Energy Saver mode by pressing this button.
The printer enters Energy Saver mode (Low Power mode) by pressing this
button during Standby state.
Note
• <Energy Saver> lamp may be kept lit for several tens of seconds if the printer
is switched off during Energy Saver mode.
6
<Cancel Job> button
Pressed to cancel printing the job.
7
<OK> button
Pressed to confirm the menu option selected on the menu screen. This button
is also used when printing reports/lists.
8
<
> <
> <
> <
> buttons
Pressed to advance to the next menu, item, or option.
Note
• When using the <
> and <
> buttons to change the current setting,
holding down either button cycles through available settings at high speed.
To display a setting’s default value, press <
> and <
> at the same time.
9
<Back> button
Press this button while the menu screen is displayed to return to the previous
item.
Online
Information
Print Menu
Back
Printer
Settings
Cancel Job
Energy Saver
Error
Ready
2
1
3
4
5
6
7
8
9
10
11
12
Summary of Contents for DocuPrint 3105
Page 1: ......
Page 44: ...68 3 Printing 3 Click Custom Paper Size 4 Click Setup 2 3 4...