•
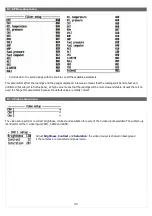
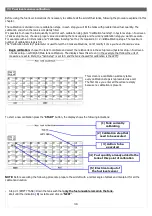
Hourmeters: Total time accumulated by the engine (big number in white color). This time is further divided in total time
accumulated in green, yellow and red zones (colored windows below the total time).
•
FLIGHT TIMER: The flight timer starts automatically when the engine meets or exceeds for 30 seconds the parameter “RPM
flight” in RPM setup menu and it stops automatically when the engine is turned off (0000 RPM). It remains stored in memory
until you begin a new flight.
•
PEAK RPM IN CURRENT FLIGHT : Maximum peak RPM reached by the engine in the current/last flight; it remains stored in
memory until you begin a new flight.
•
PEAK RPM EVER : Maximum peak RPM reached by the engine during its life.
•
READINGS SECTION
•
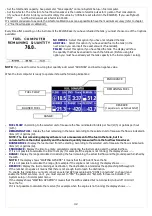
Battery voltage
•
Battery current (if optional sensor is installed)
•
OAT - Outside Air Temperature in °C (if optional sensor is installed)
•
CAT - Caruburetor/Airbox Air Temperature in °C (if optional sensor is installed)
•
Fuel pressure in BAR (if optional sensor is installed)
•
STATUS INDICATOR
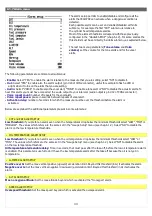
In the first line is showed the local time, as the GPS have the fix. To adjust the local time offset see the configuration menu,
chap.6.1.8, parameter “
Local time is UTC”
.
The second line can shows the following indications:
“
WARMUP
” : This word, in red color, is showed before the take-off if the ECLIPSE notice that not all the main measures are in the
green zones. The measures checked are: CAT, fuel pressure, oil pressure and temperature, all the CHTs. When all the measures
becomes in its green zone ECLIPSE will show the word “
READY
”, that disappear 30 seconds after take-off and is replaced by the
flight timer (indicated with FT).
•
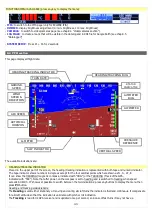
FUEL LEVELS SECTION
The fuel level indications are obtained by reading the fuel level sensors installed in your aircraft and connected to ECLIPSE.
The indications are approximated, do not solely rely on the ECLIPSE to determine the fuel available in the tanks but always
refer to primary instrument installed in your aircraft.
Before using the fuel levels section you must be sure to have already set the following parameters:
- Set the unit of measure: USgallons or liters (set this before all the other parameters). See parameter “Unit” on menu
System Setup-->Fuel Level-->Tanks setup.
- Activate only the tanks used (Left/Right/Main tank enable on menù System setup-->Fuel Level-->Tanks setup).
- Set the type of level sensors installed (Left/Right/Main tank sensor on menù System setup-->Fuel Level-->Tanks setup).
- Execute the calibration for each used tanks (see chap.7.3).
•
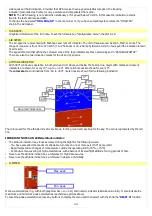
FUEL COMPUTER SECTION
Before using the fuel computer section you must be sure to have already set the following parameters:
- Set the unit of measure: USgallons or liters (set this before all the other parameters). See parameter “Unit” on menu
System Setup-->Fuel Level-->Tanks setup.
- Set the unit of measure: kilometers or nautical miles. See parameter “Space unit” on menù System Setup-->Fuel computer.
41
colder
EGT
warmer
EGT
colder
CHT
warmer
CHT
warmer EGT
temperature
colder EGT
temperature
remainder between
warmer and colder EGT
warmer CHT
temperature
colder CHT
temperature
remainder between
warmer and colder CHT
Summary of Contents for Eclipse
Page 6: ...ECLIPSE PART I INSTALLATION 6 ...
Page 7: ...2 Dimensions 7 ...


