21
Setup:
1. To rename a condition, select a condition
between 1 and 5, select name.
2. Use the onscreen keyboard to enter in the new
name.
3. To copy a condition, select a condition you
wish to copy and select copy, then select the
condition you wish to copy to. The system will
prompt if you are sure, select
[yes]
to confirm.
•
To assign a condition to a switch refere to
【
6.19 Logic Switches
】
.
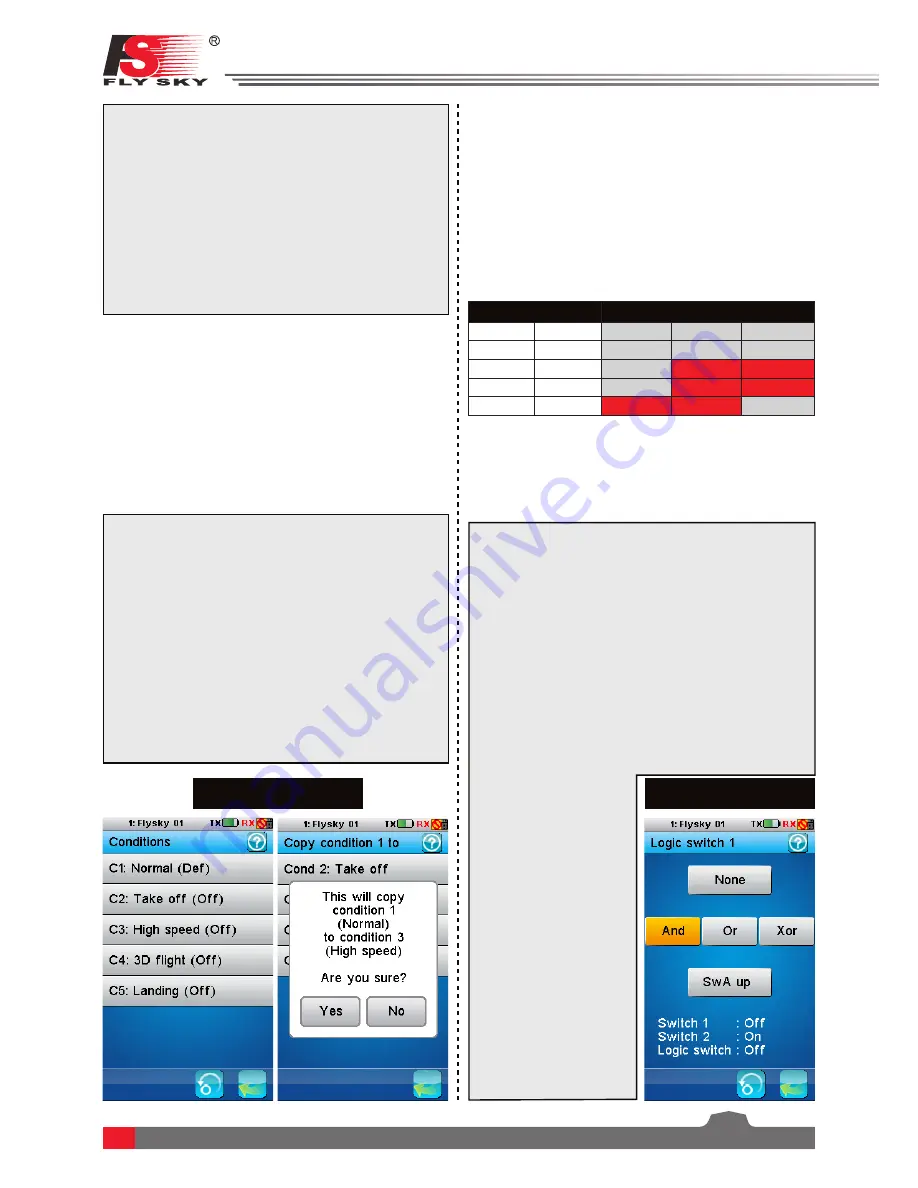
6.18 Conditions
(Pic.22)
Conditions are used in combination with logic
switches so that the system takes an action when two
ore more conditions are met, for example, SWE and
SWG both set to their high positions. If the conditions
are not met no action will be taken. This function
enables the user to rename and copy the conditions
however the conditions actions are set via the logic
switch menu.
Pic.22
2. Select the master, this channel/input will control
the slaves output. It is also possible to select
stick/knob, basic functions or a channel output.
3. Select a slave, slaves may only be output
channels.
4. If desired apply a curve to the mix, to do this
select the curve option, select a number/point
below the graph and use the wheel to change
the value.
•
This function can be set with up to 5
conditions.
6.19 Logic Switches
(Pic.23)
A logic switch is a switch that activates whenever
certain conditions are met, for example, a light
could be programmed using a logic switch so that it
will only turn on, if switches A and B have been are
toggeled on, but if only one or none of the switches
are active the light will remains off. This is an example
of an AND gate.
The chart below shows the relationships of each of
the logic gates.
The system has 3 slots for logic gates, each which
can be assigned as AND, OR or XOR. Once the logic
switches have been assigned they can be chosen
from within the switches menu of other functions
that support switches, for example the throttle down
function.
Setup:
1. Select a logic switch slot from the menu.
2. Select the desired logic gate type, the currently
select logic gate will be highlighted in yellow.
3. Open the first switch selection menu above the
logic gate selection boxes. Then choose the
physical switch from the chart. Then choose
which state you wish the switch to trigger the
logic gates input, Up, Middle or Down. Once a
switch has been selected press the back button
located at the bottom right of the screen.
4. Open the second switch selection menu below
the logic gate selection boxes. Then choose the
physical switch from the chart. Then choose
which state you wish
Pic.23
the switch to trigger
the logic gates
input, Up, Middle
or Down. Once a
switch has been
selected press the
back button located
at the bottom right
of the screen.
Switch
Gate
Switch 1 Switch 2
AND
OR
XOR
off
off
off
off
off
off
on
off
on
on
on
off
off
on
on
on
on
on
on
off


