The disinfectant must be an electrolytic chloroxidizer (active principle: sodium hy-
pochlorite) specific for disinfecting, which is available in any pharmacy.
Implementation:
- Fill a container big enough to hold all of the parts to disinfect with a solution of
potable water and disinfectant, according to the proportions indicated on the
packaging of the disinfectant.
- Completely immerse each part in the solution, taking care to avoid the formation
of air bubbles on the parts. Leave the parts immersed for the amount of time in-
dicated on the packaging of the disinfectant associated with the concentration
chosen for the solution.
- Remove the disinfected parts and rinse abundantly with warm potable water.
- Dispose of the solution following the instructions provided by the disinfectant
manufacturer.
method B:
sanitise the accessories
C1.1-C1.1a-C1.1b-C1.1c-C1.2-C1.3-C1.4-C2-C3-
C4
by boiling them in water for 10 minutes; use demineralised or distilled water to
prevent calcium deposits.
method C:
sanitise the accessories
C1.1-C1.1a-C1.1b-C1.1c-C1.2-C1.3-C1.4-C2-C3-
C4
with a hot steam steriliser for baby-bottle (not the microwave type). Perform the
process faithfully following the instructions of the steriliser. To ensure that the disin-
fection is effective, choose a steriliser with an operating cycle of at least 6 minutes.
After having disinfected the accessories, shake them vigorously and place them
on a paper towel. Alternatively, dry them with a jet of hot air (for example, from a
hair dryer).
At the end of each use store the device complete with accessories in a dry place
away from dust.
AIR FILTERING
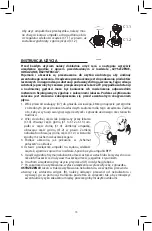
The unit is equipped with an air filter (A3) which should be
replaced when dirty or when its colour changes. Do not wash
or re-use the used filter. The filter must be regularly replaced to
help ensure efficient compressor performance. The filter should
be regularly checked. For spare filters contact your dealer or an
authorised service centre. To replace the filter:
Pull out the dirty filter with common tweezers and push the
new one all the way in its seat. Do not replace the filter during use.
Only use original
accessories and spare parts by Flaem, we disclaim any liability in the event of
using non original spare parts or accessories.
6
7
Summary of Contents for 4Neb
Page 2: ......
Page 44: ...FLAEM FLAEM 400 a b 93 42 E 2 42...
Page 47: ...C1 1 C1 2 1 A7 A8 2 C1 4 C1 1 C1 2 C1 3 C1 4 C1 2 C1 2 3 4 RF9 5 6 1 7 3 1 2 1 C1 1 C1 2 45...
Page 50: ...E FLAEM 48...
Page 65: ...400 CE 42 93 63...
Page 66: ...A6 1 2 C1 1 C1 2 C1 3 C1 4 C1 4 C1 2 C1 2 3 4 RF9 5 A1 6 7 B C1 1 C1 2 C1 1 C1 2 64...
Page 70: ...68...
Page 74: ...FLAEM FLAEM 400 a b 93 42 CE 2 72...
Page 77: ...C1 1 C1 2 C1 1 C1 2 1 A7 2 C1 4 C1 1 C1 2 C1 3 C1 4 C1 2 3 4 RF9 5 6 A1 7 B 3 1 ma 75...
Page 79: ...C C1 1 C1 1a C1 1b C1 1c C1 2 C1 3 C1 4 C2 C3 C4 6 A3 FLAEM...
Page 82: ...MEMO 80...
Page 83: ...81...

