background image

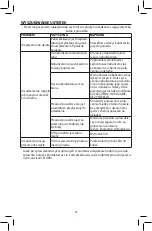
LOCALIZACIÓN DE AVERÍAS                                                                                            

Antes de llevar a cabo cualquier operación, apague el equipo y desconéctelo de la 

toma de corriente.

PROBLEMA

CAUSA

SOLUCIÓN

El equipo no 

funciona

El cable de alimentación no 

está conectado correcta-

mente en la toma de red

Conecte bien el cable de alimenta-

cion en las tomas

El aparato 

no nebuli-

za o nebu-

liza poco

No se ha introducido el 

medicamento en el nebu-

lizador

Vierta la cantidad adecuada de me-

dicamento en el nebulizador

El nebulizador no se ha 

montado correctamente

Desmonte y vuelva a montar el ne-

bulizador correctamente según el 

esquema de conexión de la portada

La boquilla del nebulizador 

esta obstruida

Desmonte el nebulizador, quite la 

boquilla y encárguese de las opera-

ciones de limpieza.

Si no se limpian los  depósitos de 

medicamento del nebulizador, se 

compromete su eficiencia y su fun-

cionamiento. Siga paso a paso las 

instrucciones del capitulo “LIMPIEZA 

HIGIENIZACIÓN DESINFECCIÓN”

El tubo de aire no está co-

nectado correctamente al 

aparato

Compruebe que se conecten correc-

tamente la toma de aire del aparato 

y los accesorios (vea esquema de 

conexión en la portada)

El tubo de aire está dobla-

do, dañado o retorcido

Desenrolle el tubo y compruebe

que no haya aplastamientos u orifi-

cios. Si es necesario, cámbielo

El filtro del aire está sucio

Cambie el filtro

El aparato es 

más ruidos 

de lo normal

Filtro no introducido

correctamente en su so-

porte

Introduzca correctamente a fondo el 

Filtro en el soporte

Si, tras comprobar las condiciones antes descritas, el dispositivo no funciona correcta-

mente, acuda a su revendedor de confianza o a su centro de asistencia autorizado por 

FLAEM mas cercano.

28

29

Summary of Contents for 4Neb

Page 1: ...NL GEBRUIKSAANWIJZING AR ZH ENGLISH pg 1 ESPA OL Pag 17 57 POLSKI Pag 9 P g 25 Pag 33 NEDERLANDS P g 41 Assembly diagram Schemat po czeniowy Esquema de conexi n Sch ma de raccorde ment Aansluitschema...

Page 2: ......

Page 3: ...pay close attention to children and persons with particular difficulties as they are often unable to accurately evaluate danger The apparatus is unsuitable for use in presence of flammable anaestheti...

Page 4: ...upply cord are to be carried out by FLAEM authorised personnel only by complying with the information provided by the manufacturer Unauthorized repairs will void the warranty and may represent a dange...

Page 5: ...selector moves up and down between positions C1 3 C1 2 C1 2 C1 3 4 Insert the assembled upper part C1 1 C1 2 C 13 into the lower part C1 4 and hook it by turning it clock wise C1 2 C1 1 C1 1c a b C1...

Page 6: ...turned anti clockwise RESPIRATORY SYSTEM UPPER AIRWAYS LOWER AIRWAYS Oropharyn geal tract Tracheobron chial tract Pulmonary tract Peripheral tract CONFIGURA TION BOWL Without Selector Selector in pos...

Page 7: ...e upper part C1 2 clockwise Close the nebuliser by turning the upper part C1 2 clockwise 3 Connect accessories as indicated in the Connection diagram on the cover 4 Set the bowl selector to the desire...

Page 8: ...4 in the dishwasher with a hot cycle method C sanitise accessories C1 1 C1 1a C1 1b C1 1c C1 2 C1 3 C1 4 C2 C3 C4 by immersing them in a solution of 50 water and 50 white vinegar then rinse thoroughly...

Page 9: ...1 C1 1a C1 1b C1 1c C1 2 C1 3 C1 4 C2 C3 C4 with a hot steam steriliser for baby bottle not the microwave type Perform the process faithfully following the instructions of the steriliser To ensure tha...

Page 10: ...form cleaning operations Failure to remove medi cation deposits from the nebulizer affects its efficiency and operation Strictly comply with the instructions contained in the CLEANING SANITI SATION DI...

Page 11: ...ectromagnetic interference with other devices RF mobile or portable radio and telecommunications devices mobile telephones or wireless connections can interfere with the functioning of electro medical...

Page 12: ...Air humidity Atmospheric pressure min 10 C max 40 C min 10 max 95 min 69KPa max 106KPa Storage conditions Temperature RH Air humidity Atmospheric pressure min 25 C max 70 C min 10 max 95 min 69KPa max...

Page 13: ...ch ni wskazano gdy stwarzaj one potencjalne ryzyko uduszenia Zwr ci szczeg ln uwag na dzieci i osoby ze szczeg lnymi problemami gdy nie zawsze s one w 4Neb Mod P0711EM 1 F400 URZ DZENIE DO TERAPII AER...

Page 14: ...pozbawionej przeszk d Przed ka dym u yciem nale y sprawdzi czy otwory wentylacyjne nie s zatkane Nie wk ada adnych przedmiot w do otwor w wentylacyjnych Naprawy w czaj c w to wymian kabla zasilania po...

Page 15: ...i e prze cz nik podnosi si i opuszcza mi dzy poszczeg lnymi po o eniami C1 3 C1 2 C1 2 C1 3 4 W o y zmontowan cz g rn C1 1 C1 2 C1 3 do cz ci dolnej C1 4 Zaczepi obracaj c zgodnie z ruchem wskaz wek...

Page 16: ...G RNE DROGI ODDECHOWE DOLNE DROGI ODDECHOWE Odcinek ustno gar d owy Odcinek tchawiczno oskrzelowy Odcinek p ucny Odcinek obwodowy KONFIGURA CJA AMPU KI Bez prze cznika Prze cznik w po o eniu 1 Prze c...

Page 17: ...z ci lek przepisany przez lekarza C1 4 Wsun cz g rn C1 1 C1 2 C1 3 am pu ki w cz doln C1 4 Zamkn ampu k obracaj c cz g rn C1 2 w prawo Zamknij nebulizator obracaj c g rn cz C1 2 w kierunku zgodnym z r...

Page 18: ...1 4 C2 C3 C4 poprzez zanurzenie ich w roztworze sk adaj cym si w 50 z wody i w 50 z octu bia ego nast pnie sp uka je du ilo ci ciep ej wody pitnej oko o 40 C Aby wykona czyszczenie w celu DEZYNFEKCJI...

Page 19: ...si ci le do instrukcji za czonej do sterylizatora Aby de zynfekcja by a skuteczna nale y wybra sterylizator z przynajmniej 6 minutowym cyklem roboczym Po zdezynfekowaniu akcesori w nale y nimi energi...

Page 20: ...Brak czysz czenia nebulizatora z pozosta o ci po leku zagra a jego spraw no ci i dzia aniu Nale y ci le przestrzega instrukcji rozdzia u CZYSZCZENIE ODKA ANIE DEZYNFEKCJA Przew d powietrza nie jest p...

Page 21: ...oducenta Ryzyko potencjalnych zak ce elektromagnetycznych z innymi urz dzeniami Przeno ny i mobilny sprz t telekomunikacyjny i wykorzystuj cy cz stotliwo radiow telefony kom rkowe lub po czenia bezprz...

Page 22: ...maks 40 C min 10 maks 95 min 69KPa maks 106KPa Warunki sk adowania Temperatura Wilgotno wzgl dna Ci nienie atmosferyczne min 25 C maks 70 C min 10 maks 95 min 69KPa maks 106KPa Wymiary Waga 15 D ug x...

Page 23: ...esorios ADVERTENCIAS IMPORTANTES Esteproducto est destinado tambi n para ser utilizado directamente por el paciente Antes de utilizar el producto por primera vez y peri dicamente durante la vida til d...

Page 24: ...antes de cada uso No introduzca ning n objeto dentro de las ranuras de ventilaci n Las reparaciones incluyendo la sustituci n del cable de alimentaci n las debe realizar solo personal autorizado por F...

Page 25: ...libremente y que el selector suba y baje entre una posici n y la otra C1 3 C1 2 C1 2 C1 3 4 Inserte la parte superior montada C1 1 C1 2 C 13 en la parte inferior C1 4 y eng nchela gir ndola a dere ch...

Page 26: ...ARATO RESPIRATORIO V AS ALTAS V AS BAJAS Tracto orofar ngeo Tracto traqueobron quial Tracto pulmonar Tracto perif rico CONFIGURA CI N AMPOLLA Sin Selector Selector en posici n 1 Selector en posici n 2...

Page 27: ...erre la ampolla girando la parte superior C1 2 a derechas Cierre el nebu lizador girando la parte superior C1 2 hacia la de recha 3 Conecte los accesorios tal como se indica en el Es quema de conexi n...

Page 28: ...orios C1 1 C1 1a C1 1b C1 1c C1 2 C1 3 C1 4 C2 C3 C4 en lavavajillas con ciclo caliente m todo C higienice los accesorios C1 1 C1 1a C1 1b C1 1c C1 2 C1 3 C1 4 C2 C3 C4 mediante inmersi n en una soluc...

Page 29: ...C1 1a C1 1b C1 1c C1 2 C1 3 C1 4 C2 C3 C4 con un esterilizador por calor para biberones de tipo de vapor no de microondas Realice el proceso siguiendo fielmente las instrucciones del esterilizador Par...

Page 30: ...de limpieza Si no se limpian los dep sitos de medicamento del nebulizador se compromete su eficiencia y su fun cionamiento Siga paso a paso las instrucciones del capitulo LIMPIEZA HIGIENIZACI N DESIN...

Page 31: ...as con otros dispositivos Los aparatos de radio y telecomunicaciones m viles o port tiles RF tel fonos m viles o conexiones inal mbricas podr an interferir con el funcionamiento de los equipos electro...

Page 32: ...l aire Presi n atmosf rica M n 10 C M x 40 C M n 10 M x 95 M n 69KPa M x 106KP Condiciones de almacenamiento Temperatura Humedad del aire Presi n atmosf rica M n 25 C M x 70 C M n 10 M x 95 M n 69KPa...

Page 33: ...TANTS Ce dispositif est destin tre utilis directement par le patient Avant la premi re utilisation et p riodiquement pendant le cycle de vie du produit contr ler l int grit de la structure de l appare...

Page 34: ...ins rer d objet l int rieur des trous d a ration Les r parations y compris le remplacement du c ble d alimentation doivent tre effectu es uniquement par le personnel FLAEM en suivant les informations...

Page 35: ...d une position l autre C1 3 C1 2 C1 2 C1 3 4 Ins rer la partie sup rieure assem bl e C1 1 C1 2 C 13 dans la partie inf rieure C1 4 et l accrocher en la tournant dans le sens des aiguilles d une montre...

Page 36: ...le sens contraire des aiguilles d une montre APPAREIL RESPIRATOIRE VOIES RESPIRATOIRES SUP RIEURES VOIES RESPIRATOIRES INF RIEURES Tractus oropharyng Tractus trach obron chique Tractus pulmonaire Trac...

Page 37: ...mpoule en tournant la partie sup rieure C1 2 dans le sens des aiguilles d une montre Fermez le n buliseur en tournant la partie sup rieure C1 2 dans le sens horaire 3 Assemblez les accessoires comme i...

Page 38: ...res C1 1 C1 1a C1 1b C1 1c C1 2 C1 3 C1 4 C2 C3 C4 en lave vaisselle sur le cycle chaud m thode C Laver les accessoires C1 1 C1 1a C1 1b C1 1c C1 2 C1 3 C1 4 C2 C3 C4 en les plongeant dans un m lange...

Page 39: ...ecter les accessoires C1 1 C1 1a C1 1b C1 1c C1 2 C1 3 C1 4 C2 C3 C4 avec un st rilisateur chaud pour biberon du type vapeur pas micro ondes Respecter la lettre les instructions du st rilisateur Pour...

Page 40: ...liseur pour enlever les d p ts de m dicament en compromet son efficacit et son fonctionnement Respectez scrupuleusement les instructions du chapitre NET TOYAGE ASSAINISSEMENT D SIN FECTION ST RILISATI...

Page 41: ...seulement sur l une des deux phases d alimentation Alternating current Minimum and maximum room temperature teint OFF Minimum and maximum air moisture Minimum and maximum atmos pheric pressure In com...

Page 42: ...max 95 min 69KPa max 106KPa Conditions de stockage Temp rature Humidit de l air Pression atmosph rique mini 25 C maxi 70 C min 10 max 95 min 69KPa max 106KPa Dimensions Poids 15 L x 21 P x 11 H cm 1...

Page 43: ...4Neb Mod P0711EM 1 F400 Flaem www flaem it A 1 2 3 A4 A5 A6 A7 C C1 RF9 C1 1 C1 1a C1 1b C1 1c C1 2 C1 3 C1 4 C2 C3 C4 C4 1 B D FLAEM 1 6 41...

Page 44: ...FLAEM FLAEM 400 a b 93 42 E 2 42...

Page 45: ...2 C1 1b C1 1a C1 1c C1 3 C1 2 C1 2 C1 3 4 C1 1 C1 2 C 13 C1 4 C1 2 C1 1 C1 1c a b C1 1 C1 2 C1 3 C1 4 1 C1 3 C1 2 C1 3 C1 2 C1 2 C1 3 3 C1 1 C1 2 C1 1c C1 2 C1 1a C1 1b C1 1c C1 1a C1 1b 43...

Page 46: ...71 3 5 12 1 3 67 1 2 49 1 ml min 0 53 2 0 36 2 0 30 2 0 23 2 5 m FPF 26 7 3 48 8 1 63 4 1 83 1 1 1 in vitro T V Rheinland Italia S r l EN 13544 1 2007 A1 2 Flaem I29 P07 5 3 Malvern Spraytec Parma C1...

Page 47: ...C1 1 C1 2 1 A7 A8 2 C1 4 C1 1 C1 2 C1 3 C1 4 C1 2 C1 2 3 4 RF9 5 6 1 7 3 1 2 1 C1 1 C1 2 45...

Page 48: ...ftTouch C1 1 C1 2 C1 1a C1 1b C1 1c C1 2 C1 3 C1 2 C1 1 C1 1a C1 1b C1 1c C1 2 C1 3 C1 4 C2 C3 C4 40 C C1 1 C1 1a C1 1b C1 1c C1 2 C1 3 C1 4 C2 C3 C4 C C1 1 C1 1a C1 1b C1 1c C1 2 C1 3 C1 4 C2 C3 C4 5...

Page 49: ...3 FLAEM C1 1 C1 1a C1 1b C1 1c C1 2 C1 3 C1 4 C2 C3 C4 C1 1 C1 1a C1 1b C1 1c C1 2 C1 3 C1 4 C2 C3 C4 10 C C1 1 C1 1a C1 1b C1 1c C1 2 C1 3 C1 4 C2 C3 C4 6 47...

Page 50: ...E FLAEM 48...

Page 51: ...EN 60601 1 2 EMC www flaemnuova it Flaem 93 42 II BF ON OFF EN 10993 1 93 42 CE 1907 2006 IP21 IP21 12 mm 2012 19 2012 19 49...

Page 52: ...30VA 115V 60Hz 220V 60Hz 1 m 1 8 0 3 bar 9 l min 55 dB A min 10 C max 40 C min 10 max 95 min 69 Pa max 106KPa min 25 C max 70 C min 10 max 95 min 69 Pa max 106KPa 15 x 21 x 11 cm 1 300 Kg BF C2 C3 C4...

Page 53: ...1 Uitademingsventiel B Verbindingsslang hoofdunit vernevelaar D Opbergmapje voor accessoires BELANGRIJKE MEDEDELINGEN Dit Medisch Hulpmiddel is ook bestemd om rechtstreeks door de pati nt gebruikt te...

Page 54: ...dat de luchtspleten afdicht Steek geen voorwerpen in de luchtspleten De reparaties inclusief de vervanging van de voedingskabel moeten uitsluitend uitgevoerd worden door geautoriseerd personeel van FL...

Page 55: ...keuzeschakelaar tussen twee opeenvolgende posities omhoog en om laag gaat C1 3 C1 2 C1 2 C1 3 4 Steek het geassembleerde bovenste deel C1 1 C1 2 C 13 in het onderste deel C1 4 en klik hem vast door h...

Page 56: ...in positie 2 Keuzeschakelaar in positie 3 MMAD m 7 71 3 5 12 1 3 67 1 2 49 1 Snelheid ml min 0 53 2 0 36 2 0 30 2 0 23 2 Respirabele fractie 5 m FPF 26 7 3 48 8 1 63 4 1 83 1 1 1 In vitro karakteriser...

Page 57: ...C1 2 rechtsom te draaien Sluit de vernevelaar door het bovenste deel C1 2 met de wijzers van de klok mee te draaien 3 Sluit de accessoires aan zoals aangeduid wordt in het aansluitschema 4 Stel de keu...

Page 58: ...et warme cyclus methode C de accessoires C1 1 C1 1a C1 1b C1 1c C1 2 C1 3 C1 4 C2 C3 C4 sa neren door ze onder te dompelen in een oplossing van 50 water en 50 witte azijn vervolgens overvloedig spoele...

Page 59: ...C1 2 C1 3 C1 4 C2 C3 C4 warm met een stoomsterilisator voor babyflessen geen microgolf Volg hier bij zorgvuldig de instructies van de sterilisator Voor een effici nte sterilisatie moet u kiezen voor...

Page 60: ...vernevelaar verwijder het pijpje en maak schoon Wanneer aanslag van het genee smiddel niet uit de vernevelaar wordt verwijderd kan dit de efficientie en de werking nadelig beinvloeden Houdt u strik aa...

Page 61: ...biele telefoons of draadloze verbindingen kunnen interfereren met de werking van medische elektrische apparaten Surf naar onze website www flaemnuova it voor verdere informatie Het Medische Hulpmiddel...

Page 62: ...htigheid Atmosferische druk min 10 C max 40 C min 10 max 95 min 69KPa max 106KPa Opslagvoorwaarden Temperatuur Luchtvochtigheid Atmosferische druk min 25 C max 70 C min 10 max 95 min 69KPa max 106KPa...

Page 63: ...A A1 A2 A3 A4 A5 A6 A7 B Mod P0711EM 1 F400 www flaem it Flaem 6 4Neb RF9 C1 C1 1 C1 1A C1 1B C1 1C C1 2 C1 3 C1 4 C2 C3 C4 C4 1 D C 61...

Page 64: ...C1 1a C1 1b 2 C1 1c C1 3 C1 2 C1 2 C1 3 C1 1 4 C1 4 C1 2 C 13 C1 2 C1 1 C1 1c a b C1 1 C1 2 C1 3 C1 4 C1 2 C1 3 1 C1 3 C1 2 C1 2 C1 3 3 C1 1 C1 2 C1 1c C1 2 C1 1a C1 1b C1 1c C1 1a C1 1b 62...

Page 65: ...400 CE 42 93 63...

Page 66: ...A6 1 2 C1 1 C1 2 C1 3 C1 4 C1 4 C1 2 C1 2 3 4 RF9 5 A1 6 7 B C1 1 C1 2 C1 1 C1 2 64...

Page 67: ...MMAD 3 7 71 1 5 12 1 3 67 1 2 49 2 0 53 2 0 36 2 0 30 2 0 23 5 FPF 3 26 7 1 48 8 1 63 4 1 83 1 T V Rheinland Italia S r l 1 EN 13544 1 2007 A1 Flaem I29 P07 5 2 Malvern Spraytec 3 C1 1c C1 1c C1 1c C1...

Page 68: ...C2 C1 4 C1 3 C1 1a C1 1b C1 1c C1 2 C1 1 B 10 C4 C3 C2 C1 4 C1 3 C1 1a C1 1b C1 1c C1 2 C1 1 C C4 C3 6 A3 66...

Page 69: ...3 C1 2 C4 C3 C2 C1 4 C1 3 C1 1a C1 1b C1 1c C1 2 C1 1 A 40 C2 C1 4 C1 3 C1 1a C1 1b C1 1c C1 2 C1 1 B C4 C3 C2 C1 4 C1 3 C1 1a C1 1b C1 1c C1 2 C1 1 C 50 50 C4 C3 40 C1 1a C1 1b C1 1c C1 2 C1 1 A C4 C...

Page 70: ...68...

Page 71: ...CE CEE 93 42 BF ON OFF EN10993 1 EEC 93 42 1907 2006 CE IP21 IP21 12 EN 60 60601 1 2 www flaemnuova it CE 2002 96 CE 2002 96 69...

Page 72: ...P0711EM 1 F400 230V 50Hz 130VA 0 3 1 8 9 dB A 55 1 40 10 95 10 106KPa 69KPa 70 25 95 10 106KPa 69KPa x 11 x 21 15 1 300 C2 C3 C4 BF RF9 2 8 0 65 70...

Page 73: ...P g 49 1 6 4Neb 4Neb P0711EM 1 F400 Flaem www flaem it A A1 A2 A3 A4 A5 A6 A7 C C1 RF9 C1 1 C1 1a C1 1b C1 1c C1 2 C1 3 C1 4 C2 C3 C4 C4 1 B D 71...

Page 74: ...FLAEM FLAEM 400 a b 93 42 CE 2 72...

Page 75: ...2 C1 1b C1 1a C1 1c C1 3 C1 2 C1 2 C1 3 4 C1 1 C1 2 C 13 C1 4 C1 2 C1 1 C1 1c a b C1 1 C1 2 C1 3 C1 4 1 C1 3 C1 2 C1 3 C1 2 C1 2 C1 3 3 C1 1 C1 2 C1 1c C1 2 C1 1a C1 1b C1 1c C1 1a C1 1b 73...

Page 76: ...AD m 7 71 3 5 12 1 3 67 1 2 49 1 ml min 0 53 2 0 36 2 0 30 2 0 23 2 5 m FPF 26 7 3 48 8 1 63 4 1 83 1 1 1 T V T V Rheinland Italia S r l Universit di Parma EN 13544 1 2007 A1 2 Flaem I29 P07 5 3 Malve...

Page 77: ...C1 1 C1 2 C1 1 C1 2 1 A7 2 C1 4 C1 1 C1 2 C1 3 C1 4 C1 2 3 4 RF9 5 6 A1 7 B 3 1 ma 75...

Page 78: ...C1 1b C1 1c C1 2 C1 3 C1 4 C2 C3 C4 40 C B C1 1 C1 1a C1 1b C1 1c C1 2 C1 3 C1 4 C2 C3 C4 C C1 1 C1 1a C1 1b C1 1c C1 2 C1 3 C1 4 C2 C3 C4 50 50 40 C A C1 1 C1 1a C1 1b C1 1c C1 2 C1 3 C1 4 C2 C3 C4...

Page 79: ...C C1 1 C1 1a C1 1b C1 1c C1 2 C1 3 C1 4 C2 C3 C4 6 A3 FLAEM...

Page 80: ...CE 93 42 CEE II BF EN 10993 1 93 42 EEC CE n 1907 2006 IP21 IP21 IP21 12 EN 60601 1 2 www flaemnuova it Flaem 2012 19 EU 2012 19 EU 78...

Page 81: ...P0711EM 1 F400 230V 50Hz 130VA 1 8 0 3 bar 9 1 55 A 10 C 40 C 10 95 69kpa 106kpa 25 C 70 C 10 95 69kpa 106kpa 15 x 21 x 11 cm 1 300 Kg BF C2 C3 C4 RF9 2 8 0 65 bar 79...

Page 82: ...MEMO 80...

Page 83: ...81...

Page 84: ...e laws Gwarancja zostan dostarczone przez lokalnego sprzedawcy zgodnie z obowi zuj cymi przepisami prawa La garant a ser otorgada por el revendedor local de conformidad con lo establecido por las norm...

Reviews: