


Farlink IP Camera – FL301 / FL501
9
2.2. Quick installation and usage
There are only three things that you need to do to see the video from the Farlink IP
Camera.
1. Connect the Farlink IP Camera to the home/office network.
2. Install the FarlinkView software on the notebook/PC.
3. Key in the ID/password of the FARLINK IP CAMERA (from the ID/Password card)
on the FarlinkView, and then you can see the video.
First, Connect the FARLINK IP CAMERA to the home/office network
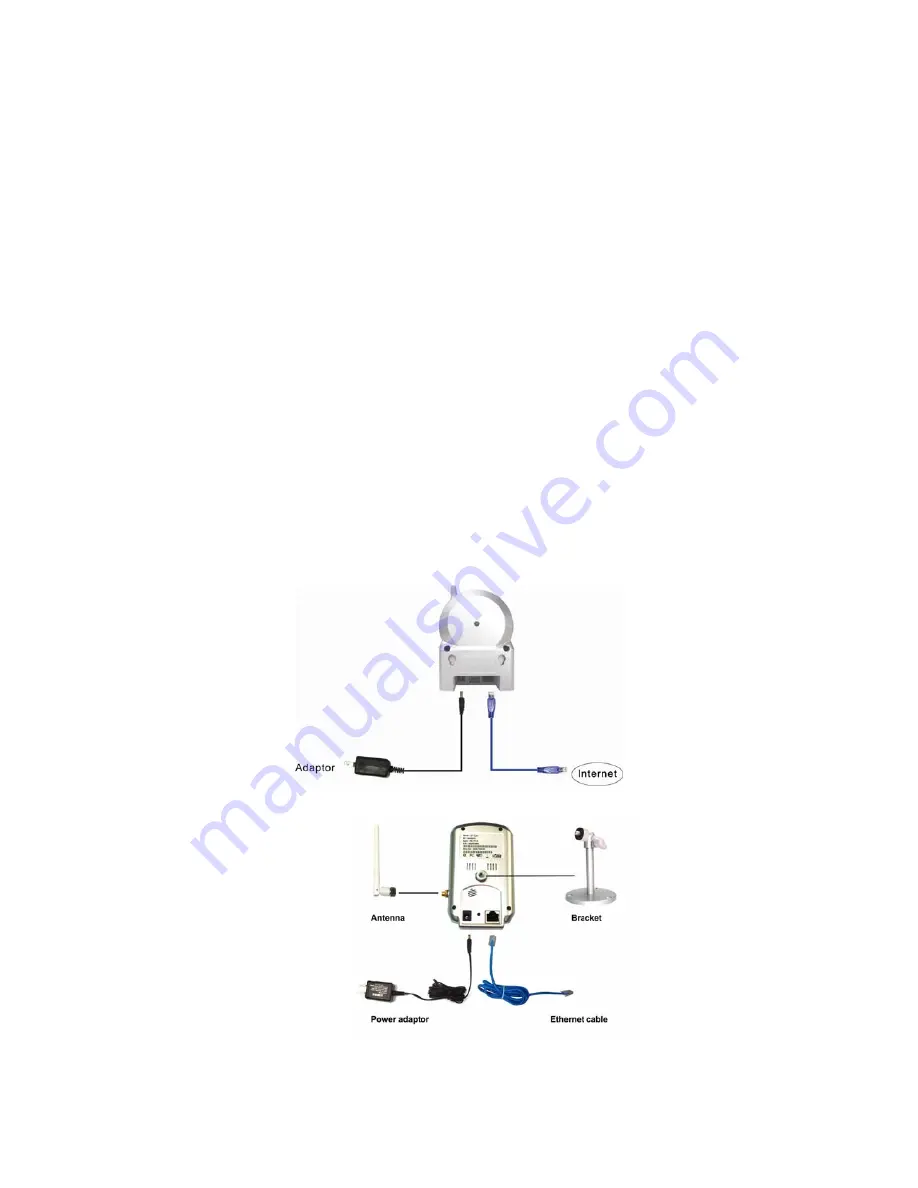
Please connect the Farlink IP Camera accessories correctly, including the power
adapter and Ethernet cable, as shown in Figure 2-3. And connect the other end of the
Ethernet cable to the home network or office network. Usually, this Ethernet cable is
plugged into a home NAT/router device or an Ethernet switch if in the office, as shown
in Figure 2-4. Since the default settings of the Farlink IP Camera use DHCP function
and very often there is a DHCP server on most of the Home/office network, the Farlink
IP Camera should be connected to the Internet immediately.
The Internet status LED
is constant red light to indicate this good connection status. If the LED is
blinking, please refer to section 3.3~3.5 to try other network settings.
_____________________________________________________
Figure 2-3: FARLINK IP CAMERA connection diagram.
Summary of Contents for FL301
Page 20: ...Farlink IP Camera FL301 FL501 20 Figure 3 6 Network settings page for fixed IP address ...
Page 23: ...Farlink IP Camera FL301 FL501 23 Figure 3 9 WiFi testing page ...
Page 34: ...Farlink IP Camera FL301 FL501 34 Figure 3 17 SD Card information page ...
Page 41: ...Farlink IP Camera FL301 FL501 41 Figure 3 23 Firmware upgrade status page ...


