


TUTIS Series DVR
25
4.1.4
Network
The DVR allows you to use a Web browser to remotely view and manage the system. You can also
receive live video streaming from the DVR using your smartphone.
Note:
Since every Network Configuration is different, please check with your Network
Administrator or ISP to see if your DVR should use specific IP address and/or port numbers.
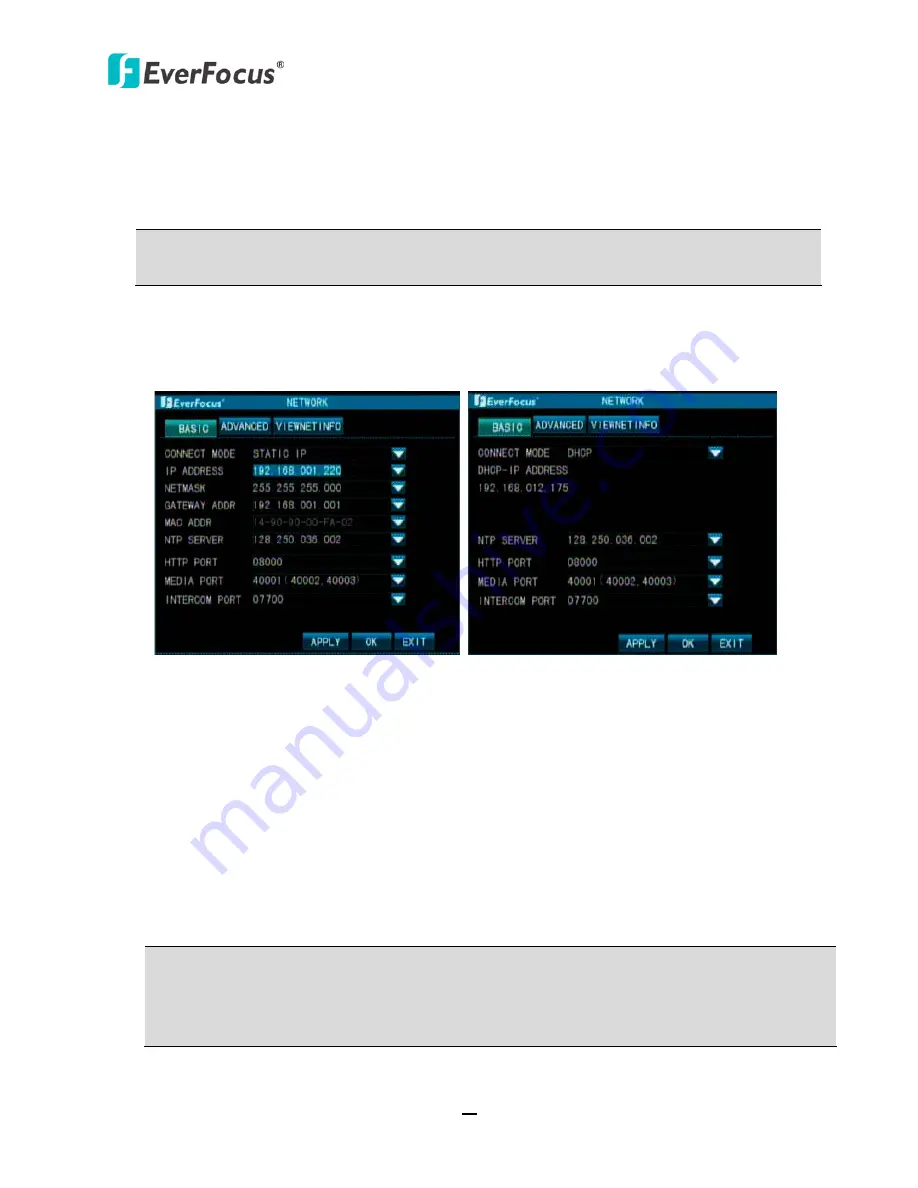
4.1.4.1 Basic
According to your network environment, select
Static IP
or
DHCP
to configure an IP address for
the DVR.
Static IP DHCP
【
Contact Mode
】
: Select
Static IP
to set up a fixed IP or
DHCP
for DHCP server to automatically
assign an IP configuration for the network connection. If
Static IP
is selected, you will need to
manually input the IP Address, Subnet Mask, and Gateway. You can find all the configurations
on your computer’s network property details.
【
NTP Server
】:
Set the time and correct the server address to achieve the time synchronization
of DVR. (no need to change)
【
HTTP Port
】
: Port number for HTTP/WEB communication, for example,
http://192.168.1.220:8000.
【
Media Port
】:
Used to send multi-media data. (Default : 40001 - 40003)
【
Intercom port
】
: The intercom port used for remote device and the DVR.
Note:
The range of the above ports is between 1024 and 65535. If some ports are occupied
by other services or devices, try to change them to unused ports. If multiple DVRs are
connected in a same LAN, please make sure all the services ports and IP address are
different.