


TUTIS Series DVR
14
4.
OSD Menu Operation
The DVR can be configured through a series of menus on the screen by using a
Mouse
,
front panel
buttons
or the supplied
IR Remote Control
. The following operations are examples of using a
Mouse. This chapter describes the functions and options of the Configuration Settings in the
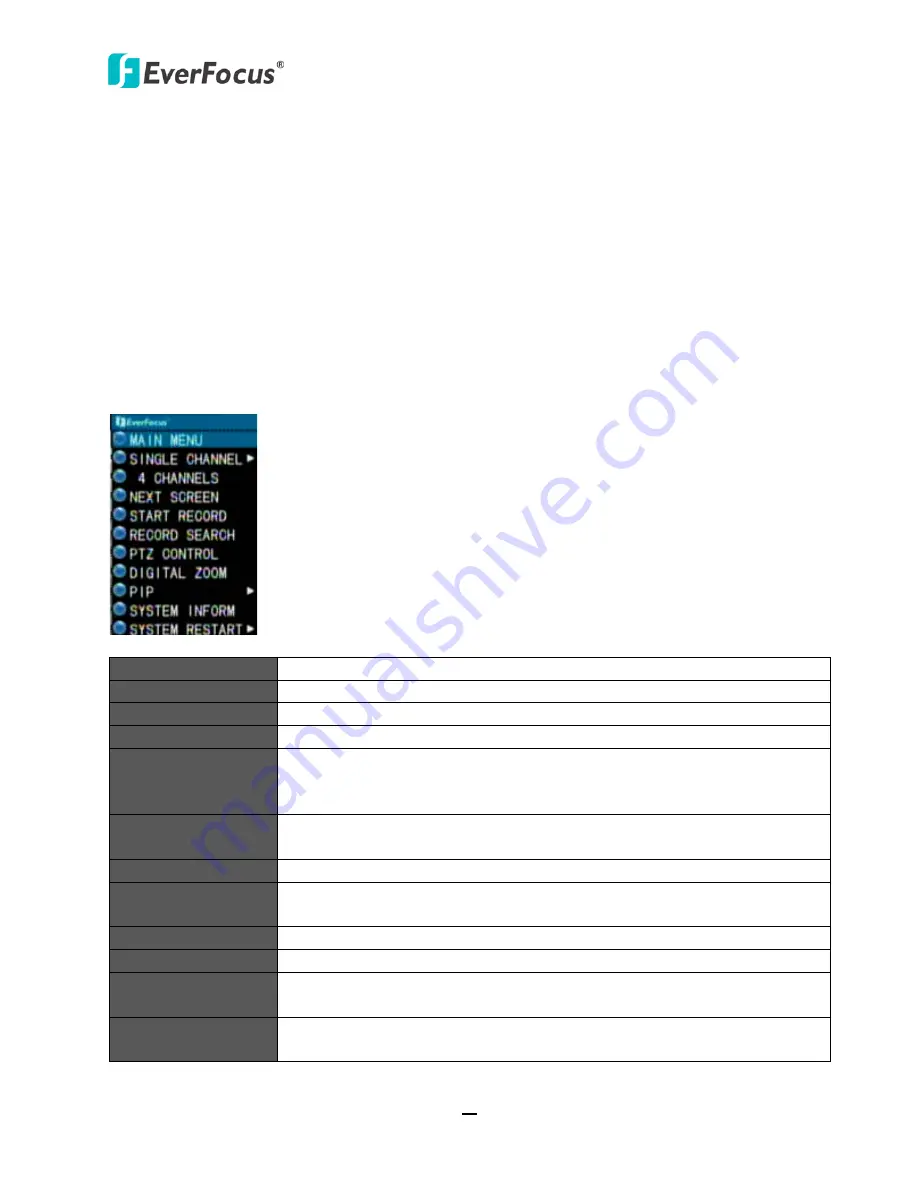
on-screen display (OSD) menus. Right-click on the screen, the
OSD Root Menu
appears.
Main Menu
You can configure the OSD settings in this menu. See
4.1 Main Menu
.
Single Channel
Select a channel to display it in full-screen.
4 Channels
Switch to 4, 9 or 16 screen mode (depends on model).
Next Screen
Switch to the next screen divisions (only for 8CH / 16CH models).
Start / Stop Record
Start/stop recording manually.
Note:
The
START RECORD
(manually record) function is only functional
when the DVR is not in the recording mode.
Record Search
Search for the recordings for Playback and Backup. See
4.1.9 Record
Search
.
PTZ Control
Control PTZ cameras. See
4.2 PTZ Control
.
Intercom
Select an online user to start using the two-way audio function. Only the
16CH model provides this function.
Digital Zoom
Zoom in one area via mouse drag. See
4.3 Digital Zoom
.
PIP
Picture in picture. See
4.4 PIP
.
System Inform
Click to display the system information, including the version, IP address,
recording files, and HDD.
System Restart
You can lock the Main Menu (
4.1.6.2 Advanced
), restart the system or
power-off the system.
Chapter
4