32
• Activate the screen button a) “Live” while in POM mode.
• As soon as you now change any value with the slide controller
(e.g. CV5, maximum speed) the new value is transmitted to the
loco and you see the effect immediately.
Live mode is not suitable for
• Setting addresses
• Function mapping
18.7.6. More info on profiles
• There is a matching profile for every ESU decoder. However,
a profile does not necessarily contain all decoder parameters.
Some rarely used settings should be adjusted manually as de-
scribed in chapter 18.4. Alternately you could use our LokPro-
grammer with its computer software.
• For DCC decoders by other suppliers it is best to use the gene-
ric NMRA profile. For extended settings we recommend to use
manual programming of CVs.
18.8. Programming Märklin® 763xx series signals
The following steps are required for programming the digital
signals of the 763xx series (e. g.: 76391, 76393, etc.):
1. Leave the signal electronics in the package and insert it into
the contact bar in the box. Make sure it is positively arres-
ted.
2. Enter a new accessory on the ECoS as described in chapter
13.1. Select the matching type of signal from the choice
list. If there is a distant signal on the mast of the main signal
then you must also set up the main signal to which the
distant signal refers. Assign the desired “Weisen” number
to each signal. Select “Momentary action mode”.
Set the switch pulse duration to 2500ms for programming.
Do not forget to enter the corresponding main signals for
distant signals on the same mast as accessories.
3. In order to be able to switch this accessory you must estab-
lish a link on one of the turnout control panel panels.
4. Switch off the ECoS.
5. Remove the connection form the ECoS to the layout. Con-
nect only the signal to be programmed to the track output
of the ECoS.
6. Switch on the ECoS. As soon as the ECoS is operational
press the “Stop“ button (emergency stop).
7. Press the “Go” button of the ECoS. The signal will now
alternate between two aspects. The following procedure
depends on the type of signal.
76391/76371/76372: confirm the signal on the screen. The
signal will be programmed with the preset time of 2500
ms.
76392/76394: Switch to signal aspect Hp1. Wait until the
signal starts to alternate between different signal aspects.
Then switch to signal aspect Hp2.
76395/76397: the initial steps are the same as for the sig-
nals 76391 resp. 76393. Thereafter the distant signal will
start to alternate between two signal aspects. Activate Hp1
or Hp0 of the corresponding main signal. If the distant si-
Programming Decoders
gnal is linked to a two-aspect main signal then press HP1
or Hp0 once again after the distant signal has started again
to alternate between two aspects. Otherwise you activate
the signal aspect Hp2 of the corresponding main signal. In
this case the allocation of the second address will happen
automatically.
8. The signal is now programmed. Turn off the ECoS. Remove
the signal from the box and install it on the layout.
• Only start with the further steps once the signal has begun to
alternate between the two signal aspects once more.
• It is quite sufficient to trigger the commands very briefly. The
required switching time is predetermined by the setting to
2500 ms. For later operation you should change this value to a
more practical number (e.g. 500 ms).
• In case of very long pauses between the individual steps the
signal may terminate the programming process. Restart the
process by pressing the „Stop“ button once again.
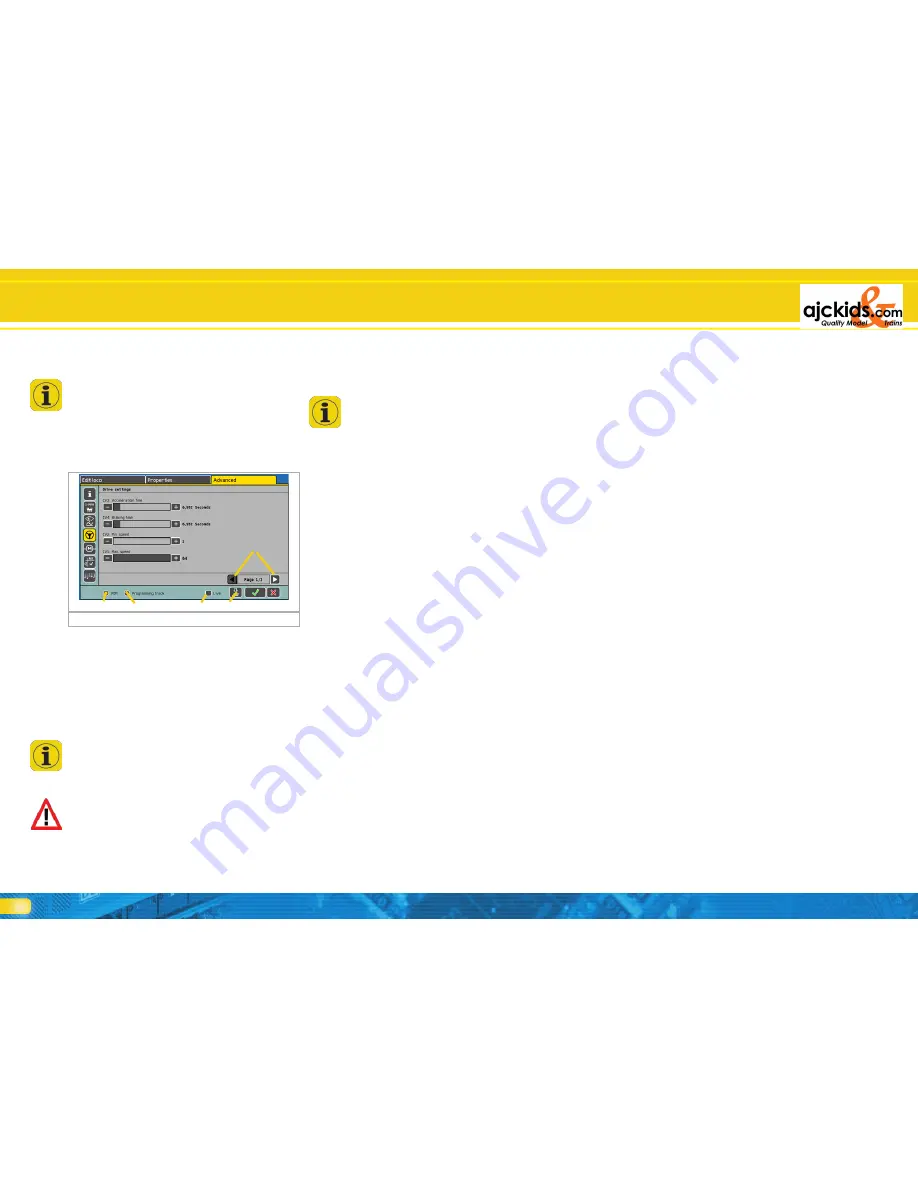
b)
Figure 87
d)
a)
c)
e)
18.7.4. Profiles of M4 decoders
The command station will automatically detect and preset the
decoder profile for all M4 decoders it recognises. This profile
cannot be changed. The procedure for adjusting decoder para-
meters is done in the same manner as with DCC decoders.
This similarity of the procedure should not mislead you: M4
decoders do not have CVs that can be directly accessed.
18.7.5. Editing decoder settings
After assigning a decoder profile you can edit any decoder pa-
rameters comfortably on the graphic display. Initially all chan-
ges are set in ECoS only and not transferred to the decoder. Of
course, you can transfer (program) the data set locally on ECoS
to the decoder at any time.
a) Choice field “Live”
b) Radio button „POM“ (=Programming On the Main)
c) Radio button „Programming track“
d) Screen button “Write data on decoder“
e) Paging up and down in the submenus
• First decide if you want to program on the mains (POM) or on
the programming track. The selection is done with the two
radio buttons b) and c). In case of M4 decoders POM is auto-
matically preset and cannot be changed.
If you want to use POM then you may not change the address.
Address changes can only be accomplished on the program-
ming track.
18.7.5.1. Download mode
• Transfer the complete set of data to the loco by pushing the
screen button d).
All CV data of the decoder will be overwritten. Please check if
you actually want to proceed before pushing this button!
18.7.5.2. Live mode
In POM mode you can observe all changes “live” during the
programming process: ECoS transmits all changes to the (run-
ning) loco immediately. Thus programming becomes far easier
than previously.


