Maintenance
Service
6. While
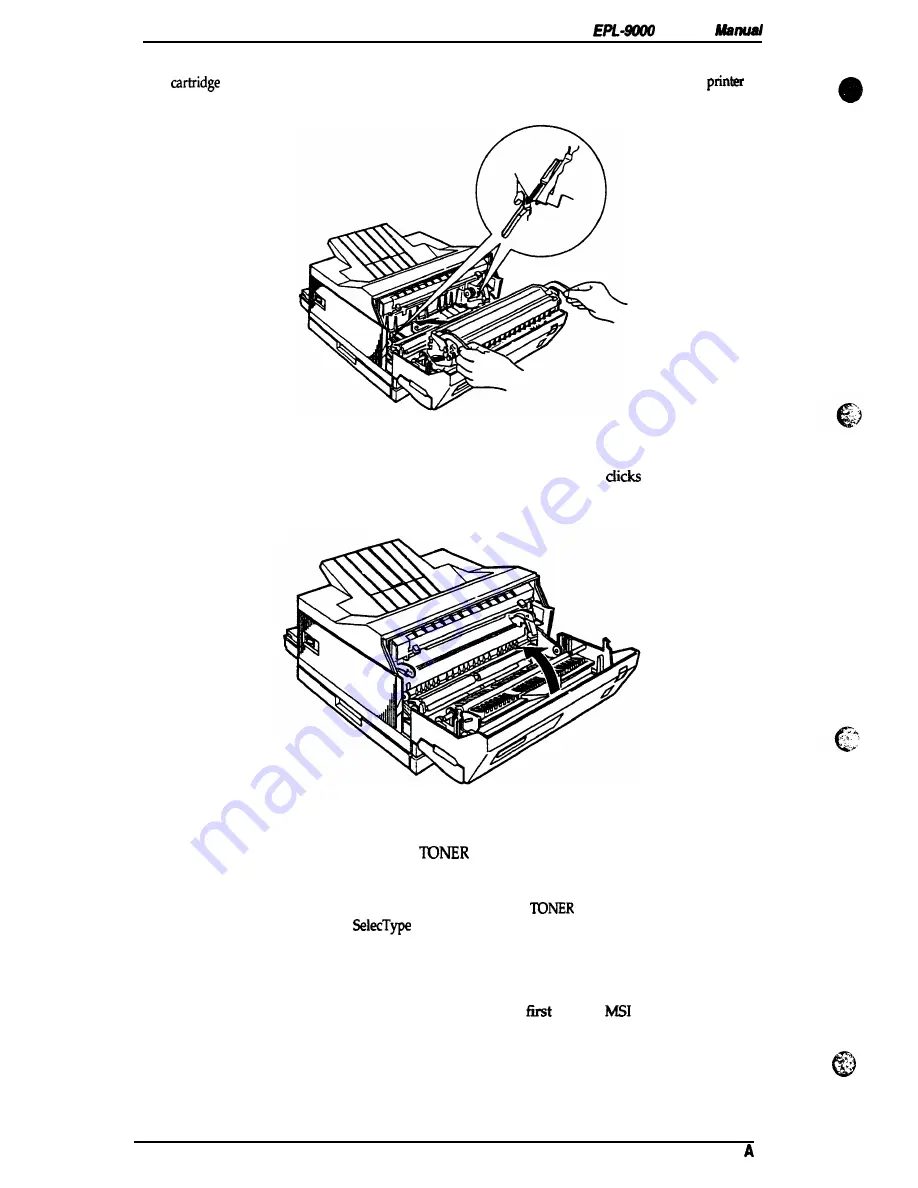
holding the imaging cartridge, carefully slide the plastic mmer on either side of the
into the grooves, as shown in Figure 6-6. Slide the cartridge gently into the
as
far as it will go.
Figure 6-6. Imaging Cartridge Replacement (3)
7. Close the printer
and gently press the top of the case until the latch
shut, as shown m
Figure 6-7.
Figure 6-7. Imaging Cartridge Replacement (4)
8.
Turn on the printer. WARMING UP and
FULL? appear alternately on the display for
about
10 seconds. Press
Enter
while these messages appear. READY then appears on the
display.
Note:
You must
press
Enter while the
WARMING UP and
FULL? messages
appear, so
9.
10.
11.
that the TONER
option m
will register correctly.
. .
After READY appears on the display, press
Menu once
and then press
ALT and Menu together
once. TEST MENU then appears.
Press Item several times until CLEANING PAPER appears. Then press
Enter.
Put a sheet of standard
A4 paper with the long edge
into the
tray and then press
Continue. CLEANING
PRINT flashes on the display as the printer pMts and feeds the paper.
6-4
Rev.
Summary of Contents for EPL-9000
Page 1: ...EPSON TERMINAL PRINTER SERVICE MANUAL EPSON ...
Page 8: ...REVISION SHEET Revision Date Rev 5 1994 Revision Page I issue vii ...
Page 117: ...Disassembly and Service Figure 3 50 Removing the ROS Unit 3 32 Rev ...
Page 118: ...Chapter 4 Adjustments Adjustment is required in this product ...
Page 160: ...Service Manual Appendix 0 c 1 R13 J Figure A 6 C135 MAIN Board Component Layout Rear Side Rev ...
Page 161: ......
Page 162: ...EPSON ...


