b
Connect the USB storage device or digital camera to the projector.
s
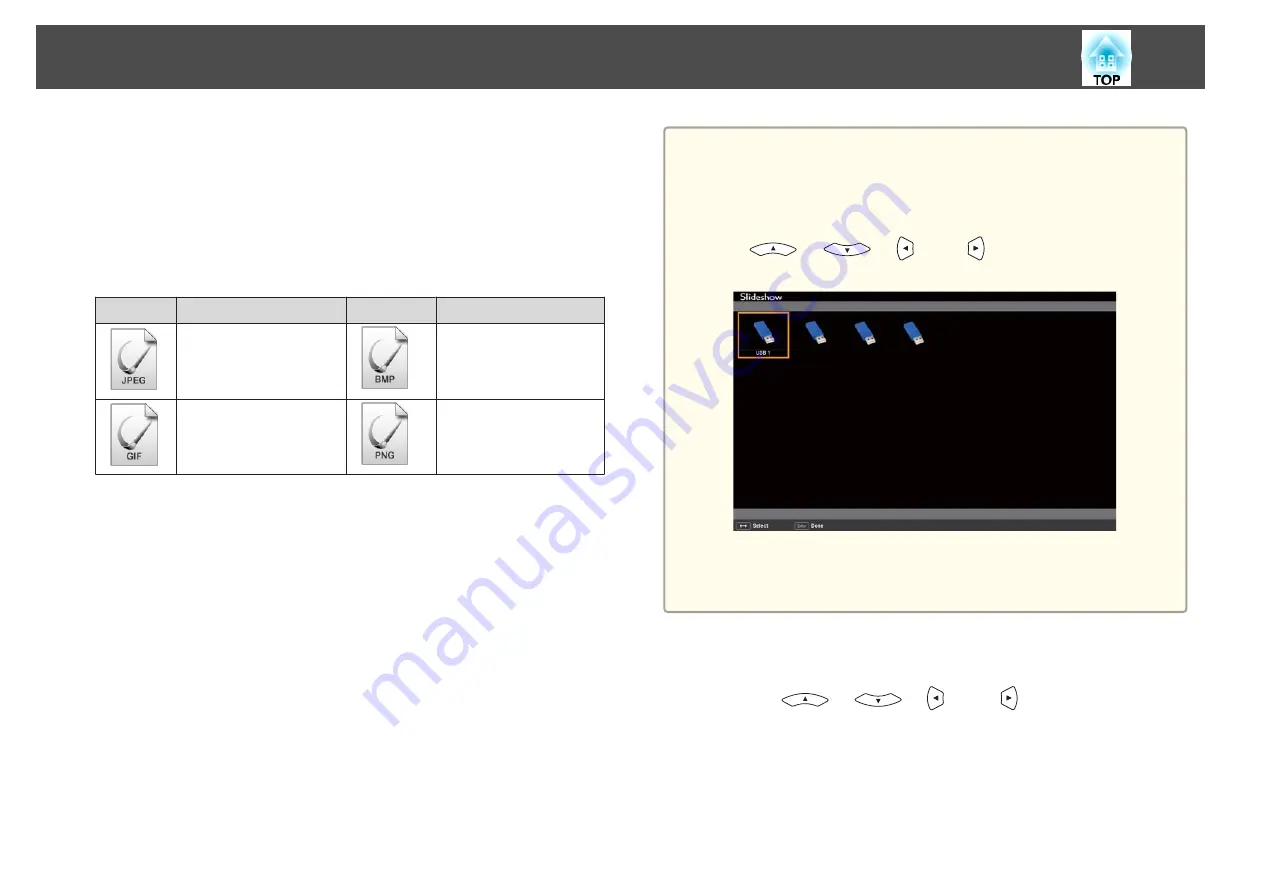
Slideshow starts and the file list screen is displayed.
•
JPEG files are displayed as thumbnails (file contents are displayed
as small images).
•
Other files or folders are displayed as icons as shown in the
following table.
Icon
File
Icon
File
JPEG files
*
BMP files
GIF files
PNG files
*
When it cannot be displayed as a thumbnail, it is displayed as an icon.
a
•
You can also insert a memory card into a USB card reader and then
connect the reader to the projector. However, some commercially
available USB card readers may not be compatible with the
projector.
•
If the following screen (Select Drive screen) is displayed, press the
[
], [
], [
], and [
] buttons to select the drive
you want to use, and then press the [Enter] button.
•
To display the Select Drive screen, position the cursor on
Select
Drive
at the top of the file list screen, and then press the [Enter]
button.
Projecting images
a
Use the [
], [
], [
], and [
] buttons to select the
file or folder you want to project.
Projection Functions
44
Summary of Contents for EB-92
Page 1: ...User s Guide ...
Page 6: ...Introduction This chapter explains the projector s features and the part names ...
Page 27: ...Basic Usage This chapter explains how to project and adjust images ...
Page 70: ...Configuration Menu This chapter explains how to use the Configuration menu and its functions ...
Page 109: ...Appendix ...


