EPSON AcuLaser C1100
Revision B
ADJUSTMENT
Overview
490
5.1.5 MCU Firmware Update
This section explains an MCU firmware (engine firmware) update.
NOTE:
The computer should be able to send binary data under DOS via a
parallel interface.
1.
Print a status sheet or engine status sheet to check the current MCU firmware version.
(Refer to
“ 1.19 Status Sheet”
(p.67)
,
“ 6.4.1 Engine Status Sheet”
(p.499)
)
2.
Turn the power off for both the printer and computer, and connect them with a parallel
cable.
3.
After turning the computer back on, copy the program data for the update (file
name.MOT) to any route directory of the computer.
4.
Turn the printer on while pressing the [Up], [Down], [Job Cancel] and [Start/Stop]
buttons.
5.
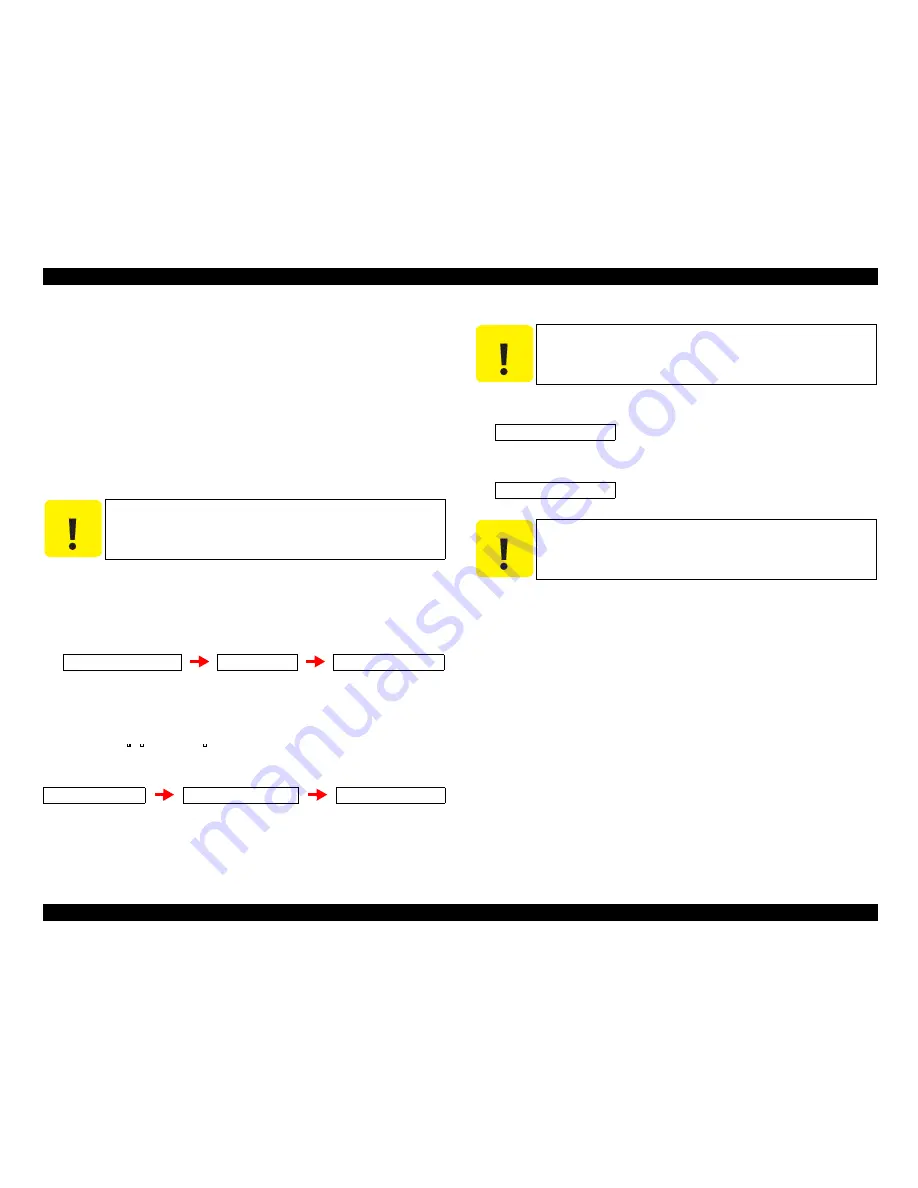
The LCD panel of the printer will indicate the messages as follows:
6.
Check that the message “Please Send EFU Data” is indicated on the LCD panel.
7.
To transfer the program data file from the computer to the printer, type the command
(shown below) on the DOS prompt and press the ENTER key of the computer.
8.
The LCD panel of the printer will indicate the message as follow:
9.
Press the [Enter] button on the operation panel of the printer. This displays the
following message and starts writing.
10. When the writing is completed, the following message appears and the printer
automatically starts warm-up operation.
11. Confirm the check sum and turn the printer off.
12. After turning the printer back on, print a status sheet or engine status sheet.
13. Compare the status sheet or engine status sheet printed in Step 1, and confirm that the
MCU firmware version has been updated. (Refer to
“ 1.19 Status Sheet ”
(p.67)
,
“
6.4.1 Engine Status Sheet”
(p.499)
)
C A U T I O N
Disconnect all interface cables except the parallel cable.
Engine Firmware Update
EFU Ver. 100
Please send EFU data
copy /b file name.mot LPT1
send size=**********
SEND SIZE=**********
Type:***** sum=****
C A U T I O N
In Step 9 below, press the [Enter] button after making sure that the
engine has completely stopped.
Writing:Size=******
TYPE:***** SUM=****
C A U T I O N
In Step 11 below, turn the printer off after making sure that the
engine has completely stopped.
Summary of Contents for C1100 - AcuLaser Color Laser Printer
Page 1: ...EPSON AcuLaserC1100 A4 Full Color Laser Printer SERVICE MANUAL SEPG04002 ...
Page 12: ...Schematic Diagram of Safety System Leg_Sec001_025EA ...
Page 19: ...C H A P T E R 1 PRODUCTDESCRIPTION ...
Page 74: ...C H A P T E R 2 OPERATINGPRINCIPLES ...
Page 119: ...C H A P T E R 3 TROUBLESHOOTING ...
Page 276: ...C H A P T E R 4 DISASSEMBLYANDASSEMBLY ...
Page 485: ...C H A P T E R 5 ADJUSTMENT ...
Page 491: ...C H A P T E R 6 MAINTENANCE ...
Page 510: ...C H A P T E R 7 APPENDIX ...
Page 539: ...EPSON AcuLaser C1100 Revision B APPENDIX Exploded Diagrams 539 7 6 Exploded Diagrams ...
Page 562: ...Model AcuLaser C1100 LP V500 Board C567MAIN Sheet 1 of 4 Rev A ...
Page 563: ...Model AcuLaser C1100 LP V500 Board C567MAIN Sheet 2 of 4 Rev A ...
Page 564: ...Model AcuLaser C1100 LP V500 Board C567MAIN Sheet 3 of 4 Rev A ...
Page 565: ...Model AcuLaser C1100 LP V500 Board C567MAIN Sheet 4 of 4 Rev A ...


