166
Scanning
Using EPSON Scan directly
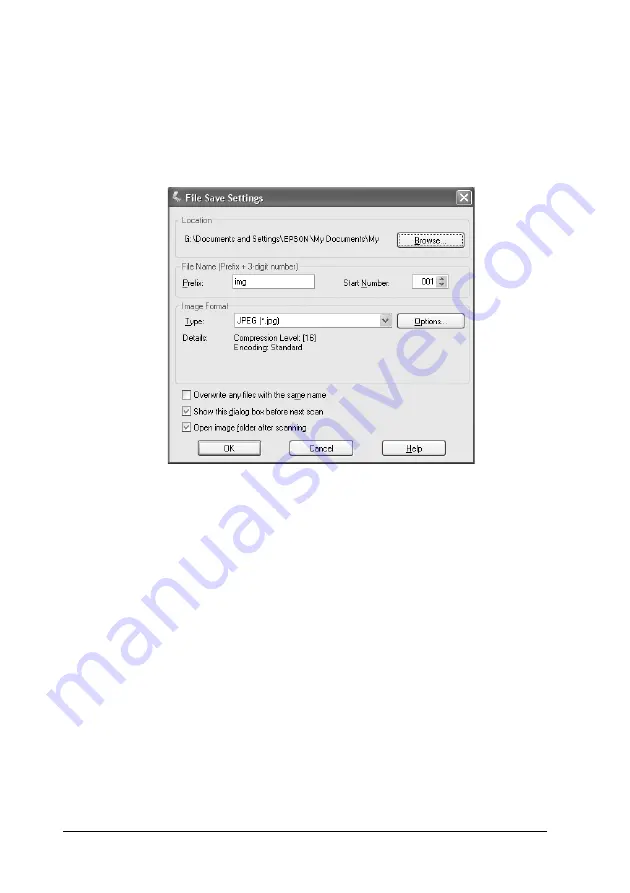
After scanning images, the scanned images are automatically
saved as files in the folder specified in the File Save Settings dialog
box.
Note:
If the
Show this dialog box before next scan
check box is cleared,
the File Save Settings dialog box does not appear automatically. To open
the dialog box, click the down arrow to the right of the
Scan
button in
the EPSON Scan main window and then select
File Save Settings
.
1. Specify a location where scanned images are saved. If you
want to change the default location, click
Browse
(for
Windows) or
Choose
(for Mac OS X) and then select a desired
folder.
2. Specify a file name with an alphanumeric character string
(prefix) and a 3-digit number (start number).


