


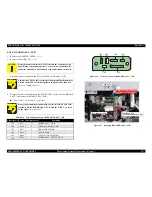


EPSON Stylus Pro 3800/3800C/3850
Revision A
DISASSEMBLY & ASSEMBLY
Disassembly/Assembly Procedure (Group 1)
109
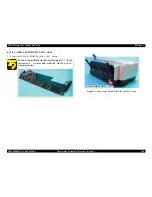
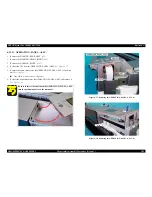
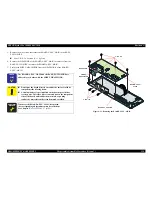
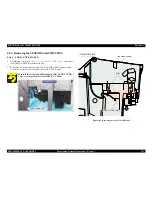
4.
Remove the OPTICAL TUBE, LED, LEFT/RIGHT and the BUTTON, PS from
the OPERATION PANEL.
See Figure 4-23.
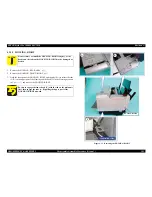
5.
Remove the OPERATION BUTTON from the OPERATION PANEL.
See Figure
4-23.
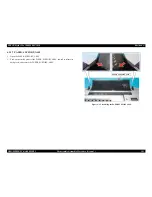
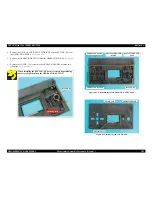
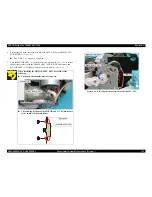
6.
Remove the COVER, LCD secured to the OPERATION PANEL with the two-
sided tape.
See Figure 4-24.
Figure 4-23. Disassembling the OPERATION, PANEL, ASSY.
Figure 4-24. Removing the COVER, LCD
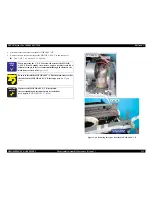
When installing the BUTTON, PS, be sure to insert its positioning
hole over the guide pin on the OPERATION BUTTON.
BUTTON, PS
positioning point
OPERATION BUTTON
OPERATION PANEL
OPTICAL TUBE, LED,
LEFT
OPTICAL TUBE, LED,
RIGHT
BUTTON, PS
OPERATION PANEL
Two-sided Tape
COVER, LCD
Summary of Contents for 3800 - Stylus Pro Color Inkjet Printer
Page 1: ...EPSONStylusPro3800 3800C 3850 Large Format Color Inkjet Printer S SERVICE MANUAL SEIJ06007 ...
Page 5: ...Revision Status Revision Date of Issue Description A November 30 2006 First release ...
Page 9: ...C H A P T E R 1 PRODUCTDESCRIPTION ...
Page 35: ...C H A P T E R 2 OPERATINGPRINCIPLES ...
Page 61: ...C H A P T E R 3 TROUBLESHOOTING ...
Page 85: ...C H A P T E R 4 DISASSEMBLY ASSEMBLY ...
Page 190: ...C H A P T E R 5 ADJUSTMENT ...
Page 250: ...C H A P T E R 6 MAINTENANCE ...
Page 262: ...C H A P T E R 7 APPENDIX ...
Page 279: ......
Page 280: ......
Page 281: ......
Page 282: ......
Page 283: ......
Page 284: ......
Page 285: ......
Page 286: ......


