File Setup FAQs
I have a file with only cut lines, but they came in as an “Engrave” process.
How do I change it to a cut process?
Select the process and change the Process Type to “Vector”.
I merged two of my layers, but now it lost part of the graphic.
Change the Process Type to “Engrave” and see if they show up now. It may have changed your process
to Vector and hidden any non-vector parts of your image.
I want to set up the Dashboard to automatically process all files I print to
the laser with hairlines as cut lines. How do I do this?
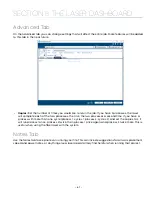
Go to the Settings icon and in the Dashboard tab, change your New Job Settings to “Split by Hairlines”.
I forgot to remove part of the artwork I don’t want to engrave. How do I get
rid of that part of the file?
There are two ways to do this. Either ungroup your image, select the item and delete it, or separate it by
selection and turn that process to Off.
Additional CorelDRAW Laser Dashboard Features
Each program you use will provide different ways to manage these functions. CorelDRAW offers a very
straight forward way to access each of these features.
Multiple Passes
You can automatically engrave or cut a job multiple times by setting the Number of Copies to the number
of passes that you want to make. When each pass is finished the laser will automatically start another
pass until all passes are complete.
Print Range
If you only want to print one aspect of your project (for example, just the text in the document), you can
select that part of the file, then click Selection and the laser will only engrave or cut that piece of your file.
Multiple Pages
When you want to engrave multiple pieces within one document, such as five different engraved glass
coasters, each with a different name, you can use the Multiple Pages feature of CorelDRAW. Set up each
of the coaster files on a separate page in your single CorelDRAW file, then when you print to the laser you
- 68 -
SECTION 5: THE LASER DASHBOARD


