


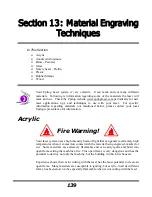


Section 13: Material Engraving Techniques
148
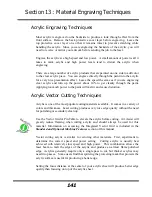
With some plastics it is best to engrave using two passes. The first pass cuts through
the cap layer and the second pass cleans away the residue that some plastics leave
behind.
Another technique that can be useful is to mask the plastic before engraving with
transfer or masking tape. This will prevent a buildup of residue on the plastic surface.
Misting the transfer tape with water will reduce heat buildup and melting on sensitive
plastics.
Plastic Vector Cutting Techniques
Use a Vector Grid to elevate the plastic before cutting. Air Assist will greatly reduce
flaming when cutting plastic.
Vectoring plastics is similar to vectoring other materials. First, experiment to
determine if the plastic can be cut with the laser. Plastics that are up to 1/16 inch
thick can usually be cut in a single pass. Thicker plastics may need two passes.
As with engraving, it is sometimes necessary to mask and dampen the plastic before
cutting. Even masking and wetting both front and backsides of the plastic is desirable
on sensitive plastics that have very low melting points.
WARNING!
Never leave your laser unattended when vector cutting plastics!
Plastic can be very flammable.
WARNING!
Do not engrave PVC (Polyvinyl Chloride). PVC will destroy the
optics and mechanics of your Epilog system. Cutting or engraving PVC will void
your warranty.
Summary of Contents for Fusion 13000
Page 2: ...ii THIS PAGE WAS INTENTIONALLY LEFT BLANK ...
Page 4: ...Contents at a Glance iv THIS PAGE WAS INTENTIONALLY LEFT BLANK ...
Page 8: ...Table of Contents viii INDEX 195 THIS PAGE WAS INTENTIONALLY LEFT BLANK ...
Page 10: ...Fire Warning x SEE PREVIOUS PAGE ...
Page 14: ...Introduction xiv THIS PAGE WAS INTENTIONALLY LEFT BLANK ...
Page 15: ...1 Manual Epilog Laser Setup ...
Page 16: ...2 THIS PAGE WAS INTENTIONALLY LEFT BLANK ...
Page 26: ...Section 1 Safety 10 ...
Page 27: ...Section 1 Safety 11 ...
Page 28: ...Section 1 Safety 12 THIS PAGE WAS INTENTIONALLY LEFT BLANK ...
Page 41: ...Section 3 Getting Started 11 THIS PAGE WAS INTENTIONALLY LEFT BLANK ...
Page 44: ...Section 4 Installing the ECC 14 ...
Page 51: ...Section 4 Installing the ECC 21 THIS PAGE WAS INTENTIONALLY LEFT BLANK ...
Page 58: ...Section 5 Installing the Epilog Dashboard Print Driver 28 10 Click on Update Driver ...
Page 68: ...Section 5 Installing the Epilog Dashboard Print Driver 38 Click on Add Local Printer ...
Page 108: ...Section 6 Using the Epilog Dashboard 78 THIS PAGE WAS INTENTIONALLY LEFT BLANK ...
Page 109: ...79 Manual Basic Operations ...
Page 110: ...80 THIS PAGE WAS INTENTIONALLY LEFT BLANK ...
Page 130: ...Section 8 Using the Front Control Panel 100 THIS PAGE WAS INTENTIONALLY LEFT BLANK ...
Page 136: ...Section 9 Using the ECC Epilog Control Center 106 THIS PAGE WAS INTENTIONALLY LEFT BLANK ...
Page 148: ...Section 10 Standard Optional Machine Features 118 ...
Page 152: ...Section 11 Engraving Machine Cleaning 122 Crash Bar and locating pins ...
Page 160: ...Section 11 Engraving Machine Cleaning 130 ...
Page 184: ...Section 13 Material Engraving Techniques 154 THIS PAGE WAS INTENTIONALLY LEFT BLANK ...
Page 191: ...161 Manual Technical Support Troubleshooting and Specifications ...
Page 192: ...162 THIS PAGE WAS INTENTIONALLY LEFT BLANK ...
Page 194: ...Section 15 In Case of Difficulty 164 THIS PAGE WAS INTENTIONALLY LEFT BLANK ...
Page 200: ...Section 16 Specifications 170 THIS PAGE WAS INTENTIONALLY LEFT BLANK ...
Page 208: ...APPENDIX A 178 THIS PAGE WAS INTENTIONALLY LEFT BLANK ...
Page 218: ...Appendix C Additional Dashboard Instructions 188 ...


