


Section 11: Engraving Machine Cleaning
121
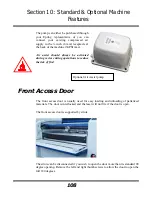
removed from the machine for cleaning by unscrewing the three thumbscrews on the
front lens cover.
To clean the optics use a high-quality cotton swab moistened with the optics cleaner
supplied in the accessory kit. Please read the label on the bottle carefully. Rubbing
alcohol should be used only to remove fingerprints. If you run out of the cleaner
supplied by Epilog, acetone can be used as a temporary measure, but should not be
used for regular cleaning as it contains impurities which can contaminate the optics.
If you run out of optics cleaner, pure ethyl (grain) alcohol such as “Golden Grain"
and "Everclear" are highly recommended because of their pure nature and because
they are readily available.
Wet the swab thoroughly with the solvent, and then blot it against a piece of cotton so
that it is no longer soaking-wet. Then daub the optic gently, rotating the swab after
each daub to expose clean cotton to the surface until the optic is free of visible
contamination. At that point, prepare a fresh swab and clean the surface with a gentle
zigzag motion across it. Avoid any hard "scrubbing" of the surface, especially while
there are visible particles on it, and try not to use repetitive circular motions. When
you are done, be careful to remove any cotton threads that may have snagged on the
mountings. Allow the optics to dry before you operate your engraver.
When reinstalling the lens assembly, please make sure that the Crash Bar is sitting on
top of the locating pins on the side of the carriage.
Focus Lens
Mirror
Summary of Contents for Fusion 13000
Page 2: ...ii THIS PAGE WAS INTENTIONALLY LEFT BLANK ...
Page 4: ...Contents at a Glance iv THIS PAGE WAS INTENTIONALLY LEFT BLANK ...
Page 8: ...Table of Contents viii INDEX 195 THIS PAGE WAS INTENTIONALLY LEFT BLANK ...
Page 10: ...Fire Warning x SEE PREVIOUS PAGE ...
Page 14: ...Introduction xiv THIS PAGE WAS INTENTIONALLY LEFT BLANK ...
Page 15: ...1 Manual Epilog Laser Setup ...
Page 16: ...2 THIS PAGE WAS INTENTIONALLY LEFT BLANK ...
Page 26: ...Section 1 Safety 10 ...
Page 27: ...Section 1 Safety 11 ...
Page 28: ...Section 1 Safety 12 THIS PAGE WAS INTENTIONALLY LEFT BLANK ...
Page 41: ...Section 3 Getting Started 11 THIS PAGE WAS INTENTIONALLY LEFT BLANK ...
Page 44: ...Section 4 Installing the ECC 14 ...
Page 51: ...Section 4 Installing the ECC 21 THIS PAGE WAS INTENTIONALLY LEFT BLANK ...
Page 58: ...Section 5 Installing the Epilog Dashboard Print Driver 28 10 Click on Update Driver ...
Page 68: ...Section 5 Installing the Epilog Dashboard Print Driver 38 Click on Add Local Printer ...
Page 108: ...Section 6 Using the Epilog Dashboard 78 THIS PAGE WAS INTENTIONALLY LEFT BLANK ...
Page 109: ...79 Manual Basic Operations ...
Page 110: ...80 THIS PAGE WAS INTENTIONALLY LEFT BLANK ...
Page 130: ...Section 8 Using the Front Control Panel 100 THIS PAGE WAS INTENTIONALLY LEFT BLANK ...
Page 136: ...Section 9 Using the ECC Epilog Control Center 106 THIS PAGE WAS INTENTIONALLY LEFT BLANK ...
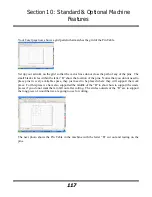
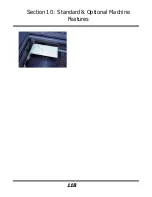
Page 148: ...Section 10 Standard Optional Machine Features 118 ...
Page 152: ...Section 11 Engraving Machine Cleaning 122 Crash Bar and locating pins ...
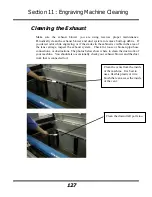
Page 160: ...Section 11 Engraving Machine Cleaning 130 ...
Page 184: ...Section 13 Material Engraving Techniques 154 THIS PAGE WAS INTENTIONALLY LEFT BLANK ...
Page 191: ...161 Manual Technical Support Troubleshooting and Specifications ...
Page 192: ...162 THIS PAGE WAS INTENTIONALLY LEFT BLANK ...
Page 194: ...Section 15 In Case of Difficulty 164 THIS PAGE WAS INTENTIONALLY LEFT BLANK ...
Page 200: ...Section 16 Specifications 170 THIS PAGE WAS INTENTIONALLY LEFT BLANK ...
Page 208: ...APPENDIX A 178 THIS PAGE WAS INTENTIONALLY LEFT BLANK ...
Page 218: ...Appendix C Additional Dashboard Instructions 188 ...


